I’m going to say the thing everyone will flag in the comments: limestone is not the most practical material for exterior window sills. We know. We chose it anyway.
This is one of those decisions where the “smart” choice and the one that actually made us happy weren’t the same thing. We spent weeks looking at granite samples, reading forums about durability, comparing maintenance schedules – and then walked into the stone yard, saw the limestone, and none of that research mattered anymore.
Sometimes you just look at a material and think, yeah, that’s the one. Even when everyone around you is saying it’s not. Standing on the scaffolding watching the last one go in, I’d do it again tomorrow.
We Almost Went With Granite
Granite was the obvious answer. Everyone said granite. Our builder said granite. The internet said granite. It requires almost no maintenance, handles rain and frost without complaining, and lasts basically forever.
But we couldn’t find a single granite pattern we actually liked.
I know that sounds like a ridiculous reason to rule out a material. It’s a windowsill, not a kitchen island. But here’s the thing about building a house – every single decision adds up visually, and exterior windowsills are one of those details you see EVERY time you walk up to your front door. Every time you look at the house from the street. They’re small but they’re not invisible.
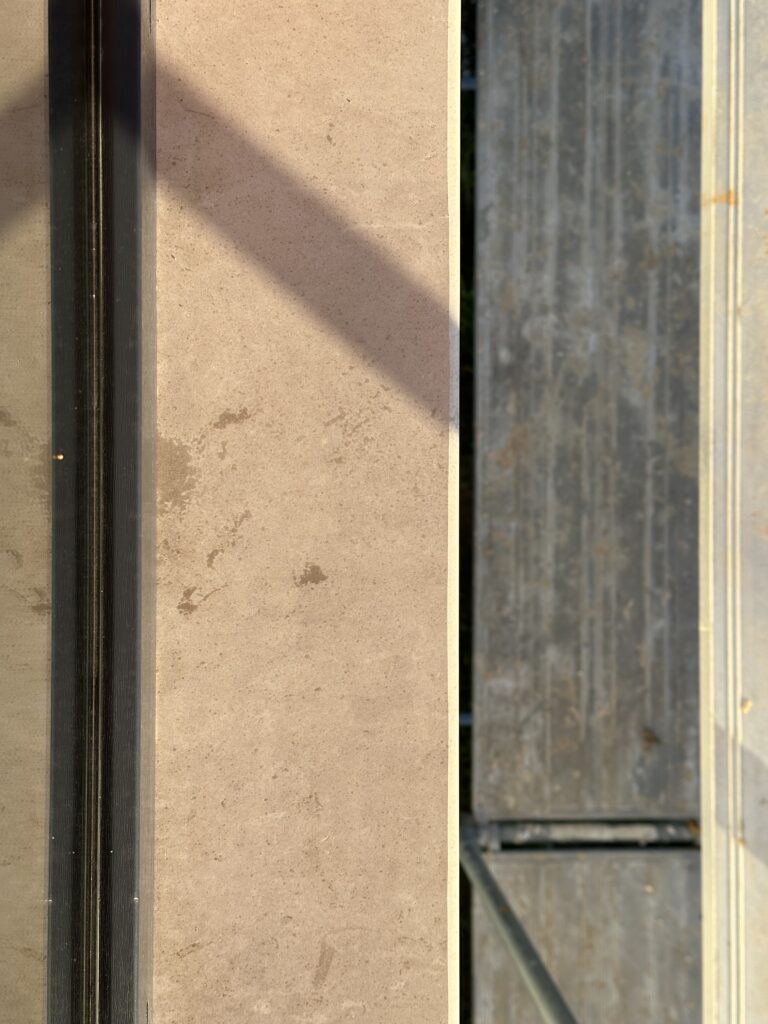
So when we found the limestone – this warm beige tone with natural veining that looked like it had always been part of the house – the decision kind of made itself. We knew the maintenance trade-off. We weighed it. And we picked the one that made us feel something.
What It Actually Cost
The stone cost us $400 for all 14 windowsills. Installation quotes came in at $800, but my partner and his father did it themselves (his father installs windows for a living – he’s the one who did all our triple-glazed windows too). So we paid $400 for stone and about $80 for mortar and adhesive. $480 total.
Even at full price though – $1,200 for 14 natural stone sills – that’s not bad for something that completely changes how the facade reads.
Five Hours for All 14
I genuinely thought this would be a two-day thing. I packed snacks, planned my whole weekend around it – and then it was done before late afternoon. 14 windowsills, five hours.
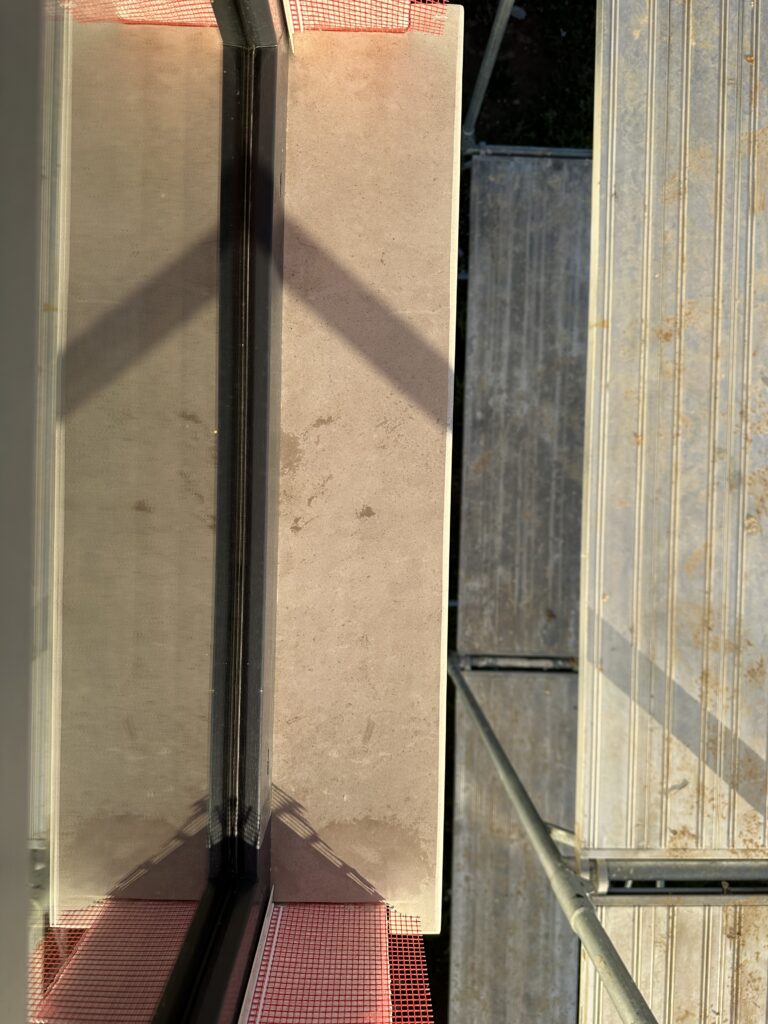
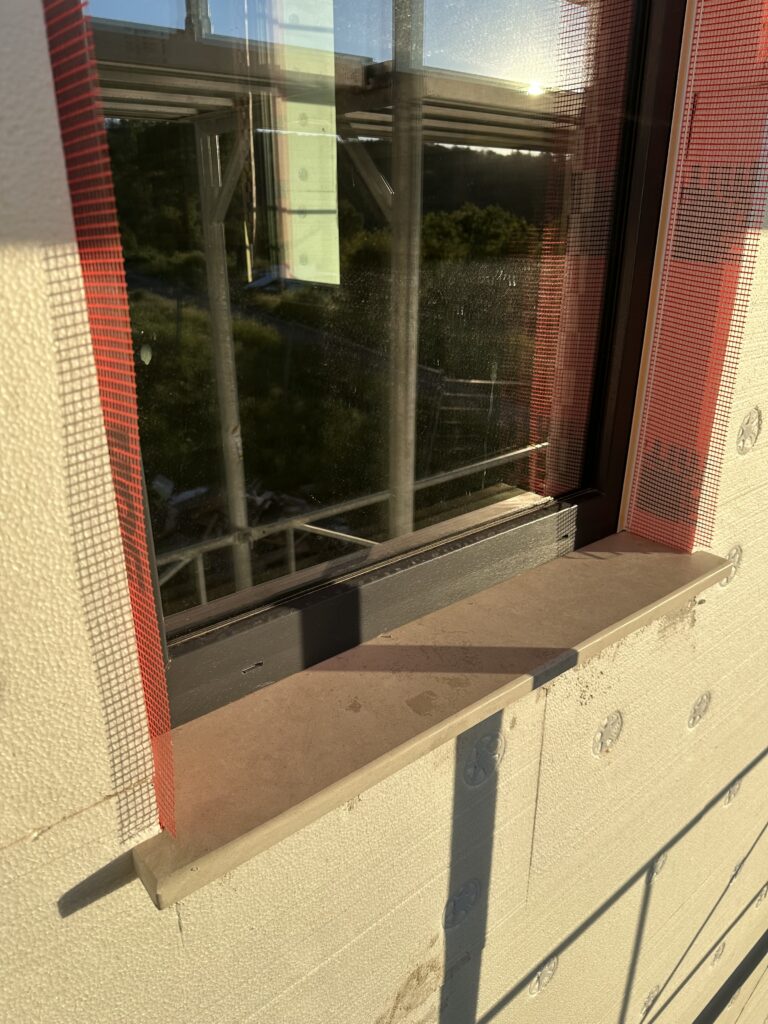
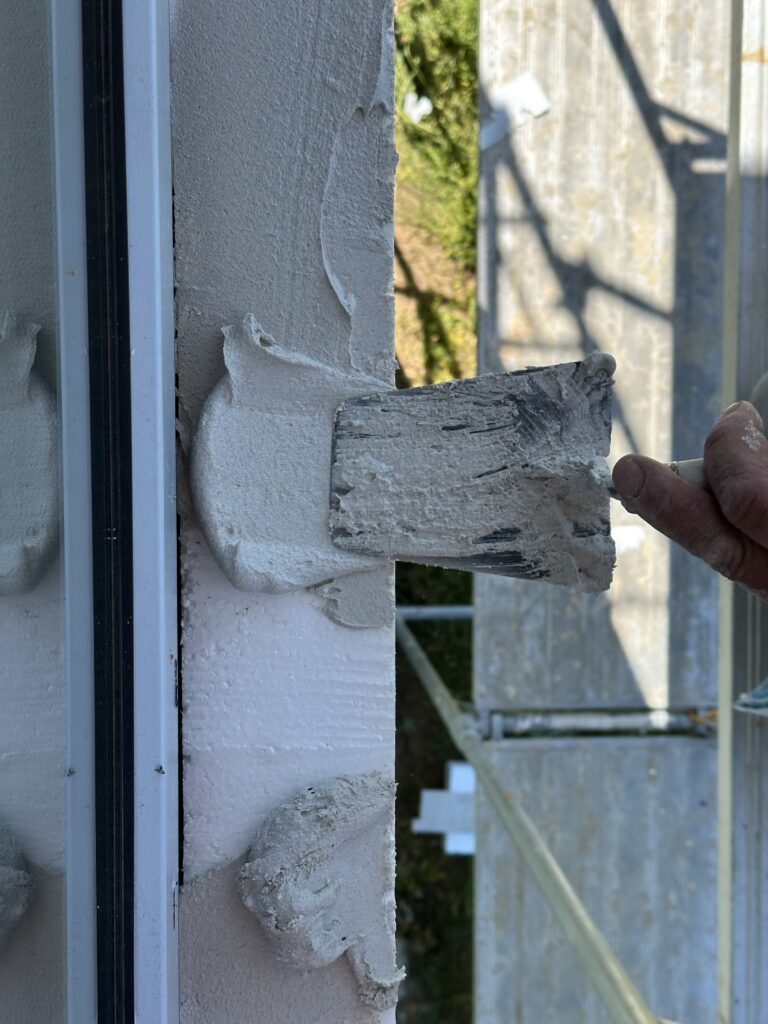
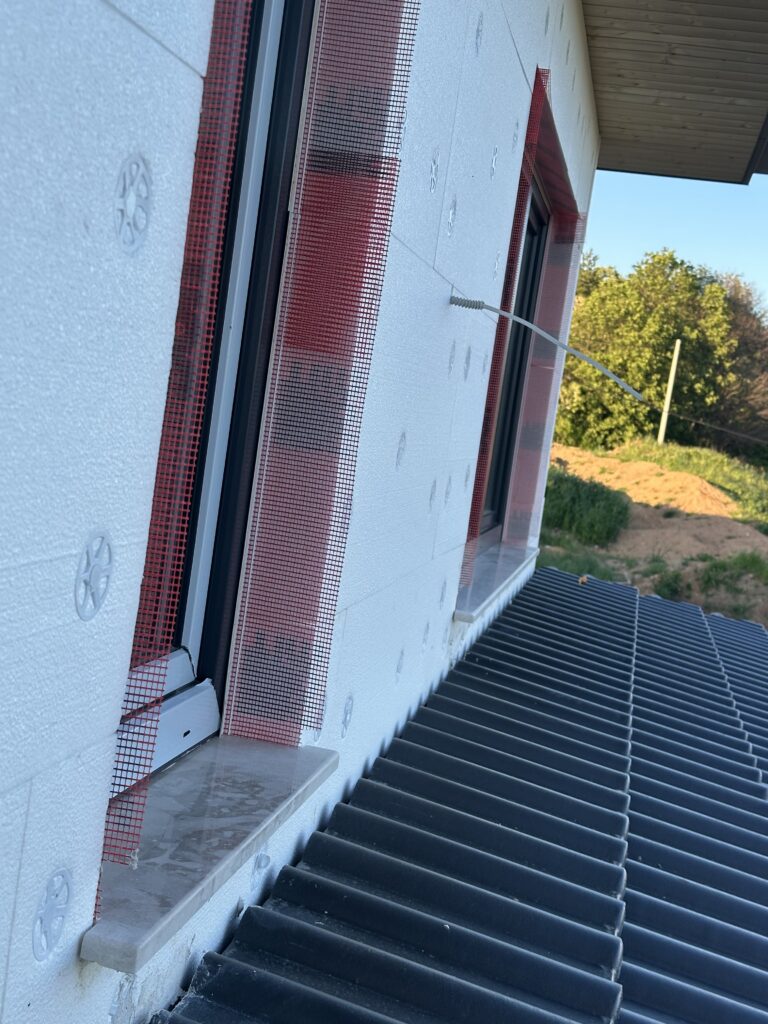
The process is more straightforward than it looks. They applied mortar where the sill sits on the insulation, then a layer on the sill itself, positioned it, leveled it, moved on. Each one sticks out about 5 cm from the wall – enough overhang for the drip edge to work without looking chunky.
One complication worth mentioning: they had to temporarily remove one of the second-floor bedroom windows to get access for the sill underneath. The window frame was blocking the angle they needed. It added maybe 30 minutes but it’s the kind of thing nobody tells you about. If your windows are already installed, check whether any of them block the sill installation angle before you start.
The Drip Edge Detail
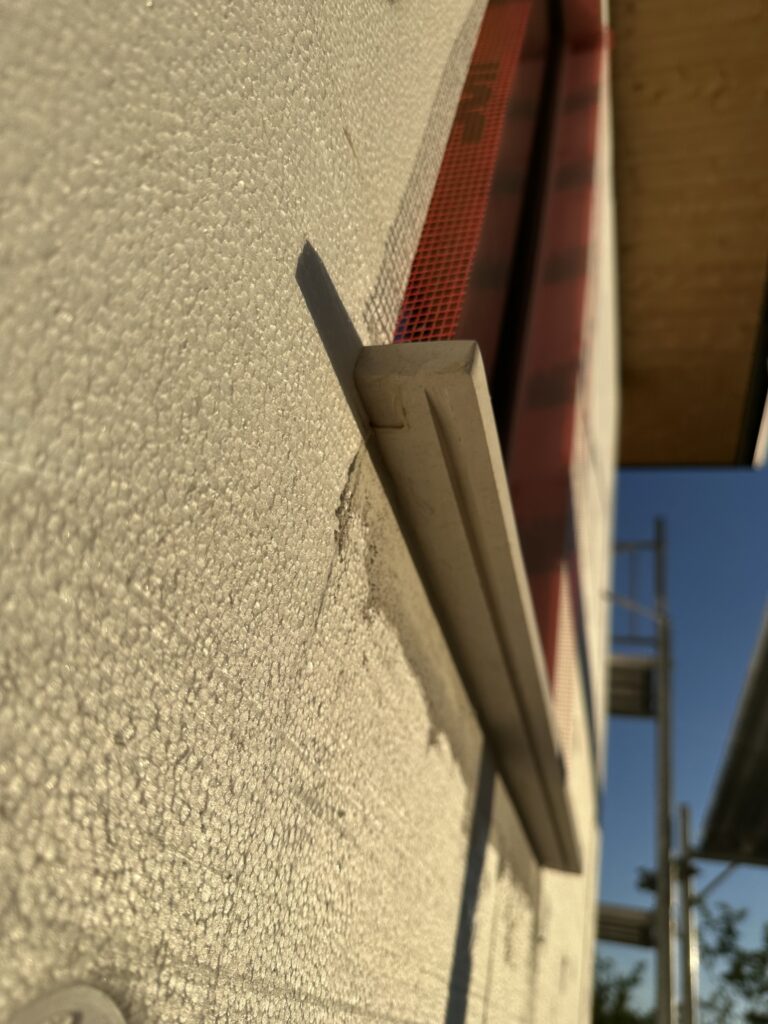
I didn’t think about drip edges until our builder brought it up. The sill isn’t just a flat shelf – it’s slightly sloped, with a groove cut into the underside about 3 cm from the outer edge. Rain hits the sill, travels along the slope, and drops off at the groove instead of running back toward the wall and staining the plaster.
Ours are 2 cm thick, 5 cm overhang, drip groove at 3 cm. If you’re ordering stone sills, make sure the drip groove is included – some suppliers cut it automatically, others don’t.
The Maintenance Reality
Here’s the trade-off we accepted: limestone is porous. It absorbs water if left untreated, and over time that means staining, moss, or edge deterioration – especially with freeze-thaw cycles.
The solution is a stone sealant every 3 to 4 years. That’s it. Not annual. Not constant. Brush on a waterproofing treatment and move on. We already treat the wooden soffit under the roof overhang, so adding the sills to that schedule is nothing.
Would granite have been zero maintenance? Yes. Would I look at granite windowsills every day and feel the same way? No. And that’s the whole calculation, really.
The Cherry on Top
The windowsills went in after the full exterior insulation was complete – EPS boards (10cm), mechanical anchors, all of it. Next up is the exterior plaster, and once that’s done the outside of the house is essentially finished.
And that’s what the sills did for me emotionally, if I’m being honest. The insulation stage made the house look like it was wrapped in packaging material. Functional, necessary, but not exactly beautiful. The windowsills were the first moment the facade felt intentional or because was more like diy?! Like an aesthetic choice had been made, not just a structural one. It surprised me how much that small detail shifted everything.
ANYWAY, one thing I keep learning during this build is how many changes happen along the way. We always knew we wanted stone windowsills – we just didn’t know which stone until we were standing in the supplier’s yard actually looking at slabs. So many decisions get made like that during a build, in real time, based on what you see and what you feel instead of what you planned six months ago. But that’s a whole other article.
FAQ
How much do exterior stone window sills cost?
Our 14 limestone sills cost $400 total for the stone and $80 for adhesive. Professional installation was quoted at $800, so full price would be around $1,200 for 14 sills. Prices vary by stone type and region – granite typically costs more than limestone.
Is limestone good for exterior window sills?
Not the most practical choice. It’s porous and needs a waterproofing sealant every 3 to 4 years. Granite or concrete would be lower maintenance. But limestone has a warmth and natural pattern that we preferred over everything else. If you’re okay with periodic sealing, it works – just know the trade-off going in.
How thick should exterior window sills be?
Ours are 2 cm thick with 5 cm of overhang. The drip groove sits 3 cm from the wall face. Too little overhang and rain runs back toward the wall. Too much and the sill looks disproportionate.
Can you install exterior window sills yourself?
My partner and his father did all 14 in about 5 hours. It’s doable if you’re comfortable on scaffolding and have basic masonry skills – apply adhesive, position, level, done. One thing to watch for: we had to temporarily remove a window to get access for the sill beneath it. Check your angles before you start.