Tired laminate countertops and a not-so-excited budget? GOOD NEWS. Countertops can be painted—yup, not just laminate. Kitchen countertops, bathroom countertops, even formica countertops can get a fresh finish with the right prep and products.
It’s not rocket science, but it does require patience. Clean, sand, prime, paint—letting each layer dry before the next. Follow the steps and everything from laminate to granite countertops can end up with a crisp, durable finish that makes the whole room feel new. A few days of effort, big visual payoff.
This guide walks through choosing the right paint, prepping the surface, protecting the area, and applying each coat so it lasts. Small bathroom vanity or full kitchen—either way, you’ll know what to do (and what not to do) before the paint can even opens.
Types of Countertop Paint
Not every paint loves kitchen countertops or bathroom countertops. Here are the heavy hitters:
| Paint Type | Best For | Pros | Cons |
|---|---|---|---|
| Epoxy paint | High-use areas | Extremely durable, heat and scratch resistant | Strong fumes, longer curing time |
| Acrylic paint | Laminate countertops, formica countertops | Easy to apply, quick drying | Less durable without a topcoat |
| Enamel paint | Wood or metal surfaces | Hard, glossy finish | Can chip if surface isn’t prepped well |
If you’re painting granite, adhesion is the drama—use a strong bonding primer first.
Essential Tools and Supplies
The right kit makes this so much smoother. At minimum, grab:
- Foam roller for that streak-free finish
- High-quality angled brush for edges
- Painter’s tape to protect walls and sink edges
- Drop cloths to catch drips
- Sandpaper (120–220 grit) to scuff surfaces
- Degreaser or cleaner
- Primer and sealant
Foam rollers help avoid that odd orange-peel texture many standard rollers leave. And quality painter’s tape matters—cheap tape bleeds and wrecks clean lines.
Related posts: Best Paint to Use on Kitchen Cabinets: Which is The Best?
Selecting the Best Finish
Your finish changes both the look and the lifespan.
- Gloss: Shiny, wipes clean easily, but shows every flaw.
- Satin: Softer sheen, hides small sins, still easy to clean.
- Matte: Low glare, modern vibe, stains more easily.
For kitchens, satin is a smart middle ground (less glare than gloss, still practical for spills). For bathrooms, matte can be lovely since daily abuse is lighter. Whatever the choice, sealing is non-negotiable: a clear polyurethane or epoxy topcoat protects against moisture, heat, and scratches.
Cleaning and Degreasing
Before you even think “primer,” get those kitchen/bathroom countertops spotless. Grease or grime will stop primer from bonding.
“Looks clean” is not the same as clean. Use a strong kitchen cleaner or dish soap with warm water. Avoid ammonia-based cleaners on laminate countertops—they can be rough on the surface.
Scrub everywhere, especially near the stove and sink where buildup hides. Rinse with clean water and let dry. If you’re extra, a quick wipe with rubbing alcohol zaps lingering residue.
Hot tip—shine a flashlight across the surface. Greasy patches will glow like a neon sign so you can spot-clean before moving on.
Repairing Surface Imperfections
Tiny chips read LOUD under paint. Granite wants a stone-safe filler. Laminate or formica does well with a two-part epoxy putty for dents; once cured, it sands smooth and disappears.
Run a hand over the whole surface—bumps, dips, rough edges? Address them now. Check formica seams, too; if an edge has lifted, a little contact cement and firm pressure bring it back in line.
Follow cure times, then sand. Skipping “small stuff” here turns into big, shiny regrets after paint.
Sanding for Better Adhesion
This is the “NOT OPTIONAL” part. Think primer handshake—it needs a little tooth. On laminate, 120–150 grit is the sweet spot (dull the shine, don’t strip).
Work in small circles, then finish with long, confident passes so the next coats lie flat. Granite? Just a gentle kiss with a diamond pad—easy does it. Then the cleanup: vacuum like you mean it and follow with a damp wipe. Any lingering dust = gritty primer…hard pass.
Painter’s Tape
Tape isn’t décor; it’s the wall between crisp and chaos. Press it down tight where laminate or formica meets backsplash or wall—unsealed edges invite sneaky bleed and those wobbly lines no one wants. Short sections help around curves and corners.
At sinks and faucets, wrap the base so drips can’t camp out. When the painting’s done, pull the tape before the coating fully cures to avoid lifting the finish.
Related posts: Are Concrete Countertops Practical or Just a Trend? Let’s Break It Down for Your Kitchen
Covering Cabinets, Walls, and Floors
Drips travel. Dust migrates. Rollers have range. Lay heavy canvas drop cloths across the whole zone (they don’t skate like plastic). Drape cabinets with plastic sheeting and overlap the drop cloth so nothing sneaks in.
Walls close by? Give them a quick shroud with plastic or kraft paper. Even for a “tiny touch-up,” protect everything—the surprise speckle pattern is not the vibe.
Step-by-Step Process
Priming the Surface — the handshake coat
Clean and dry? Great. Now bring in a bonding primer so the paint actually has something to grab—especially on slick formica. Roll on a thin, even layer (foam roller = fewer marks), then let it dry for the full window on the can (often around 24 hours).
Give it a light fine-grit scuff to knock down specks, wipe clean, and add a second thin coat if coverage calls for it. Granite wants a stone-safe/etching primer; laminate is happiest with a high-adhesion formula.
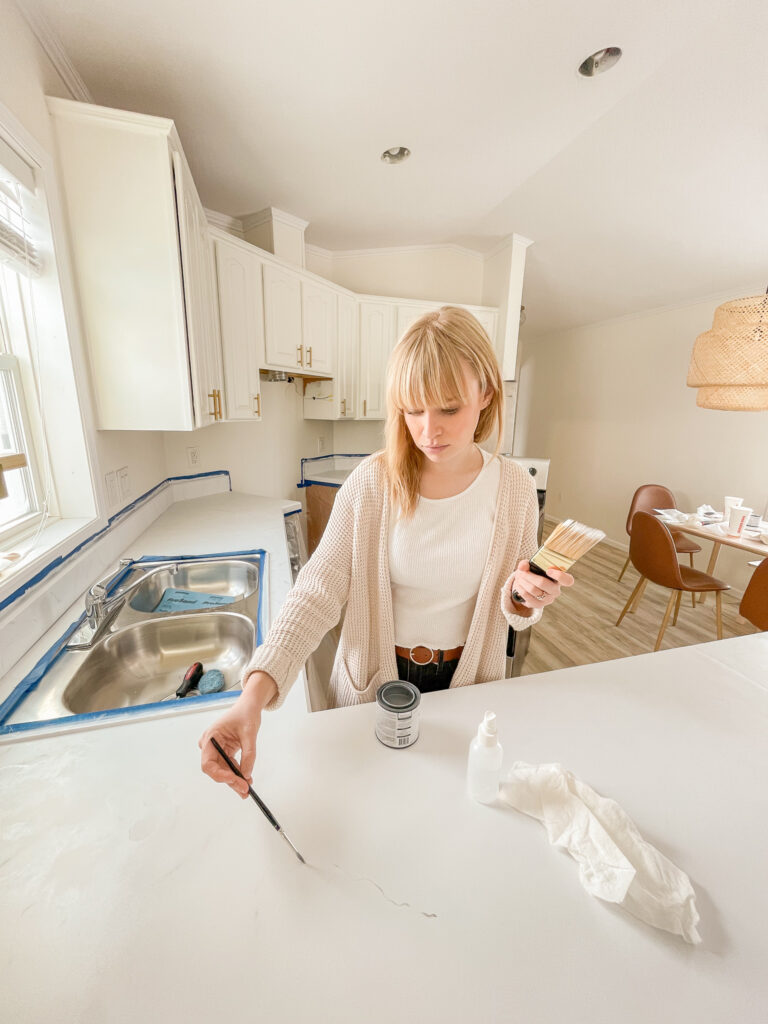
Applying the First Coat — color at last
When the primer is ready to topcoat—check the label’s “dry to recoat/topcoat” time—stir the paint (don’t shake—bubbles), decant a little into a tray, and keep the can sealed so it doesn’t thicken while you work.
Roll thin and even, working in small sections so you can smooth everything before it starts to set. Epoxy formulas run thicker and self-level nicely, but they demand serious ventilation. Resist the urge to overload the roller—too much paint = drips and a texture you’ll see forever.
Adding Additional Coats — where coverage happens
That first pass is rarely “the one,” especially when shifting dark → light on kitchen countertops. Let it dry completely (label rules), then go again. Two coats usually do it for lighter colors; deeper shades or specialty finishes may ask for a third. If it feels a bit gritty between coats, a quick whisper-sand brings it back in line.
Using a stone-look kit? This is the fun part—sponging and layering to mimic natural veining. Follow the kit steps; this is where the magic shows up. Patience wins here—rush it and trapped moisture turns into peeling later.
Sealing for Durability — armor up
Once coverage looks right and the color has fully dried, lock it in. For most kitchen and bathroom countertops, a clear resin or polyurethane topcoat is the move. Resin is a little extra (and messy) but that thick, glassy finish shrugs off scratches. Mix carefully, roll with a clean foam roller, and patrol for bubbles—gentle heat takes them down before the set.
Prefer satin or matte? Reach for a water-based polyurethane in the sheen you want. Let the topcoat cure completely before regular use; the wait is what buys the durability.
Related posts: 25 Kitchen Counter Ideas: Transform Your Space With Style and Function!
Tips for Laminate Countertops — scuff, then succeed
Laminate (yes, formica counts) needs a serious scuff to play nice with primer. Think 120–150 grit—just enough bite to kill the shine, not a full strip.
Degrease after sanding so dust and oils don’t wreck adhesion. Then: bonding primer for slick surfaces, followed by a durable countertop paint or kit. In kitchens, a water-based acrylic topped with clear polyurethane is a smart, low-yellowing combo—just honor dry times between coats (no rushing the cure).
Painting Wood and Concrete — same care, different quirks
Wood: fill gaps, sand smooth, and use a stain-blocking primer so tannins don’t telegraph through the finish.
Concrete: it’s porous (and sneaky about holding moisture).
Clean deeply and let it dry completely before coating, then use a masonry-appropriate primer. High-traffic zones love an epoxy or urethane sealer—more water resistance, more abrasion resistance, fewer regrets.
Working with Tile and Other Materials — mind the grout
Tile is fussy because of grout lines. Scrub hard, lightly sand the tile faces, and decide whether to sand/fill grout for a smoother look. A high-adhesion primer is non-negotiable here—skip it and chips will find you. For bathroom countertops, finish with a water- and mildew-resistant topcoat.
Painting granite isn’t ideal, but if it’s happening, use an etching/bonding primer to rough that slick surface and plan on a bit more maintenance than laminate or wood.
FAQ (Frequently Asked Questions)
What kind of paint should be used for kitchen countertops?
High-quality acrylic or epoxy. Epoxy cures harder and is more chemical-resistant but trickier to apply; acrylic is more beginner-friendly and performs well when sealed properly. Skip wall paint—it chips fast. Granite needs a bonding/etching primer first.
How to paint laminate countertops?
Scuff sand (no need to go to bare), clean thoroughly, apply a bonding primer, then paint in thin, even coats. Respect the dry times between layers to prevent peeling.
How to paint formica countertops?
Treat like laminate, but be extra thorough—formica is often smoother. A light, even scuff with around 220 grit helps. Remove every bit of dust before primer; leftover grit will telegraph through the finish.
Is it possible to get a granite look with paint, and how?
Yes. Start with a base color, then layer two or three accent shades using sponge dabs and irregular patterns for natural variation. Seal with clear epoxy for that glossy, stone-like finish.
How long does countertop paint take to dry?
Product and humidity set the pace. Acrylics can be touch-dry in a few hours; allow 24 hours before light use. Epoxies commonly need around 72 hours before bearing weight. Full cure times vary—follow the label and give it the time it asks for.