Hey all! My name is Julia, former college student and a home decor enthusiast who loves DIY home improvement projects and finding creative ways to decorate any living spaces on a budget. Recently moved from my dorm to my new apartment which I renovated from scratch and I am here to help you with tips & tricks about home decor/college and more 🙂
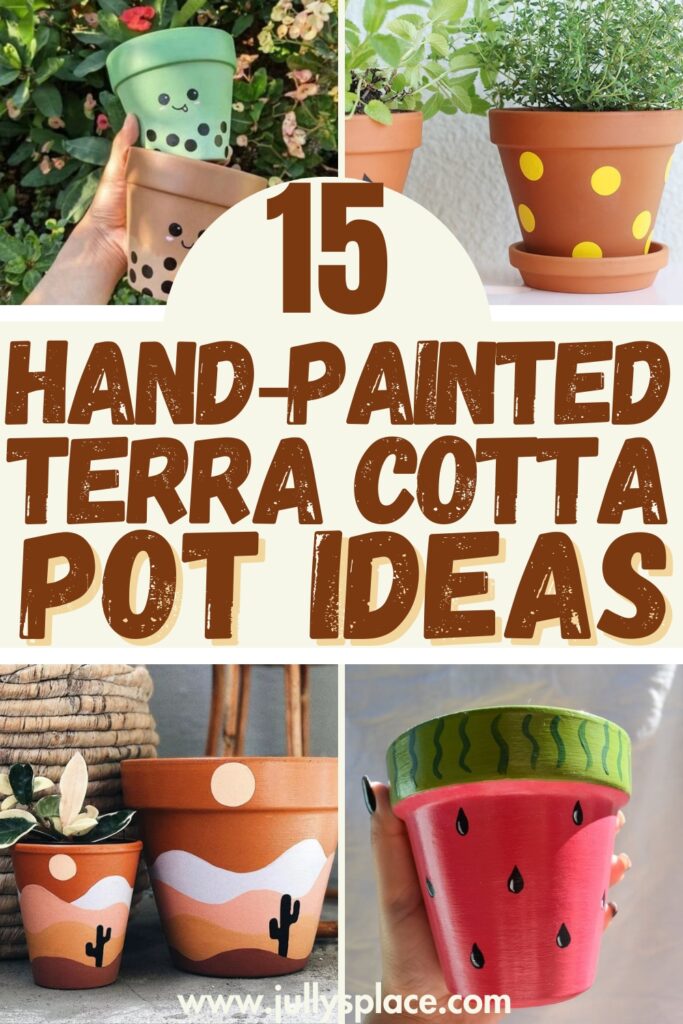
Looking for fun and creative terra cotta pot ideas? From painted designs to DIY planters, check out simple ways to give these classic pots a fresh twist!
I’ve always believed that a little creativity can go a long way, especially when it comes to sprucing up your home or garden.
Terra cotta pots are like blank canvases, just waiting for a splash of color and a dash of imagination!
Whether you’re a seasoned crafter with paint-stained fingers or someone who’s just dipping their toes into the DIY world, these fun and easy ideas will spark your inspiration.
So grab your paints and brushes, put on your favorite playlist, and let’s turn ordinary pots into extraordinary pieces that’ll make your plants stand out from the crowd!
What You’ll Need:
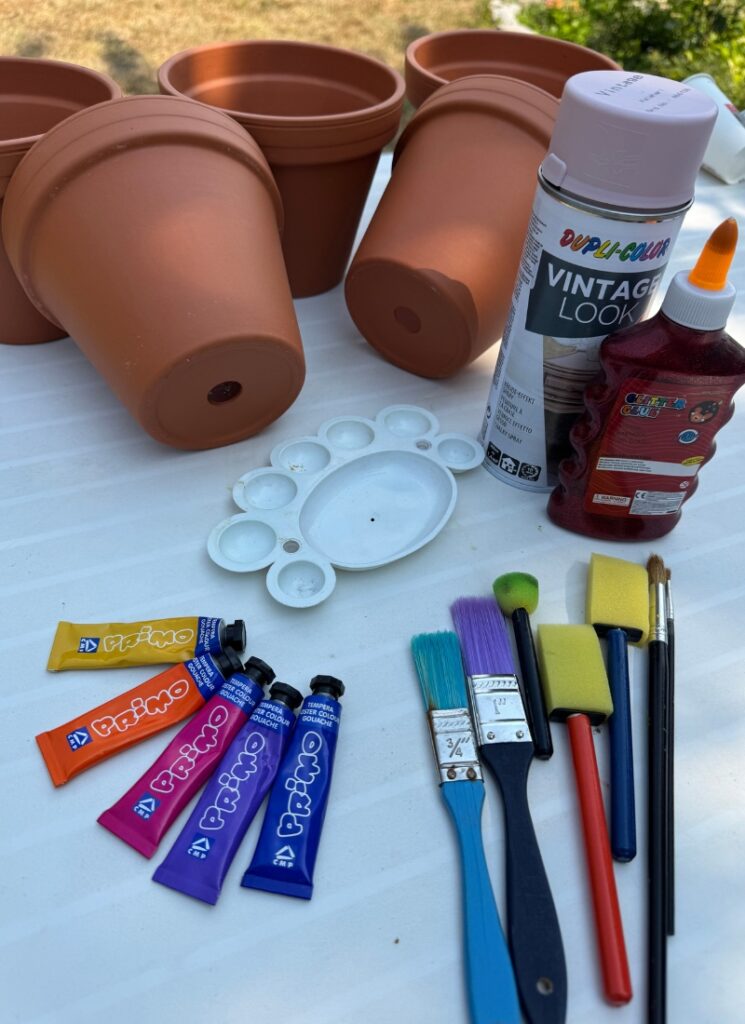
- Terra cotta pots
- Acrylic paints (various colors)
- Paintbrushes (various sizes)
- Paint palette
- Spray paint (optional, for base coating)
- Glitter glue (optional)
- Sponge brushes
- Sealant or varnish (optional, for durability)
Lemon Fresh
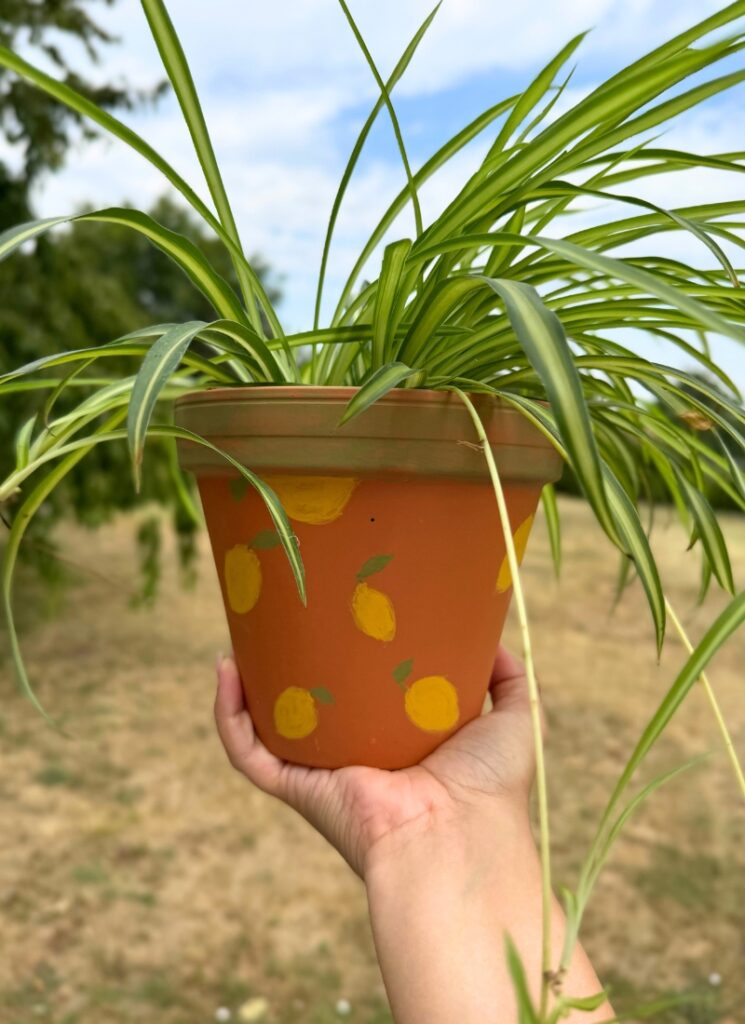
Bright and cheerful, this lemon-inspired pot brings a touch of sunny freshness to any space. Perfect for kitchens, balconies, or patios!
Sunny Sunflower

Bold and vibrant, the sunflower pot radiates warmth and happiness.
Ideal for adding a lively accent to your garden or indoor plant corner.
Sweet Hearts
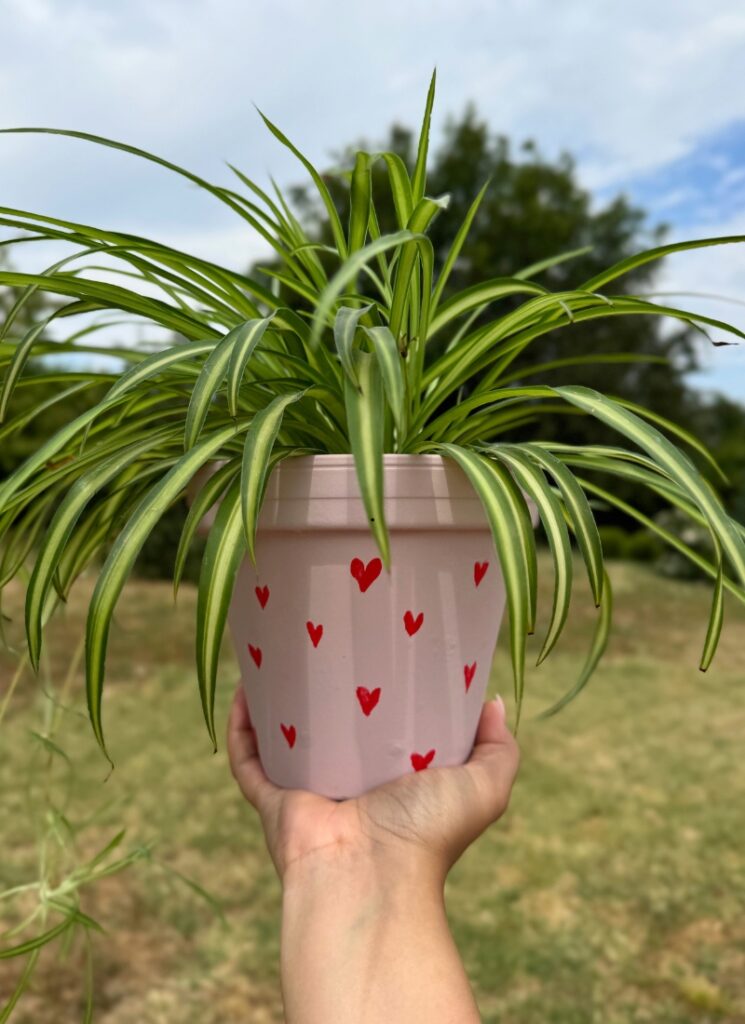
This adorable pot, adorned with tiny red hearts, adds a sweet and whimsical touch, making it a lovely gift or charming decoration for your favorite room.
Fairy House

Create a magical atmosphere with this enchanting fairy house pot.
Delightful for children’s rooms or as a whimsical garden centerpiece.
Floral Dreams
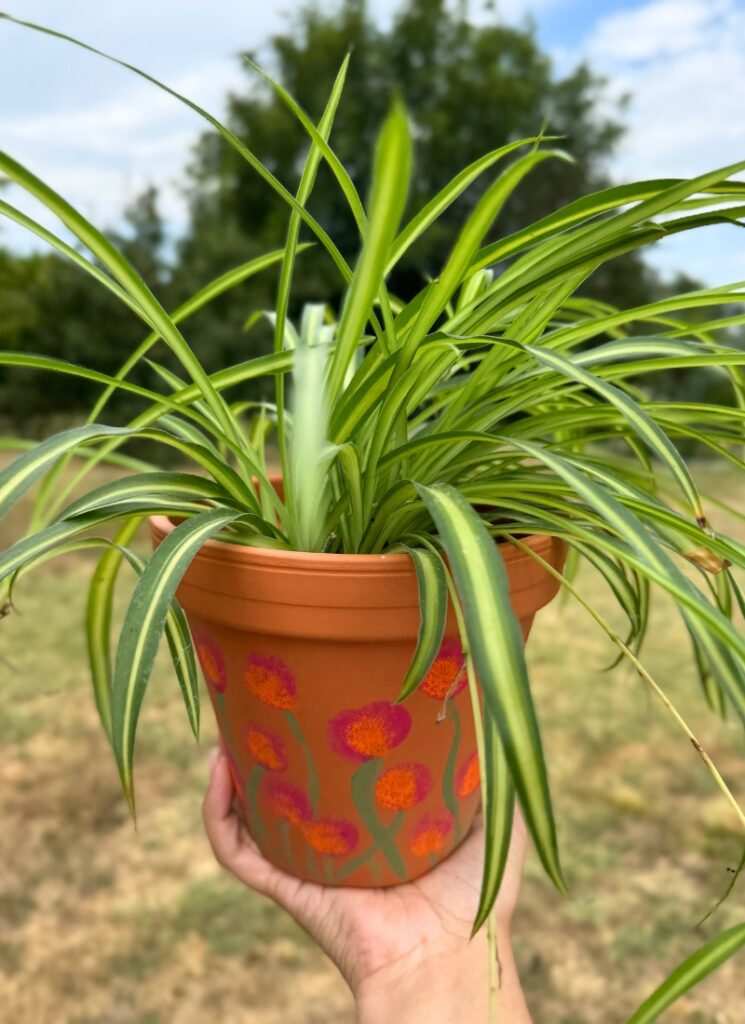
With gentle brush strokes and soft colors, this floral pot design effortlessly elevates your greenery, creating a soothing, natural vibe.
1. Bright Geometric Patterns

If you’re looking to give your old terra cotta pots a quick glow-up, try painting bright geometric shapes with acrylics.
You don’t need a steady hand—masking tape has totally saved me from wonky lines more than once.
Mixing bold colors like blue, yellow, and hot pink is a game-changer for making your plants pop.
You can create triangles, stripes, or random shapes, whatever feels right for your space.
Related posts: 27 Summer Craft Ideas to Beat the Heat This Season
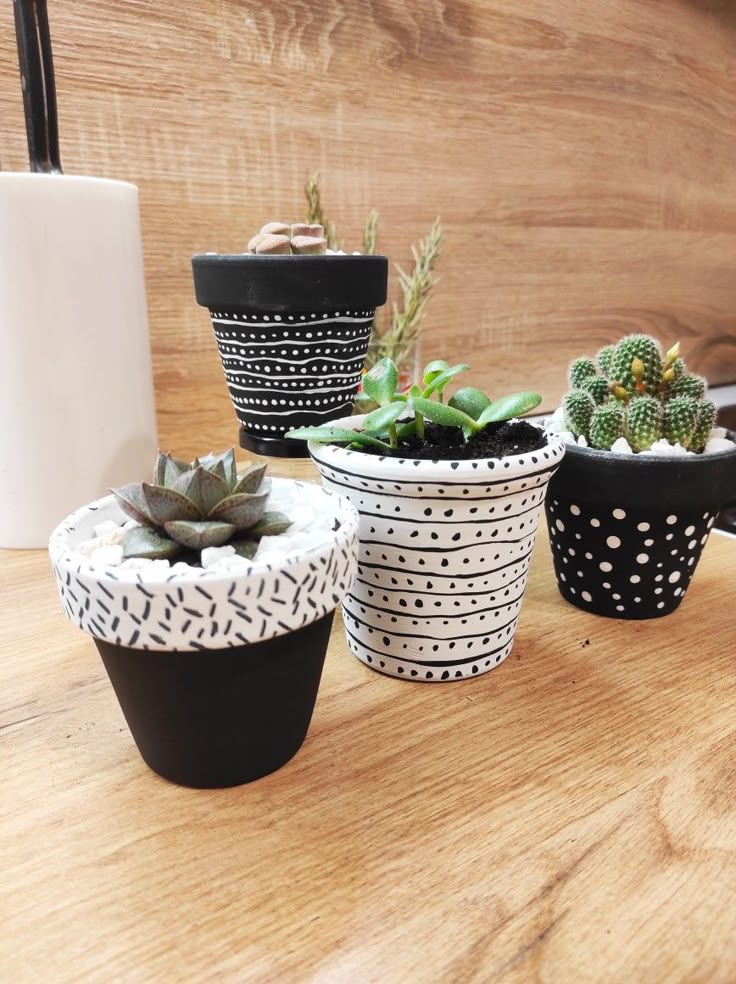
2. Cute Polka Dots
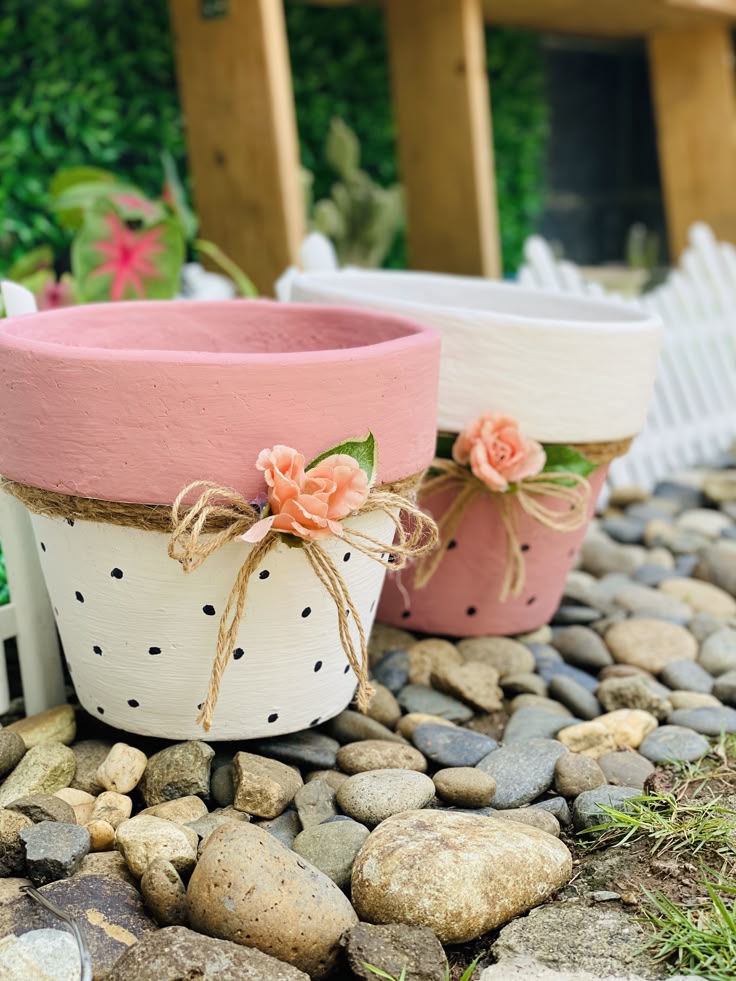
There is something so fun about adding polka dots to a plain terra cotta pot.
You can play around with color combos—like navy on white or yellow on teal—to make the dots really pop.
Honestly, once you start, it’s kind of addicting.
Probably One of my favorite combinations is the pink and black polka dot pot.
3. Floral Vibes
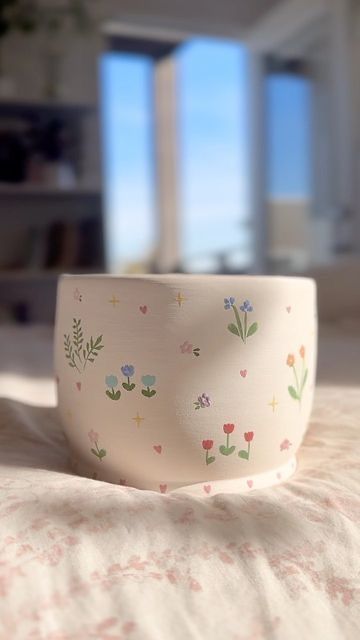
Picture this: flower pot featuring your favorite flowers and greenery like a oasis, which you can place in every room and feels more like a gentle reminder of the outdoors into your everyday space.
It gives off total cottagecore vibes, even if you live in a city apartment.
You don’t need to be a painting pro—just grab a thin brush, pick some soft greens and pastels, and work your way around the pot.
4. Boho-inspired Mandala Designs
Mandala patterns bring a little bit of boho magic to your space without being too much.
If you like chill, artsy vibes, you’ll love painting dots and circles that build into something cool.
5. Chalkboard Paint Section
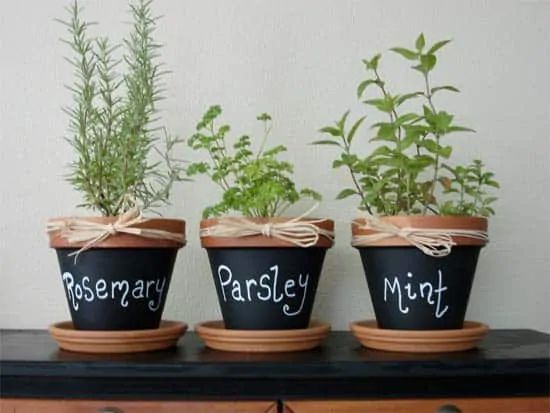
Chalkboard paint on terra cotta pots is super fun because you can switch up the words or doodles any time you want.
Just brush on a couple of coats, let it dry, and then you’re set to write anything—plant names, cute reminders, or even a little joke.
Whenever I use chalkboard paint, I love leaving random notes for family or my friends.
If you mess up, just wipe it away and start over—no stress.
Related posts: DIY Cement Pillow Candle Holders: Stylish and Simple
6. Striped Pots
Striped pots are way more fun than they sound, especially when you mix up the thickness of each line.
You don’t have to aim for perfection—honestly, a wobbly stripe just makes it feel more you.
Grab whatever paint colors you love and let yourself be a little messy; that’s part of the charm.
7. Pastel Ombre Fade

If you love dreamy colors, a pastel ombre fade is such a soft and pretty option for your terra cotta pots.
Start with your favorite pastel at the top and let it gently blend into white or another light shade near the bottom.
I tried this with baby blue and honestly, it made my mornings feel lighter somehow.
You just need a steady hand and maybe an old makeup sponge to dab the paint for that blended look.
8. Animal Faces like Owls or Cats
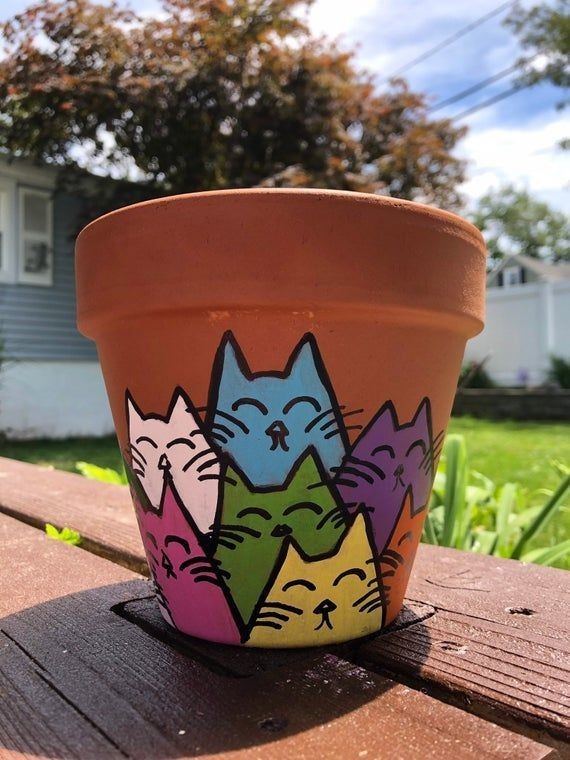
You can totally turn a plain terra cotta pot into something adorable with just some paint and a little creativity.
Animal faces like cats or owls are classic and easy to do, even if you’re not super artistic.
If you mess up the whiskers or the eyes the first time, no worries—I’ve definitely started over a few times and still had a blast.
Try picking your favorite animal so your pots show off a bit of your personality.
9. Black and White Line Art

You can grab a plain terra cotta pot and use a thin paintbrush or paint pen to doodle simple lines and shapes in black or white.
Minimalist line art looks so clean and modern, and it’s actually a lot easier than it looks.
This style works really well if you want something that matches any room or plant.
10. Abstract Splatter Paint
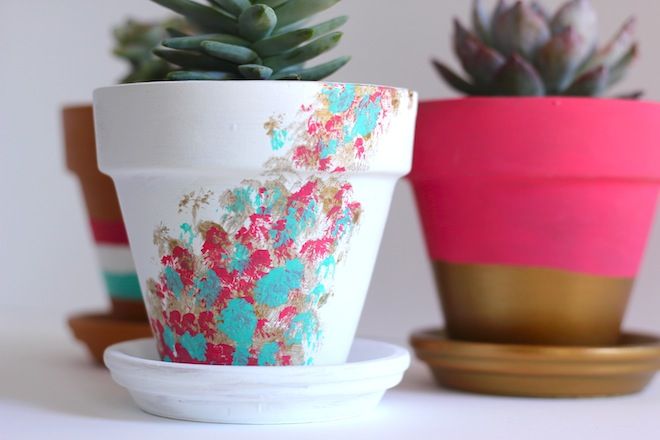
If you love a little mess and want your pots to stand out, abstract splatter painting is the way to go.
Just flick your favorite colors onto the terra cotta, and each pot ends up looking totally unique.
You don’t need to be careful or precise—just have fun with it.
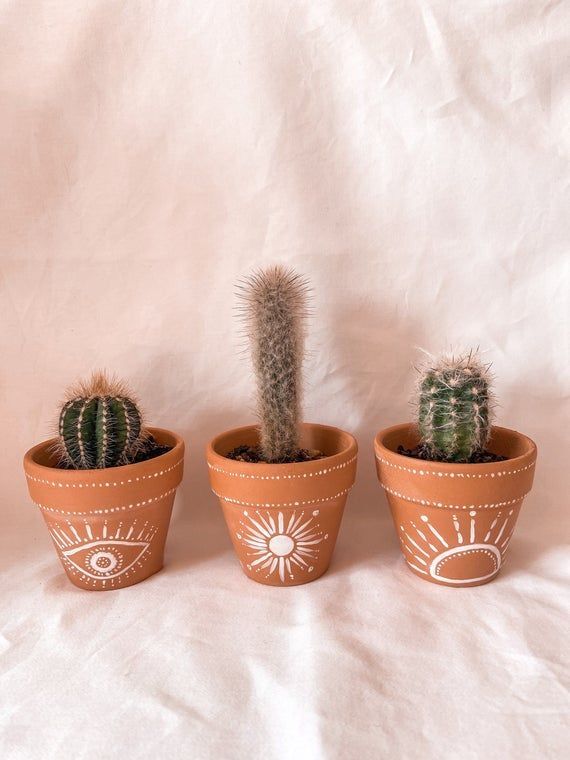
11. Sun and Moon
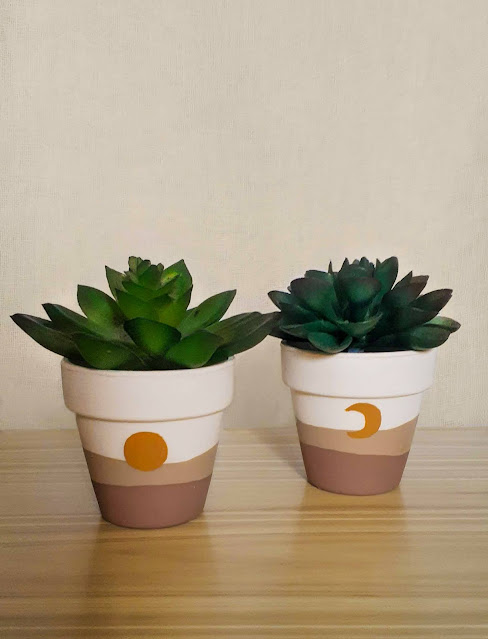
Painting sun and moon motifs on terra cotta pots gives them a dreamy vibe.
I always think these add a bit of magic to a windowsill, especially when the sunlight hits the hand-painted designs.
You can keep it simple with a bright sun on one side and a subtle crescent moon on the other.
If you’re into astrology, these celestial patterns look right at home next to your favorite crystals or succulents.
12. Tropical Leaf Silhouettes
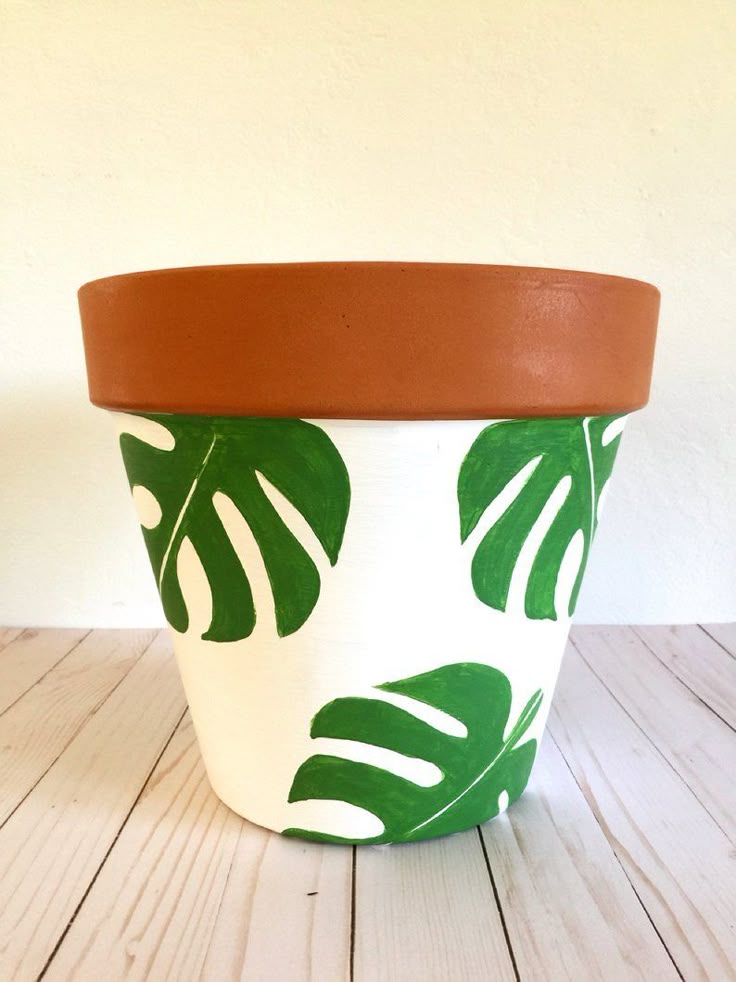
If you love that fresh, jungle vibe, tropical leaf silhouettes are a classic look for terra cotta pots.
Pick shades of green that match your space or try a mix if you want more energy.
Use a stencil or just freehand a few big leaves for that easy, breezy feel.
13. Adding Quotes
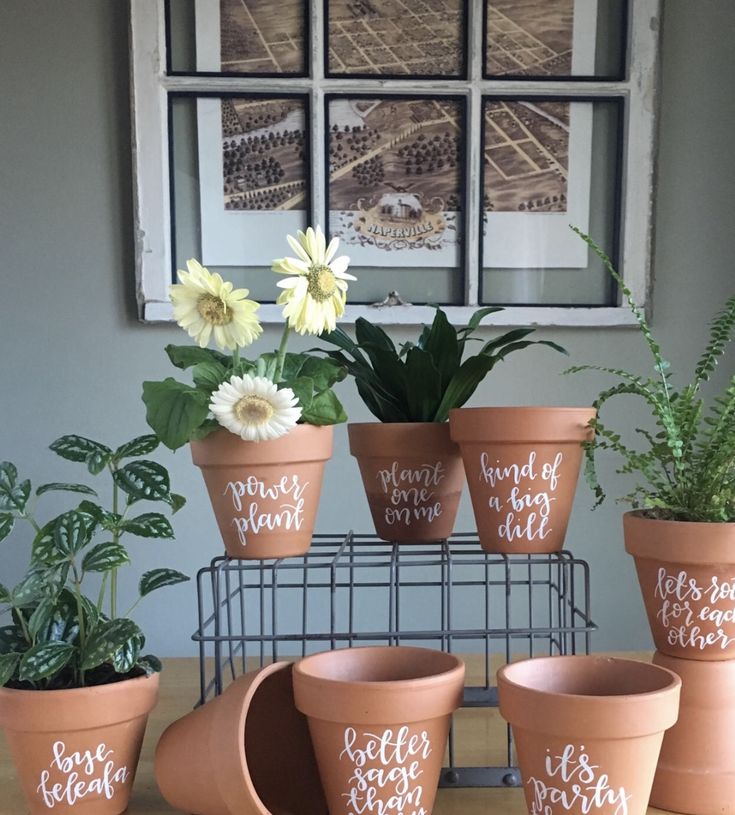
Adding a quote to your pot is such an easy way to make it feel personal.
Paint something like “Grow through what you go through” across the rim, and suddenly you’ve got a plant with encouragement built in.
You can use a thin paint marker for the words if you’re not into freehand painting.
It always makes me smile to see a little reminder like that!
14. Mosaic Tile Effects
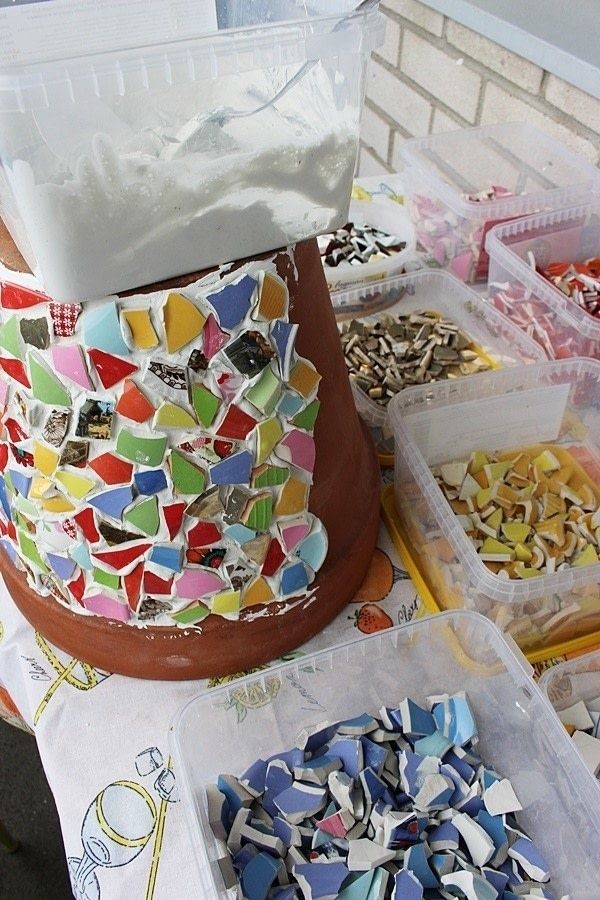
If you want your terra cotta pots to look a little fancy without actual tiles, try painting on your own mosaic pattern.
Grab a small brush and some bright acrylics, then just dab on shapes and lines to mimic those classic tile pieces.
You don’t need to make everything perfect—honestly, the messier it looks, the more you’ll loved it.
If you’re into a Mediterranean vibe, adding some deep blues or greens can really make it pop.
15. Cute Cartoon Veggies for Herb Pots
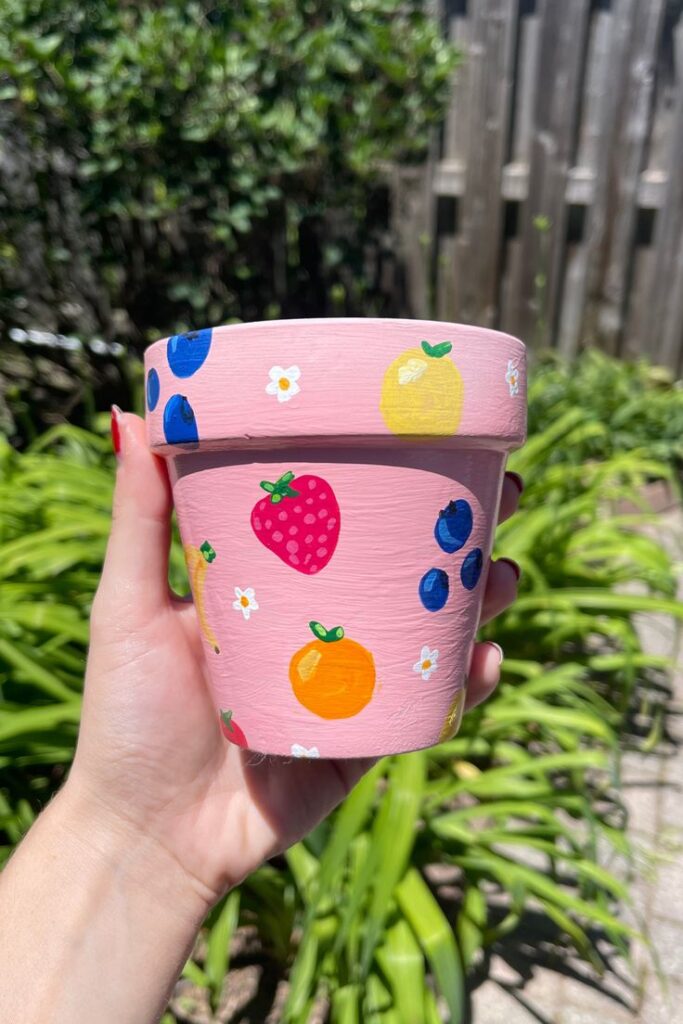
Herb pots can get a little boring, but adding cute cartoon veggies makes them so much more fun.
Try painting little carrots, tomatoes, or smiling basil leaves on your pots—you’ll spot your herbs right away.
Or you can make something more even more like summer (or any season) – strawberries, blueberries, lemons.
Painting Preparation Tips
Getting your pots ready to paint makes such a difference.
There’s nothing fun about sloppy paint or chips a week later, so taking some time on prep will save you headaches (and extra coats).
Choosing The Right Terra Cotta Pot
It’s easy to just grab any pot on sale, but quality matters.
Look for pots with no cracks and sturdy edges—thin or chipped pots break way too fast, especially once you move them around.
I’ve definitely bought those reddish pots with rough edges at the dollar store before, but they suck up paint like crazy or leave weird gritty spots.
If you want smooth, easy-to-paint surfaces, pick ones that feel heavy for their size.
The finish should look a bit matte, not glossy or glazed. Go for unsealed pots if you want your designs to stick!
If you’re into that trendy plant-dryer look, cute mini-pots work well, too.
Best Paints And Brushes
Acrylic craft paint is the classic for terra cotta, but chalk paint also works great for a base layer.
It sticks well, has vibrant color, and you can use it inside or outside with sealing.
Stay away from regular wall paint or markers—they flake right off after a few waterings. Foam brushes are a game-changer for smooth coats—no brush marks, just clean color every time.
Smaller foam or detail brushes help when you want to do lettering or little patterns.
I keep a couple cotton swabs handy for cleaning up smudges.
Prepping Pots For Painting
First thing: give your pot a good wash. Dirt sneaks into every crack, and leftover dust totally messes up paint sticking.
I just use warm, soapy water and an old dish brush. Then I let the pot dry overnight.
If your pot feels a little rough or has weird bumps, a quick once-over with fine sandpaper smooths it right out.
Brush off any dust with a dry cloth after sanding.
Last thing—wipe down the surface with a damp cloth before starting to paint. That extra step stops oils from your hands ruining the paint later.
I know this can be a little annoying but it’s better to do it, unless you want your hard work peeling off in a week!
Sealants And Finishing Touches
You’ve finished painting your terra cotta pot and want to keep it looking fresh.
Paying attention to sealing and final details makes your project last longer and really pop.
Why You Should Seal Your Terra Cotta Creations
If you don’t seal your pot, water can sneak in and ruin your paint fast.
Terra cotta is super porous, so sealing keeps your designs safe from water, fading, and chipping.
There are lots of sealant sprays—clear acrylic is an easy favorite because it dries fast and doesn’t change your colors.
Wait 24 hours after painting before sealing so your design dries and you avoid sticky disasters!
Creative Finishing Techniques
This is the fun part! Once your pot is sealed, you can add extra shine or cute touches.
Try high gloss sealant for a shiny look, or a matte sealer if you like things soft and subtle.
You can glue a ribbon around the rim, use stencils for a gold edge, or even add cute little 3D embellishments like buttons.
Small details totally make your pot feel special and yours.
FAQ (Frequently Asked Questions)
Painting terracotta pots is a fun way to show your style, and there are so many options for making your designs last.
From picking out the perfect paint to sealing everything up, you’ll want your pots to stay cute and colorful, inside or outside.
What are some easy designs for painting clay pots?
If you’re just starting, try simple stripes, bold geometric shapes, or polka dots.
You can also play with patterns like chevrons, color blocks, or even little hearts and stars.
These designs don’t need a lot of skill, but they look bright and adorable.
How do you seal hand-painted flower pots?
Let the paint dry completely first.
Then spray or brush on a clear acrylic sealer, covering the whole pot, inside and out if you want extra protection.
This keeps your art looking fresh and avoids chipping.
How can I protect my painted pots from the outdoor elements?
Once the paint dries, grab a clear waterproof spray or a brush-on sealer and cover the whole thing.
That extra layer goes a long way.
If you can, try not to leave your pots out in heavy rain or blazing sun for days on end.
On rough weather days, just bring them inside—your pots will thank you.