• Contact
  • Privacy Policy
  • Home
  • Decor
  • College
  • Projects
    • My House
    • My Apartment
  • Quiz
  • Recipes
  • Lifestyle
  • DIY Crafts
  • Renovations
  • About
  • Contact
  • Privacy Policy

  • Home
  • Decor
    • Bedroom
    • Bathroom
    • Kitchen
  • College
    • College Party
    • Dorm Room
  • Projects
    • My House
    • My Apartment
  • Renovations
  • Quiz
  • Recipes
  • Lifestyle
    • DIY Crafts
    • Halloween
    • Gifts
  • About

DIY Crafts · March 25, 2025

Easter Tiered Tray Decor: Budget-Friendly and Beautiful

  • Facebook
  • Twitter
Jully

Hey all! My name is Julia, former college student and a home decor enthusiast who loves DIY home improvement projects and finding creative ways to decorate any living spaces on a budget. Recently moved from my dorm to my new apartment which I renovated from scratch and I am here to help you with tips & tricks about home decor/college and more 🙂

Easter is just around the corner and today I want to show you how I set up my Easter tray, using a mix of vibrant and budget-friendly items to create a beautiful, harmonious look.

Easter Tiered Tray Decor: Budget-Friendly and Beautiful

Hey there, friends!

Easter is just around the corner, and it’s time to get our homes ready with some colorful and stylish decorations.

Today, I want to show you how I set up my Easter tray.

Here’s what you’ll need: a variety of colorful Easter decorations.

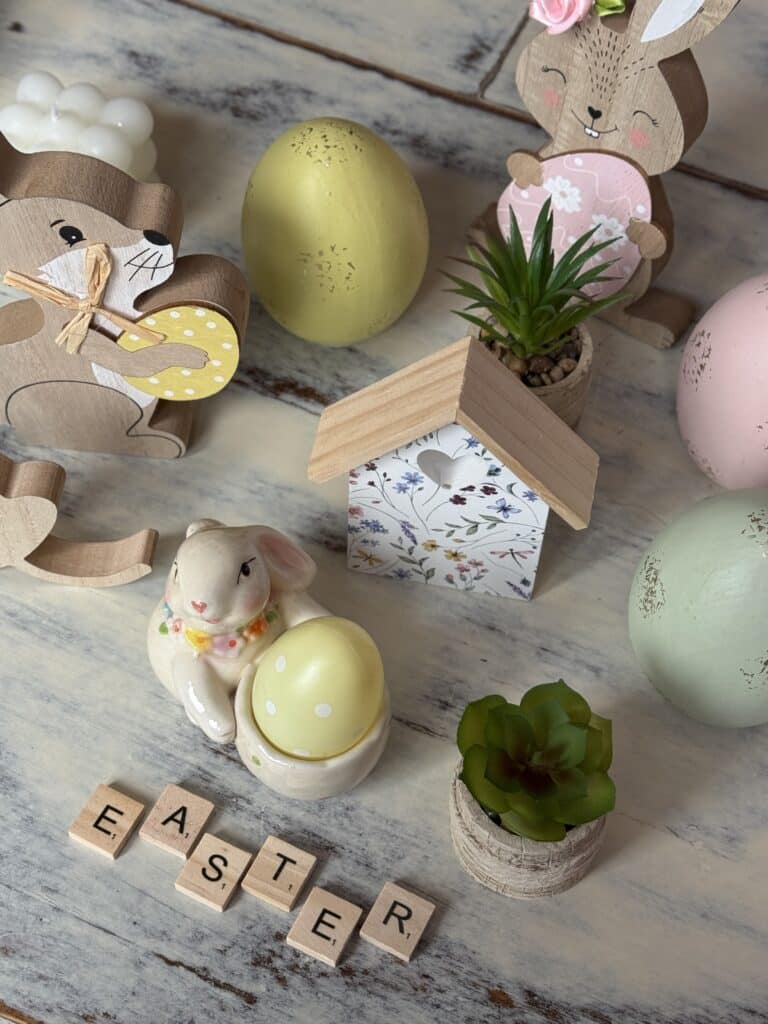
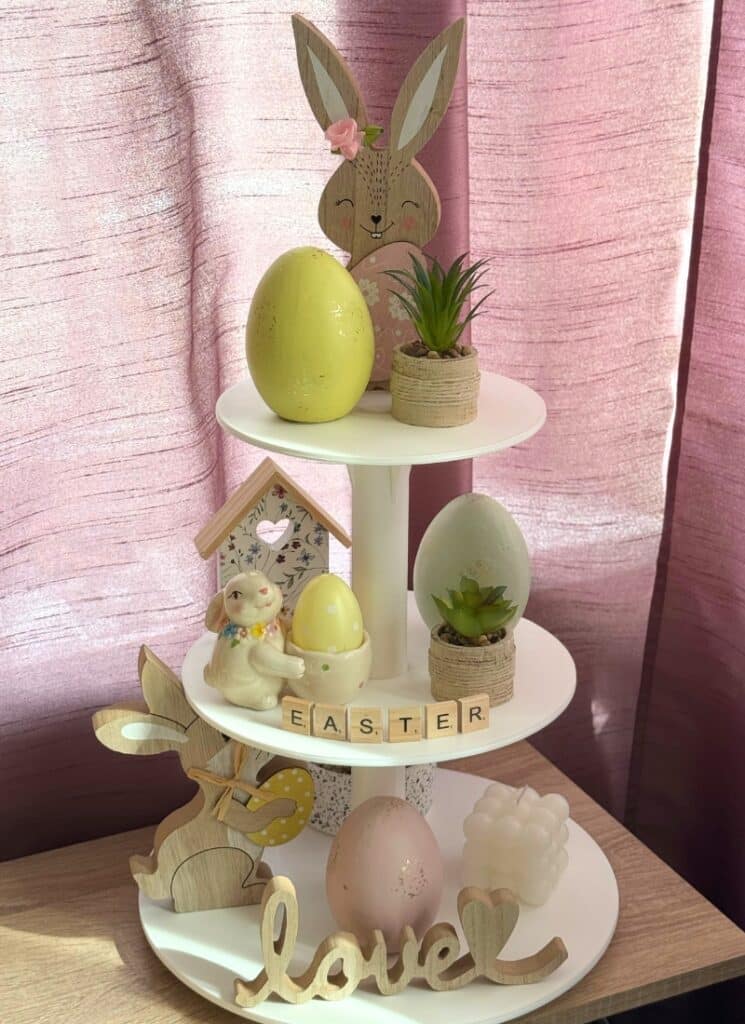
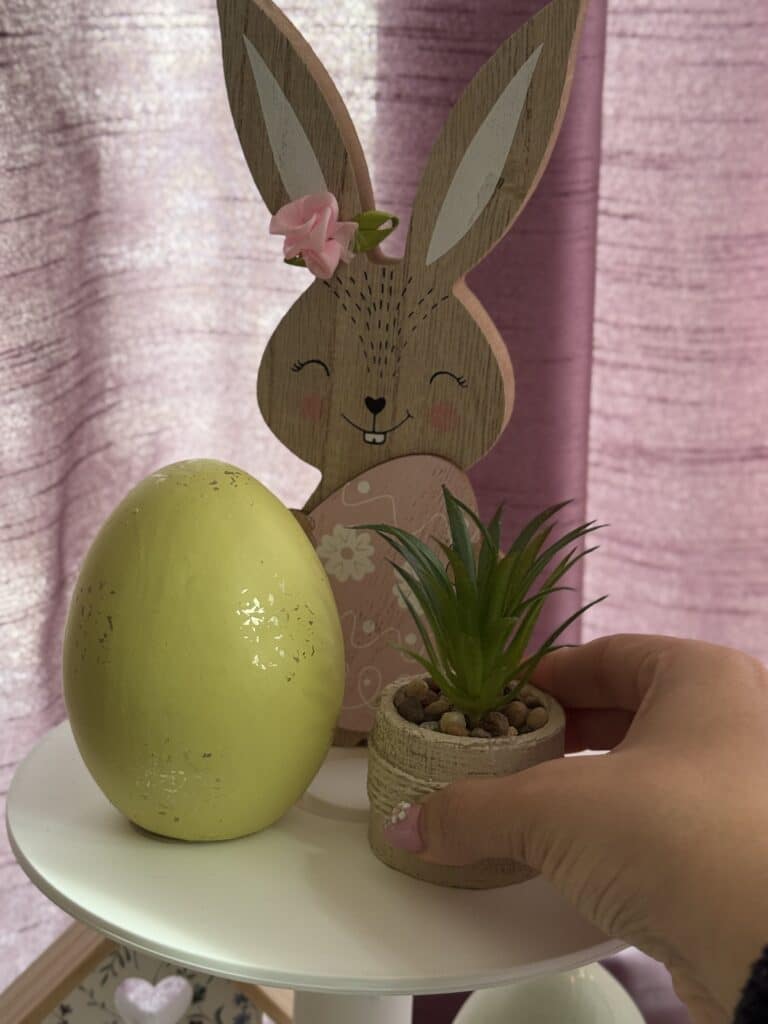
Let’s start with the first (bottom) tier. For this, I used a wooden bunny figurine, a ceramic Easter egg, a candle, some greenery (real or artificial), and a cool sign.

It’s important to arrange these items nicely to make the Easter tray look beautiful and harmonious.

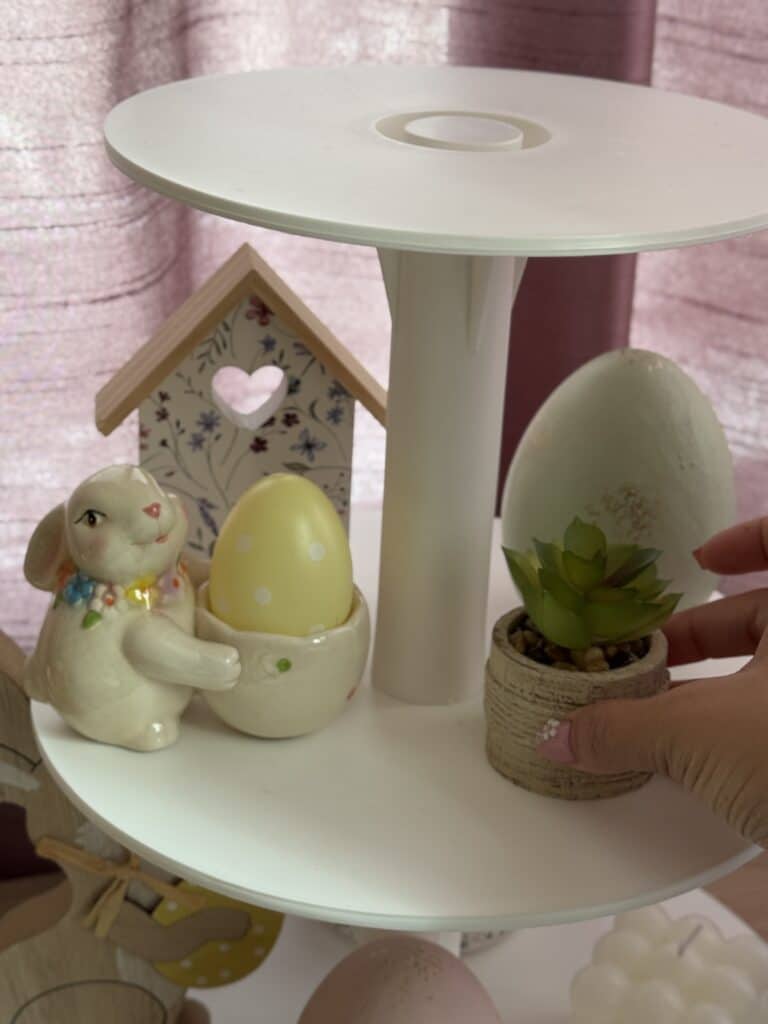
For the second tier, I used another ceramic egg in a different color, a small tree house with flowers, a bunny candle holder, smaller artificial greenery, and my favorite budget-friendly piece—a wooden “EASTER” sign that looks like a word game. And that’s the second tier done!

Finally, for the top tier, I kept it simple with just three elements: a wooden bunny, a ceramic egg, and some greenery.

Important! It’s really important to use decorations made from materials that complement each other.

I mainly used wood and ceramics, but you can choose something different.

Also, adding greenery is key—it always works magic and makes everything look better.

You can also add a wooden calendar, a photo, or even some sweet treats—why not?

Get creative and have fun!

  • Facebook
  • Twitter

In: DIY Crafts

You’ll Also Love

Quick and Easy DIY Boho Storage BasketQuick and Easy DIY Boho Storage Basket
3D Textured PaintingStep-by-Step Guide to Crafting a 3D Textured Painting
Hand‑painted Terra Cotta Pot Ideas15 DIY Hand‑painted Terra Cotta Pot Ideas to Brighten Up Your Space
Next Post >

DIY 3D Sunflowers: A Boho Art Project for Your Home

jullysplace
Jully

Hey all! My name is Julia, former college student and a home decor enthusiast who loves DIY home improvement projects and finding creative ways to decorate any living spaces on a budget. Recently moved from my dorm to my new apartment which I renovated from scratch and I am here to help you with tips & tricks about home decor/college and more :)

JOIN THE CLUB

Join the club with more than 100,000 monthly visitors and get access to our FREE Printables

All you need

  • HOME
  • LIFESTYLE
  • RECIPES
  • MY APARTMENT

LET'S WORK

  • ABOUT
  • CONTACT
  • PRIVACY POLICY

Follow me

  • My Favorite
  • Get to know me
  • Bonus Content
  • More

JOIN THE CLUB

Join the club with more than 100,000 monthly visitors and get access to our FREE Printables

Jully's Place is a participant in the Amazon Services LLC Associates Program, an affiliate advertising program designed to provide a means for sites to earn advertising fees by advertising and linking to Amazon.com

© | All Rights Reserved, Jully's Place
footer-logo

Copyright © 2025 · Theme by 17th Avenue