There’s something about this renovation story that just stays with you.
You know when someone pours their whole heart into something and you can just feel it in every little detail?
That’s exactly what Stacey — the creative behind @dawn.of.a.daydream — has done with her home. And honestly, her story is something special.
She moved into a tired 1960s fixer-upper that most people would’ve passed on without a second look. But where others saw problems, she saw potential — not just in the house, but in herself.
With no clear plan but a whole lot of grit, she picked up her first tool, joined a design challenge, and turned her entryway into something truly transformative.
And I mean that literally. A space that changed the way she saw herself — what she was capable of, what she could build, and how she could create something all her own.
From the beadboard closet and the faux wood front doors to that bold black paint and cozy little speakeasy nook (you’ll see), every part of it tells a story — of starting over, taking risks, and not waiting around for permission to begin.
If you’ve ever felt stuck, unsure, or like you’re figuring it out as you go… you’re going to love this one.
Let’s take a peek at her renovation story.
Background & Why This Project Matters
When we moved to the U.S., I wasn’t allowed to work because of my visa status and honestly, I lost myself for a while. I went from being a teacher in England to not really knowing who I was anymore.
People would say I was lucky to be here and to have a supportive husband (which I am), but I needed something that was mine.
I missed having a purpose, creating something of my own, and feeling proud of what I did each day.
So I started working on our home.
About the House
Our home is a 1960s fixer-upper that most people ran from.
Old and neglected, with a broken pool and more things not working than working.
A few people even tried to talk us out of it, but something about it called to me. I could see the potential.
I didn’t have a clear plan, just a vision, and a lot of determination to turn this tired house into a home filled with warmth, character, and soul.
The Entryway: My First Renovation
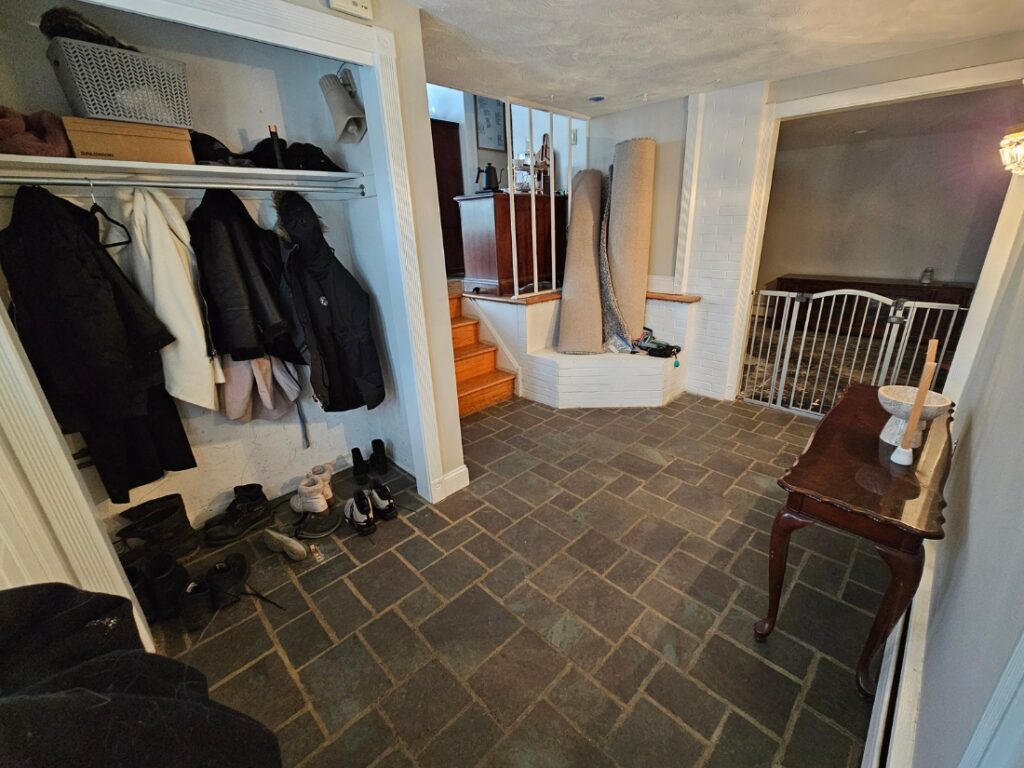
This was the first space I ever renovated in our home and the first time I really believed in myself.
It was also the first time I picked up a power tool, and the first time I ever put myself out there on the internet to share something I had made.
To hold myself accountable, I joined the One Room Challenge, which encourages you to transform a space in just 8 weeks. It gave me a community to connect with while I tackled this huge challenge but it also meant I had a deadline and extra eyes watching. It felt like a massive risk at the time, but I’m so glad I said yes. Because this space changed everything for me.
It’s still my favorite room in the house.
The first job was to create a mood board which I did on Canva. My mockups are never entirely realistic, but they do give me a good idea of what the overall space will look like in the end!
The Closet
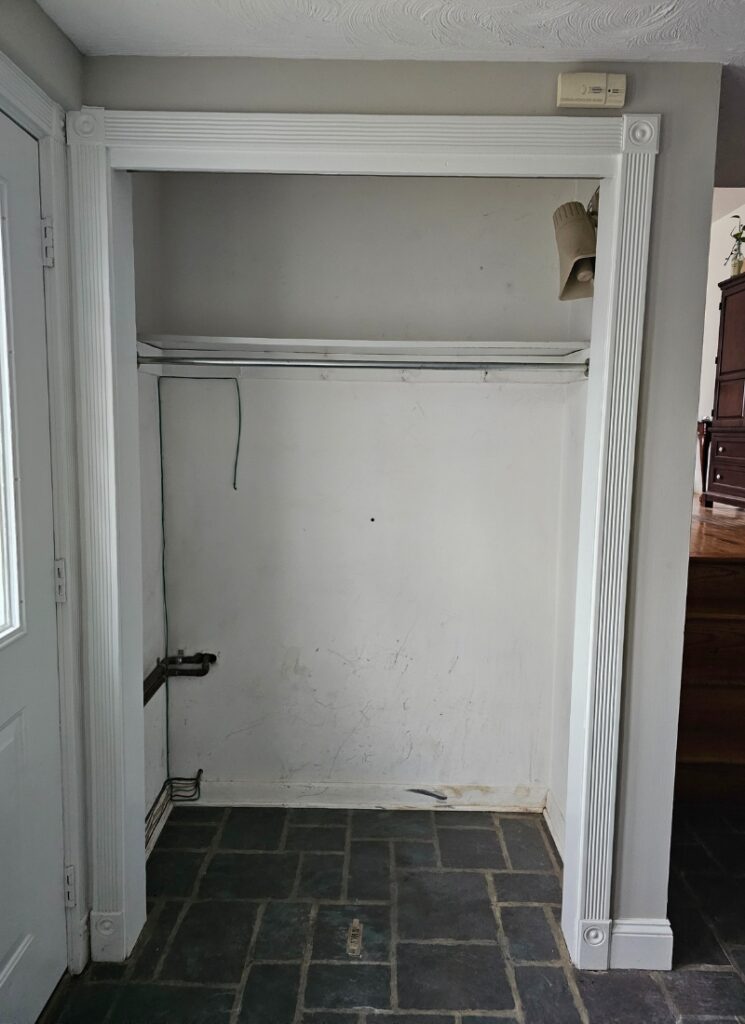
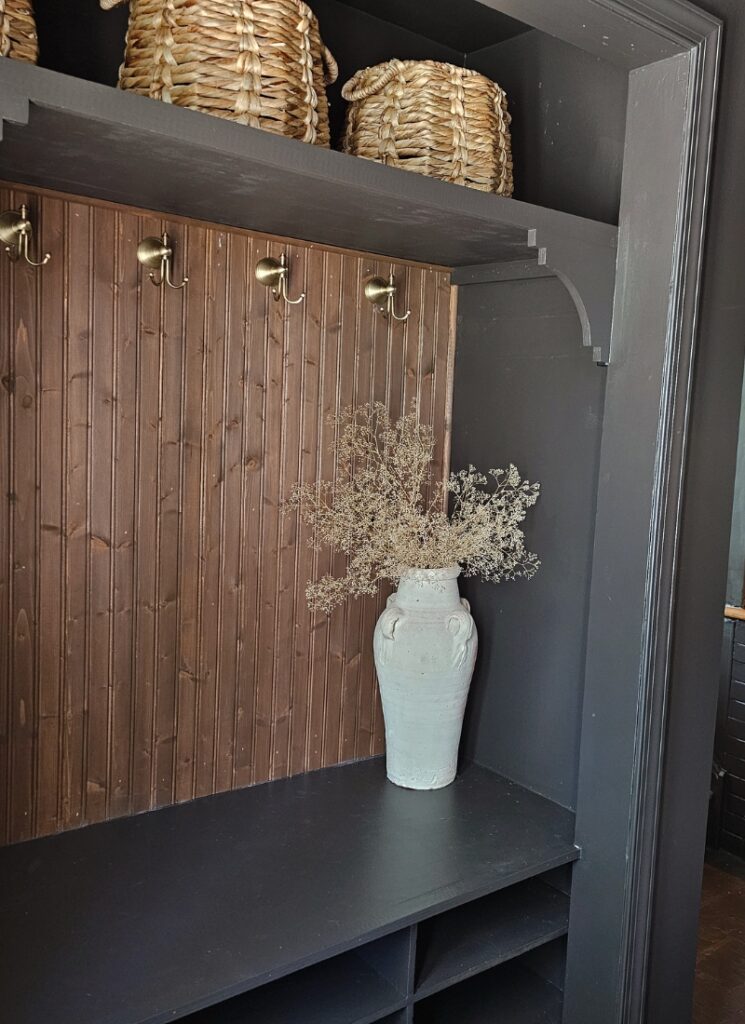
The entryway closet was very basic when we moved in. The trim was badly cut, there was just a single rail inside, spiderwebs everywhere, and an ancient alarm system siren stuck in the corner.
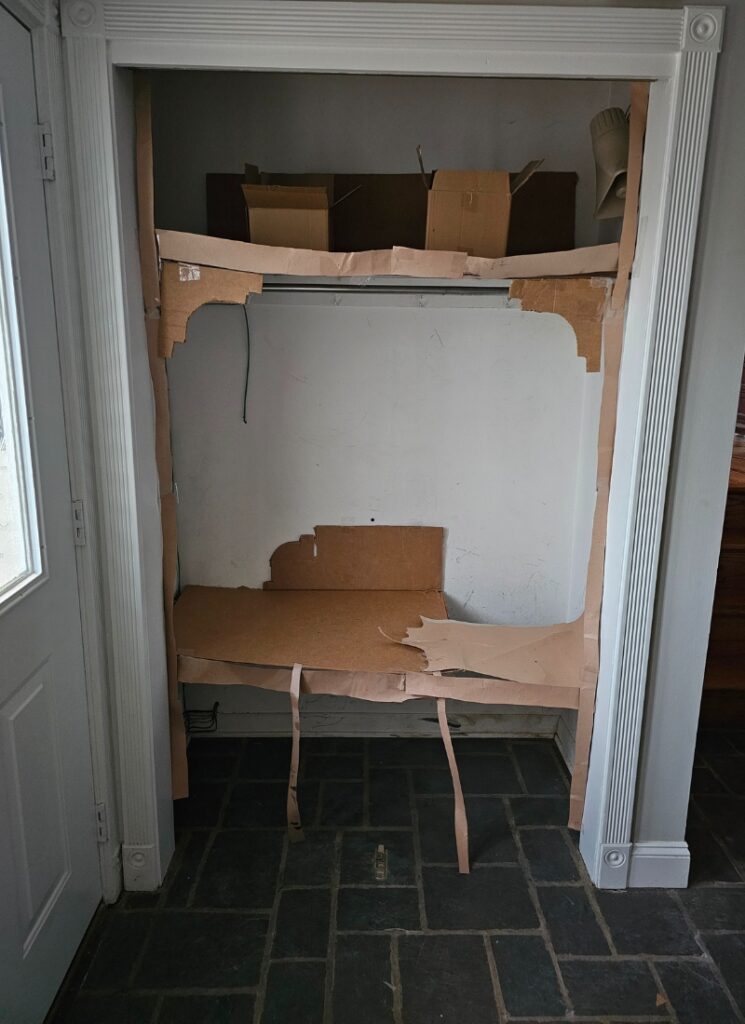
I wanted to create something more functional but also something that felt like me, even though I wasn’t totally sure what my design style actually was. Since I had never done anything like this before, I first brought the plant to life using scraps of cardboard, a little unorthodox maybe but definitely effective!
If you are new to DIY or design, it’s a great way to see your vision in real life, without any cost or commitment!
It was my first time ever using a saw, and I was absolutely terrified to even turn it on.
But by the time the closet was finished, I owned three! A circular saw, a mitre saw, and a jigsaw for some fancy curvy details.
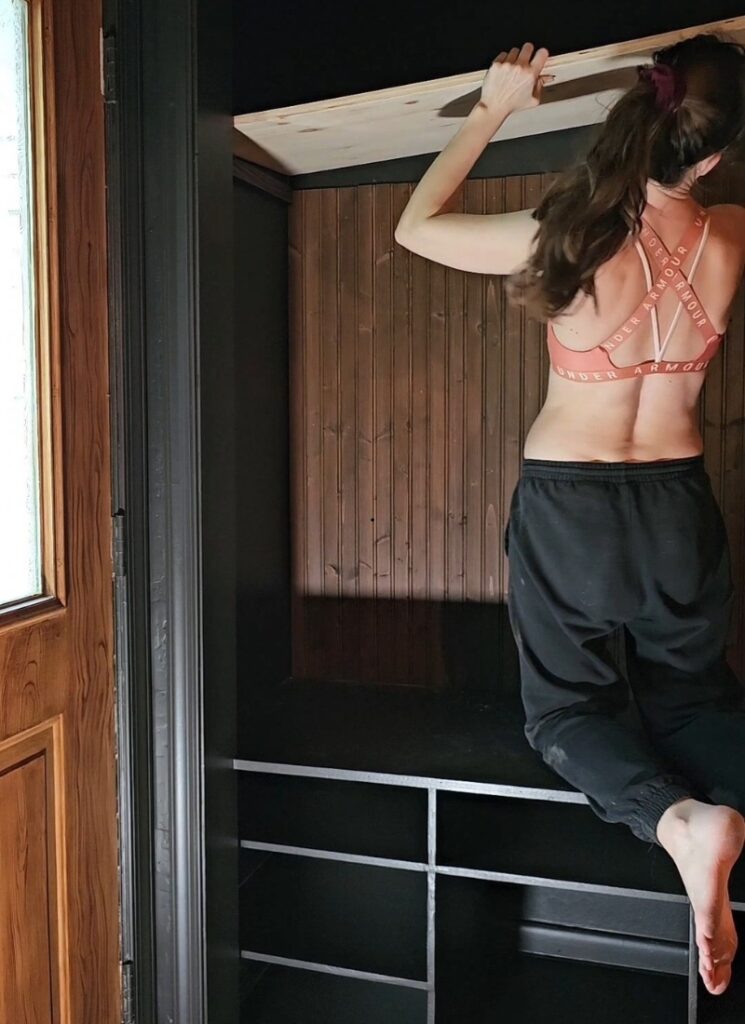
Honestly, I’m still not sure how I pulled it off but somehow, despite being my very first woodworking project, I managed to build a closet that felt both moody and a little luxurious. It’s not perfect by any means, but every time I walk by it, I still can’t believe that I am the one who built it.
I used walnut-stained beadboard, added beautiful brass hooks, and even installed automatic lighting that turns on when you walk up to the space which made it feel extra fancy!
I spent so long cutting and staining individual beadboard panels. It took three coats to get the tone and richness I wanted, and it took way longer than I had planned but it was absolutely worth it. The closet became the foundation for the entire room.
The Front Doors
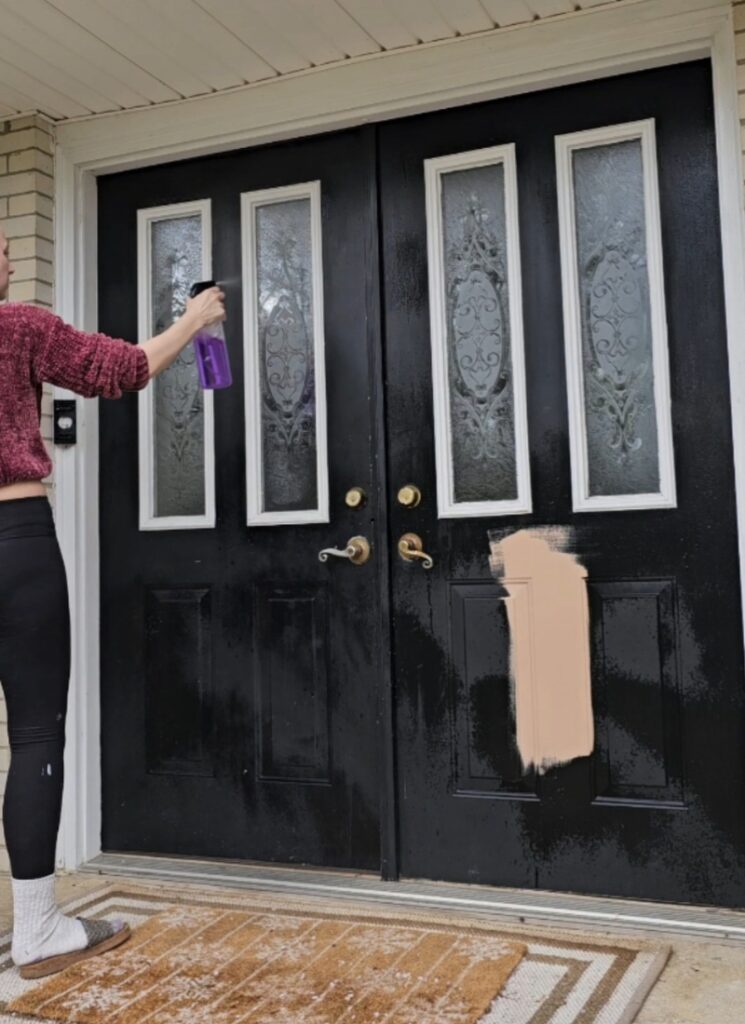
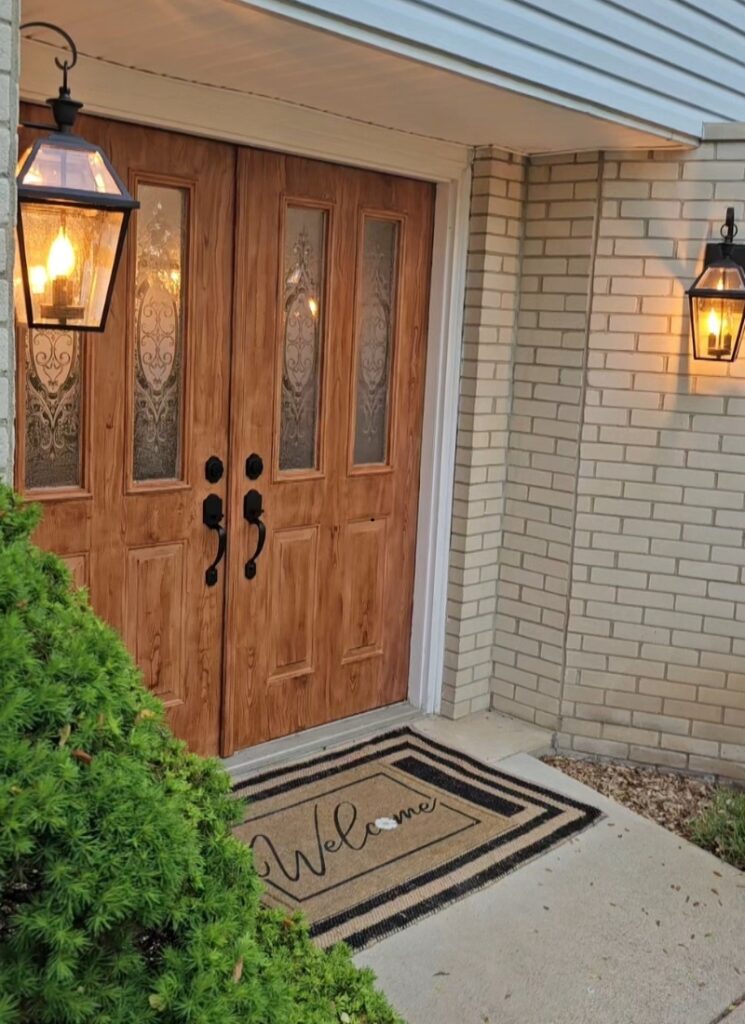
The double front doors were a mess, rickety, with multiple layers of mismatched paint, and they didn’t feel secure or inviting.
My husband really wanted to replace them, but once we saw the price of solid wood doors (thousands!), we knew it wasn’t happening.
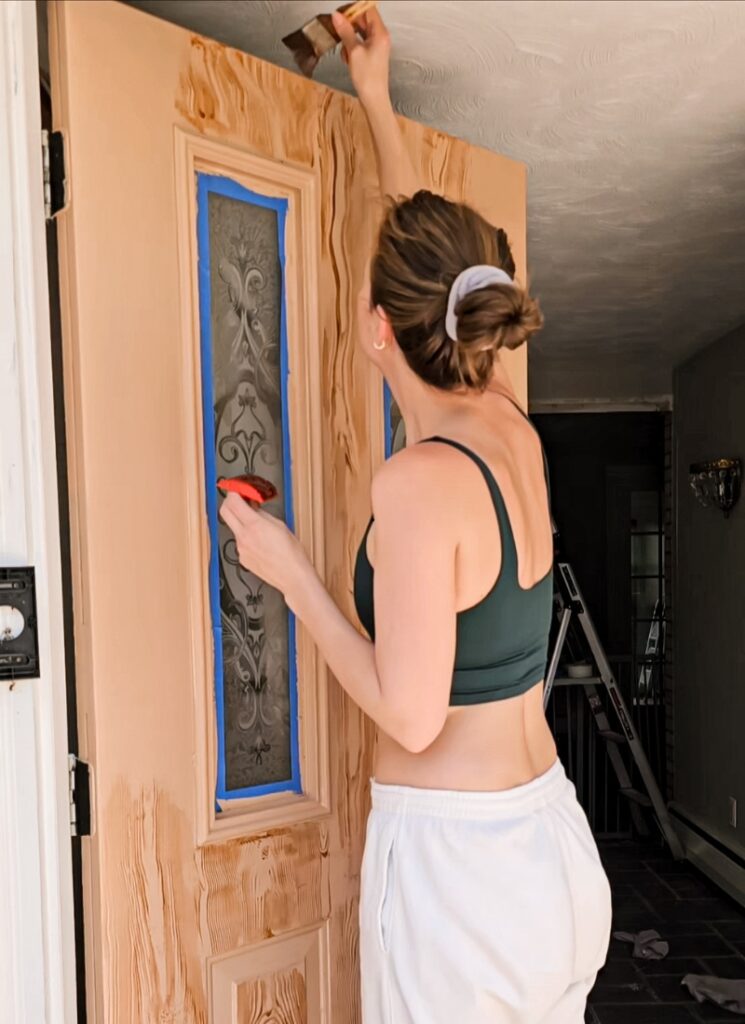
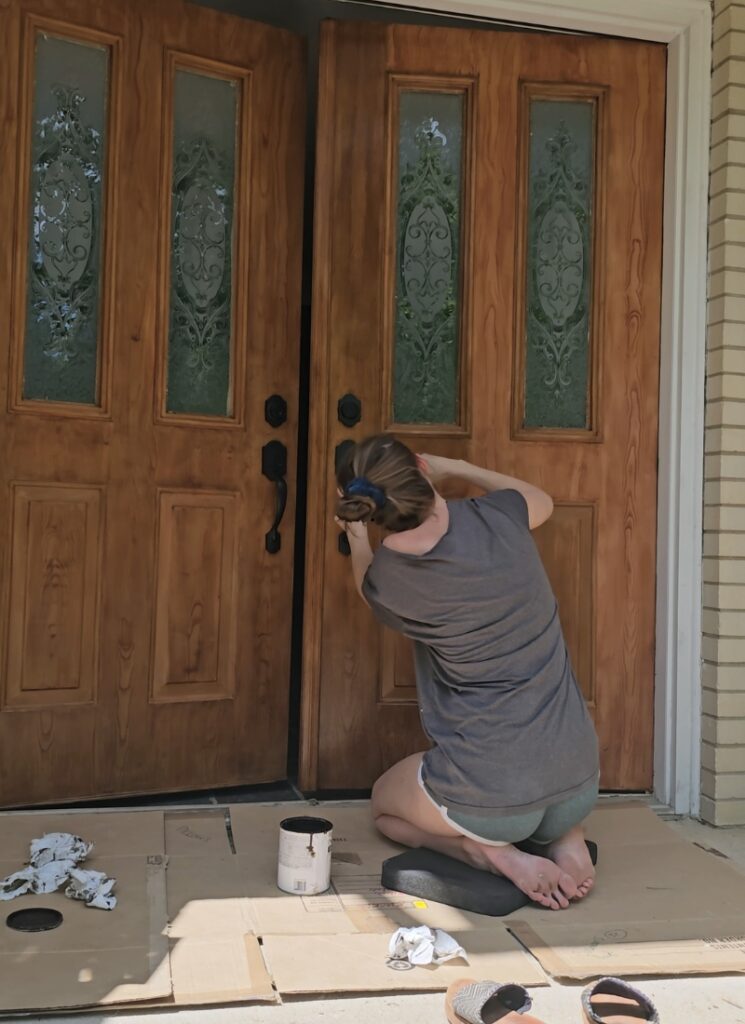
So I decided to try creating a faux wood finish using gel stain and a graining tool. It definitely took a few tries, but I eventually figured out a technique that worked.
The finish looks so realistic, and I’m proud to say it’s held up beautifully, not a scratch! I also swapped in some more substantial door handles, which instantly made the entryway feel far more grand.
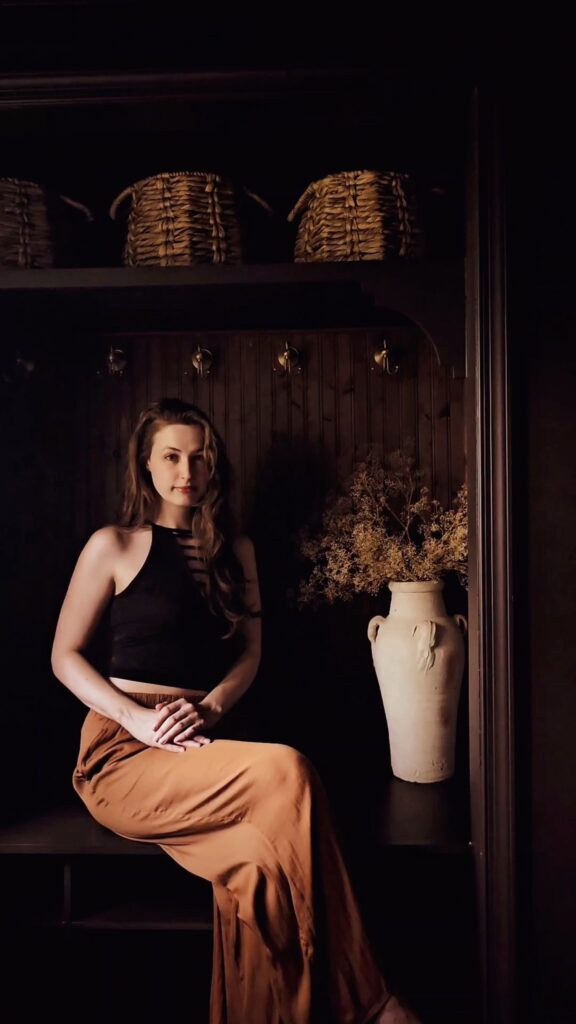
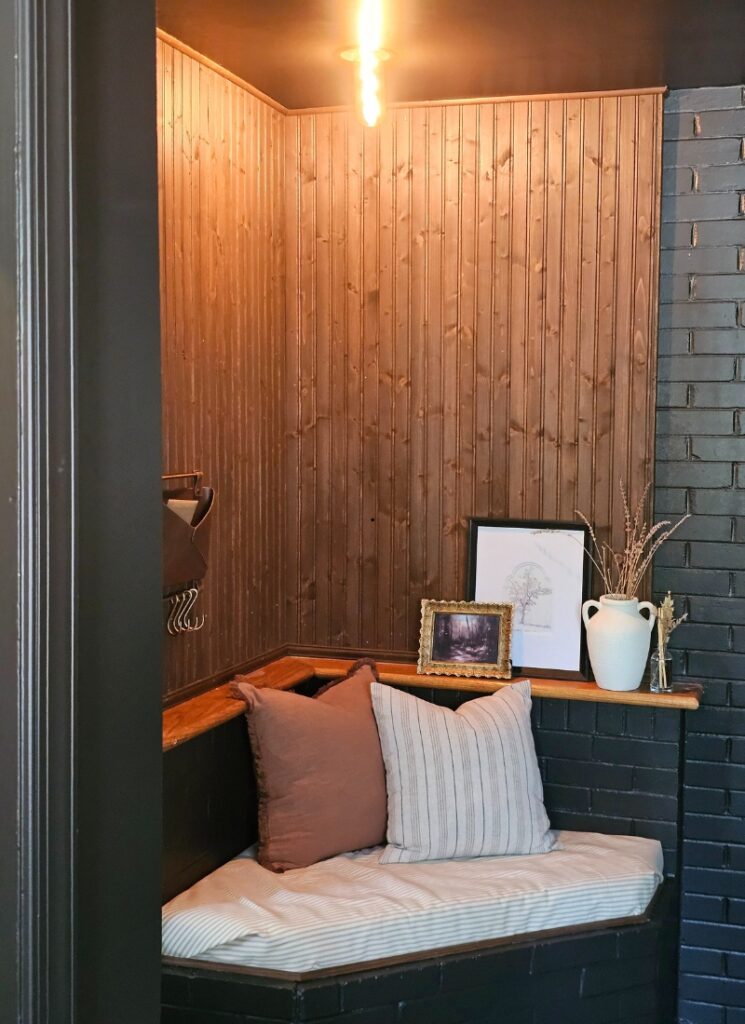
That Random Wall (and the One That Made Me Cry)
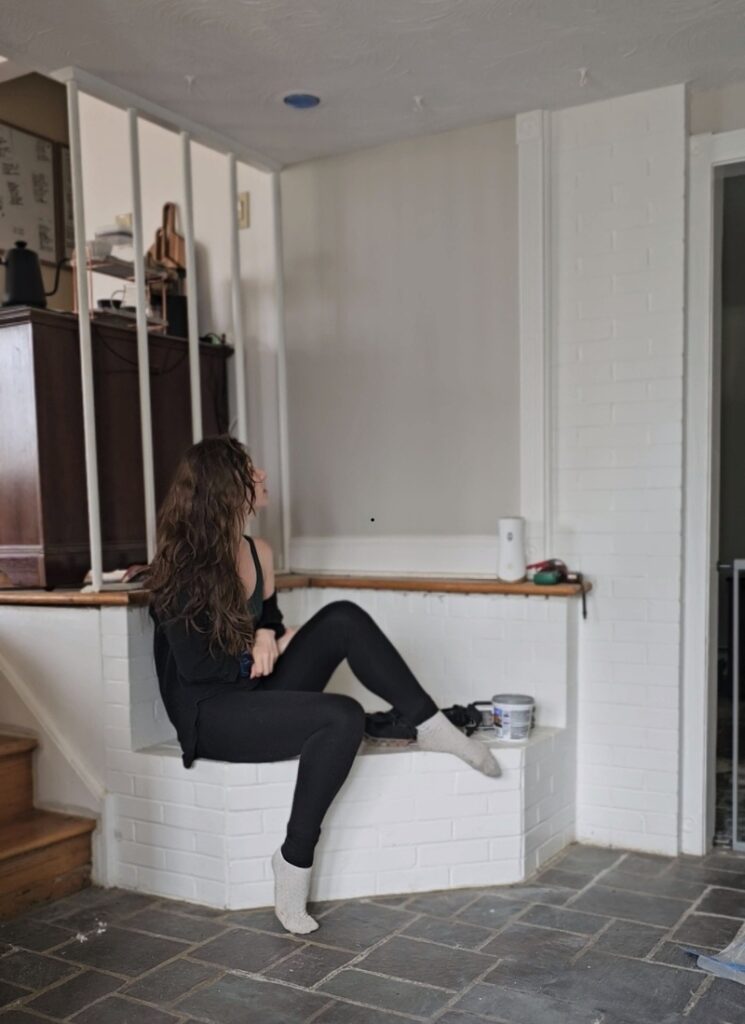
Our house is a split-level, and originally there was this strange little half wall and an awkward angular jut-out between the entryway and the upper room. It made the whole space feel like a basement and I really didn’t like that you could see into the next room the second you walked through the door.
So… I decided to build a wall.
I had never built a wall before. But there were already structural bars connecting the two rooms, so I knew it didn’t need to be load-bearing. I just boxed in the existing frame and closed it up. When I stood back and saw what I’d accomplished… I cried. I was so proud of myself.
That was the moment I realized we are capable of so much more than we think. And now, I spend all my time showing others that they are, too.
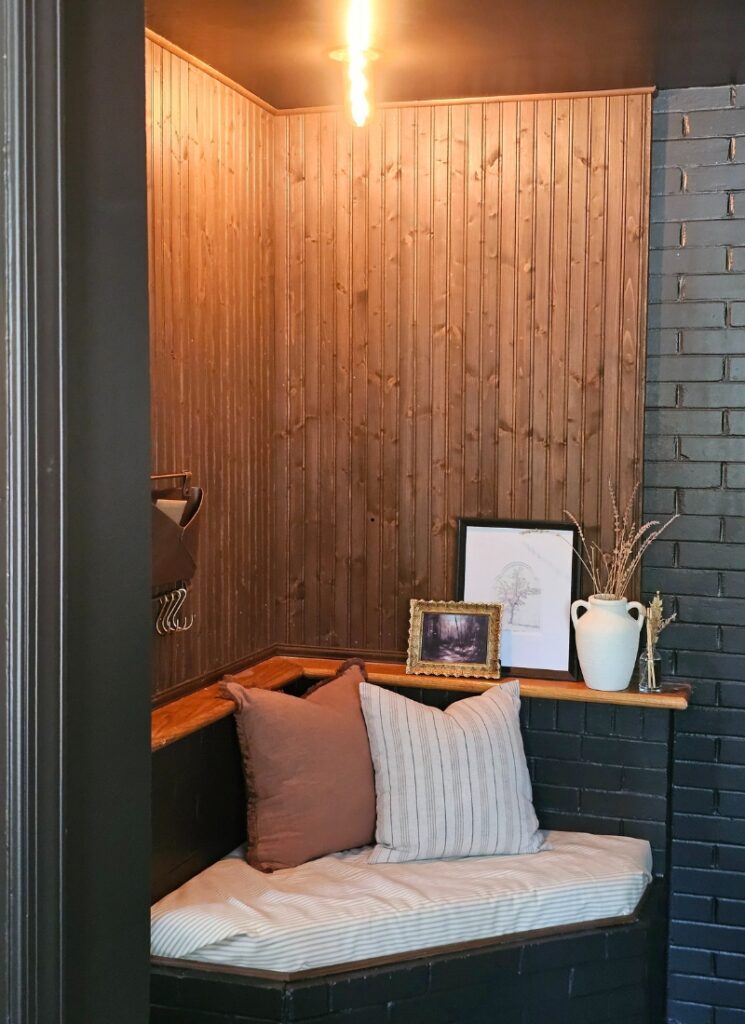
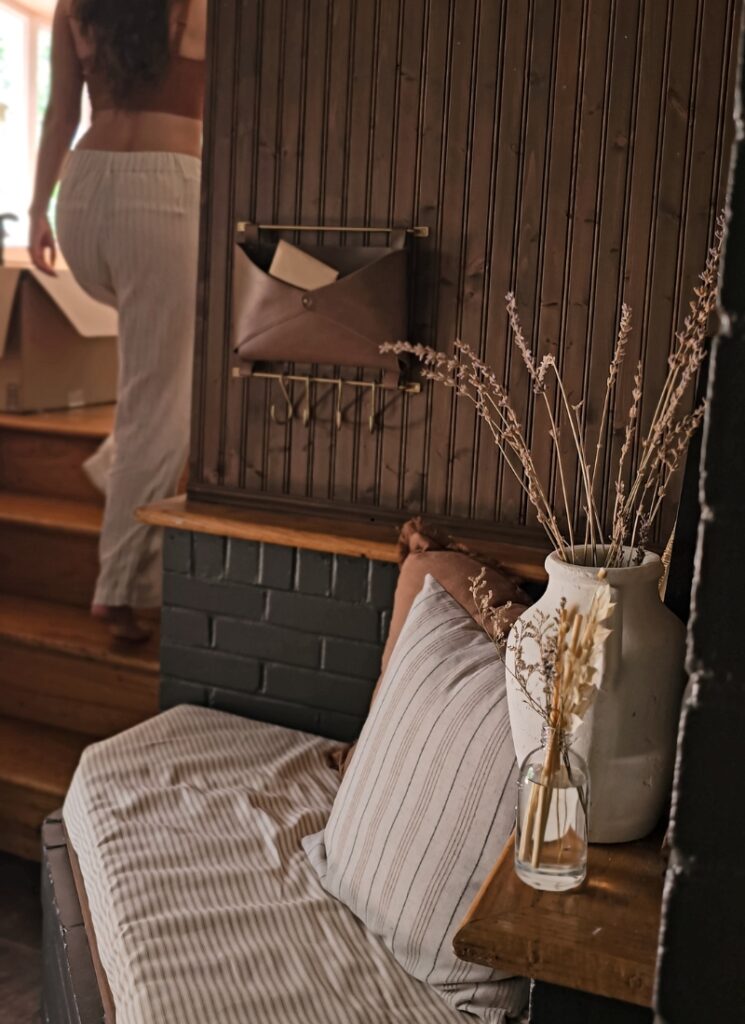
That wall gave me the chance to create a little feature nook, one of my favorite parts of the entire entryway. I made a custom bench cushion out of foam, plywood, and the perfect ticking stripe fabric (which, yes, took me way too long to find).
I trimmed it in the same walnut-stained wood as the closet and added more of that same beadboard behind it to tie the two together.
Then I added vintage-style Edison lighting overhead and suddenly it felt like a cozy corner in a speakeasy.
My dog has officially claimed it as her napping spot, which honestly makes me love it even more.
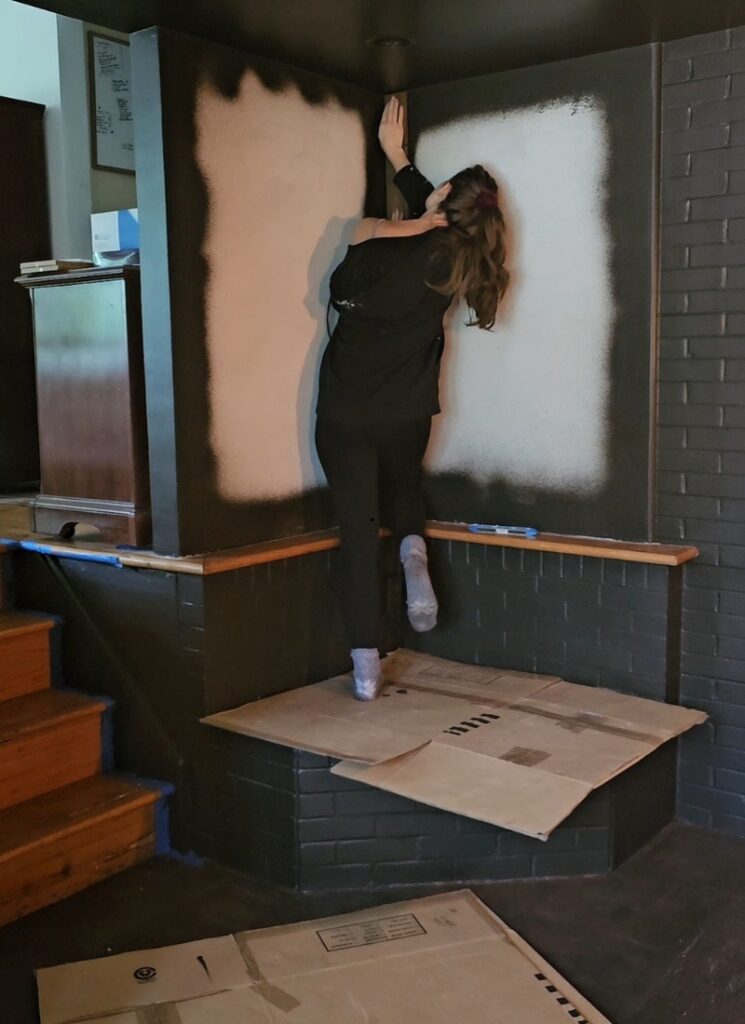
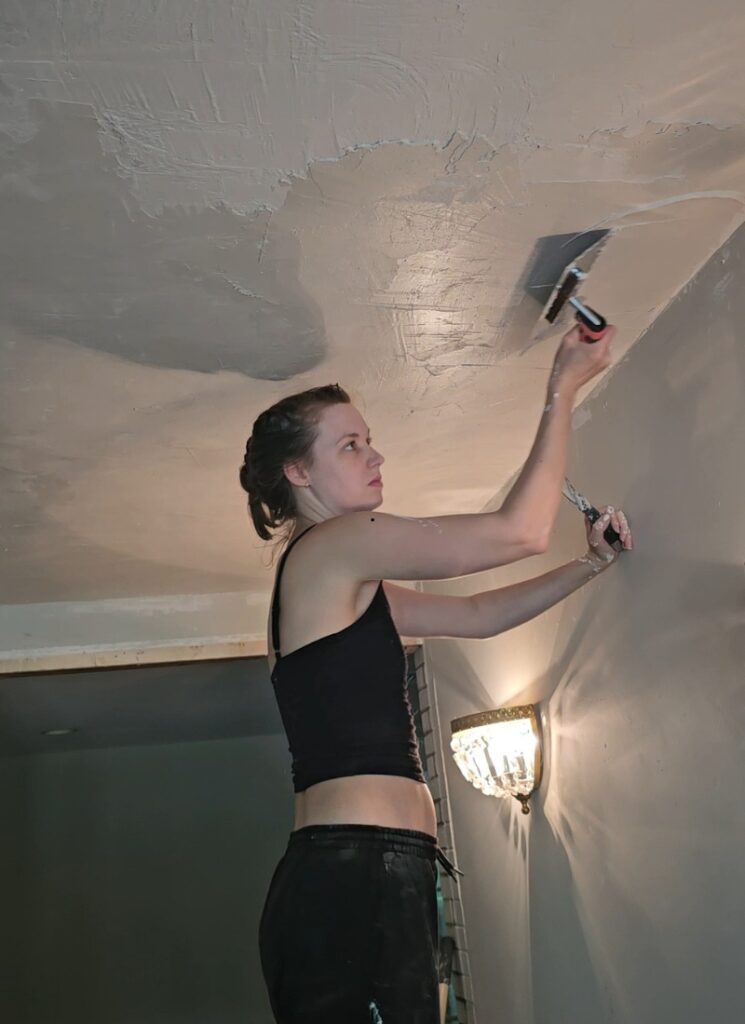
Walls, Ceilings, and All That Black Paint
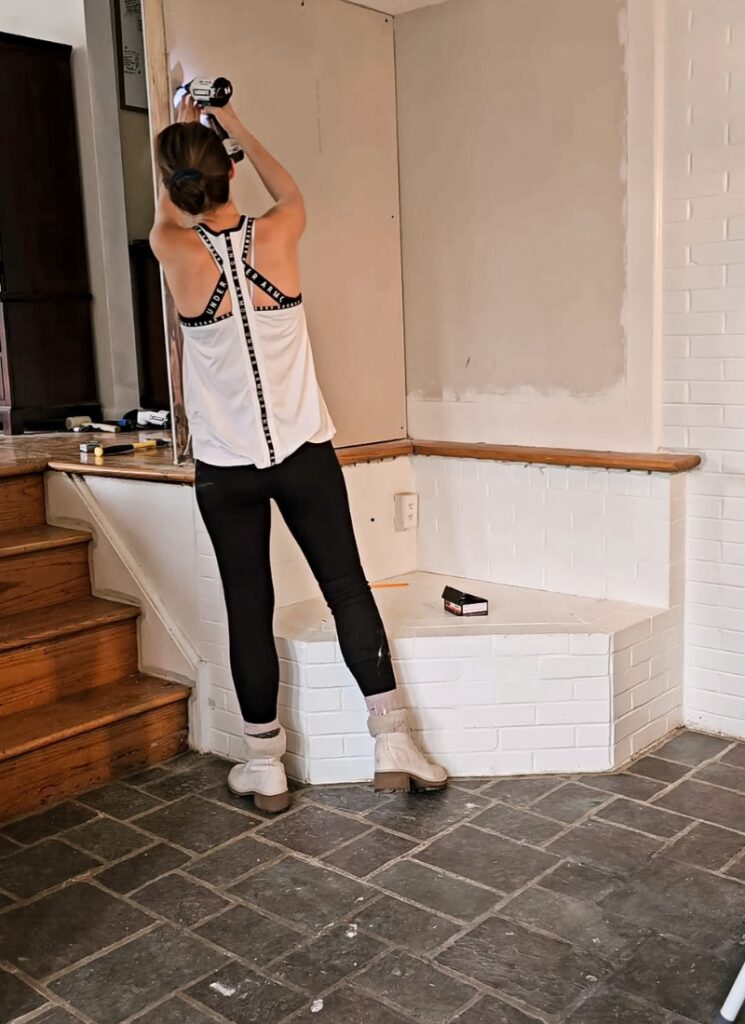
I smoothed over the old, swirly artex ceiling and added new trim to all the doors. I was especially happy to say goodbye to the jagged original cuts though I saved the old wood for future projects because I try not to waste anything.
Even though removing all the trim was satisfying, the entryway definitely looked worse before it looked better and I had a lot of self doubt on demo day.
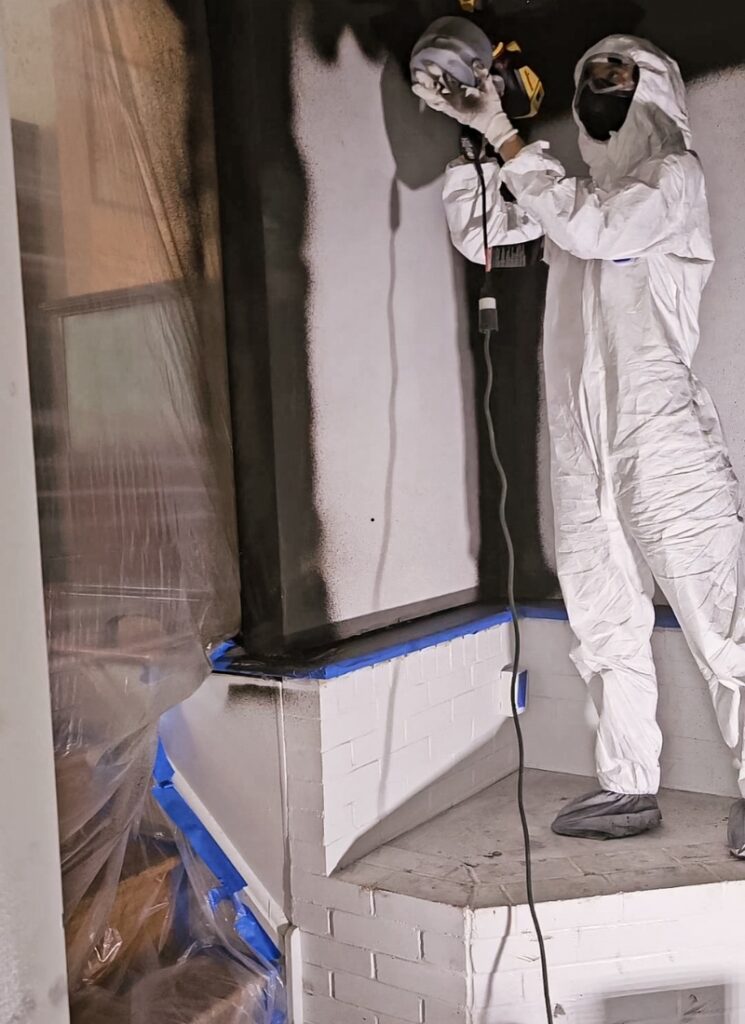
I bought a paint sprayer, another first, and color-drenched the entire room in black. Yep black walls, black ceiling, black trim. Everything.
It sounds dramatic (and it is!), but the shade I picked has warm copper undertones, and when it’s paired with soft lighting, it creates the most beautiful, cozy glow.
Instead of a cold, transitional space, it feels like a warm hug the second you step inside. I know most people go for bright, airy entryways but to me, this feels far more inviting after a long day.
The Floors
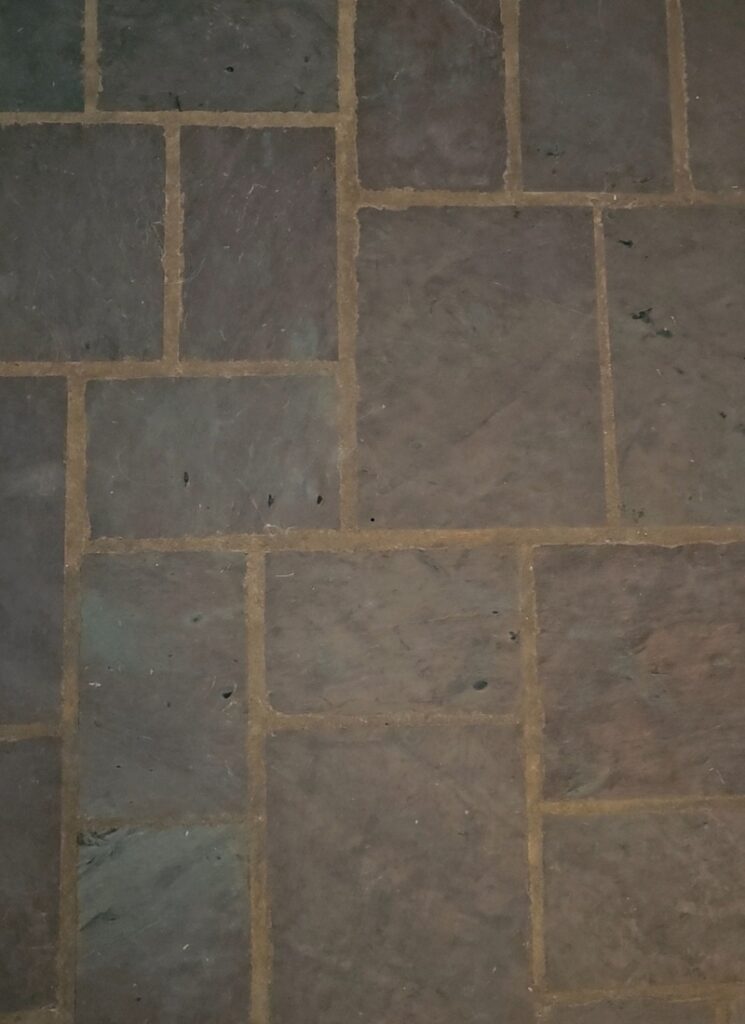
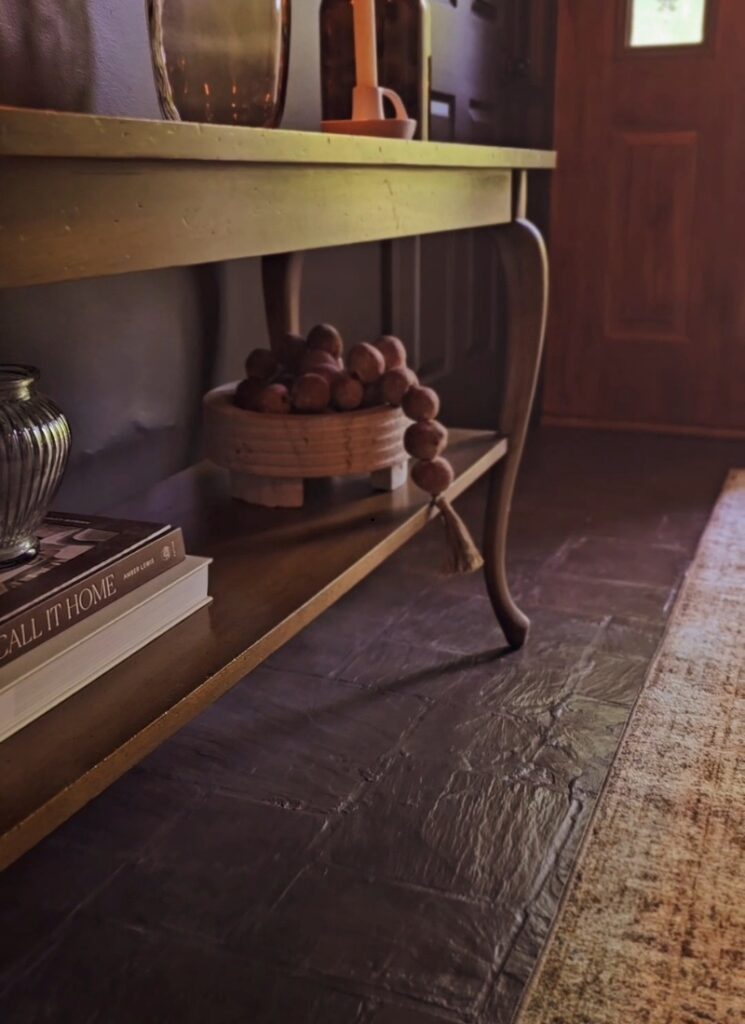
The original floors were uneven, blue-grey rectangles with messy grout lines that made the whole space feel a little… off.
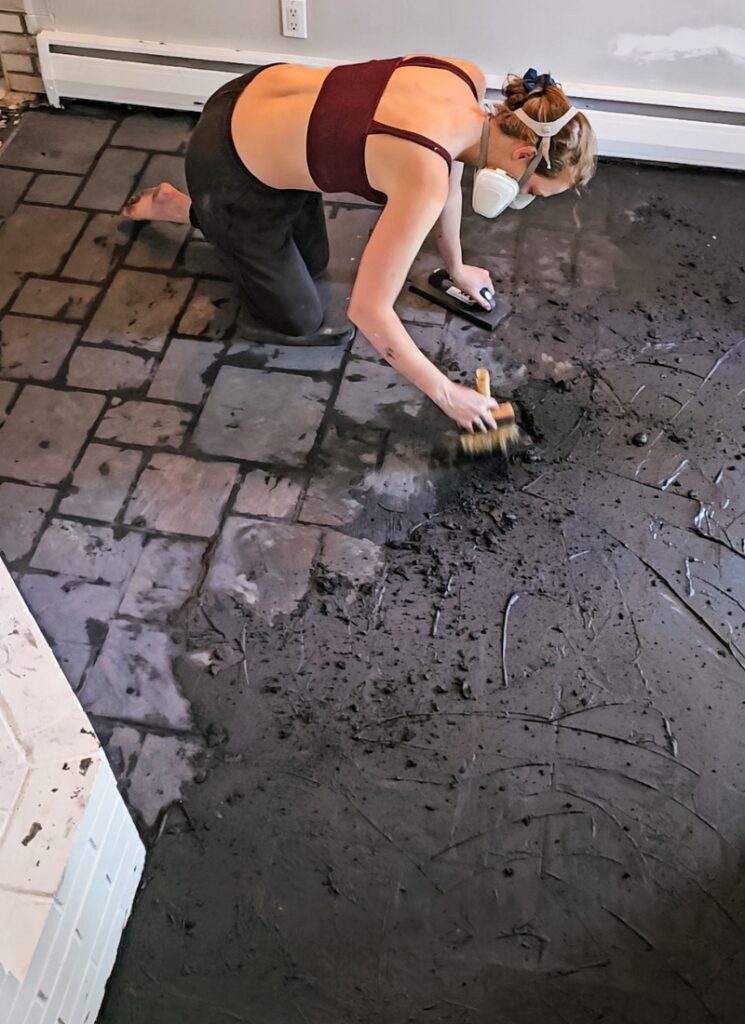
Even with all the other updates, they stood out in the wrong way. I didn’t want to rip them out, so in the final week before the challenge deadline, I took a risk: I over-grouted the entire floor and then scraped it back to create a more organic, cobblestone-inspired effect.
At this point, a lot of people on the internet thought I had lost it, they genuinely thought I’d ruined my floors. But I trusted my vision.
I went in with three different semi-transparent concrete stains and blended them together to get the look I wanted: soft and natural. Because the stains were translucent, the original stone still peeked through, so it didn’t look like I had just painted over them.
It brought in the exact warmth I was craving, and now the floors finally belong in the space instead of clashing with it.
Finishing Touches
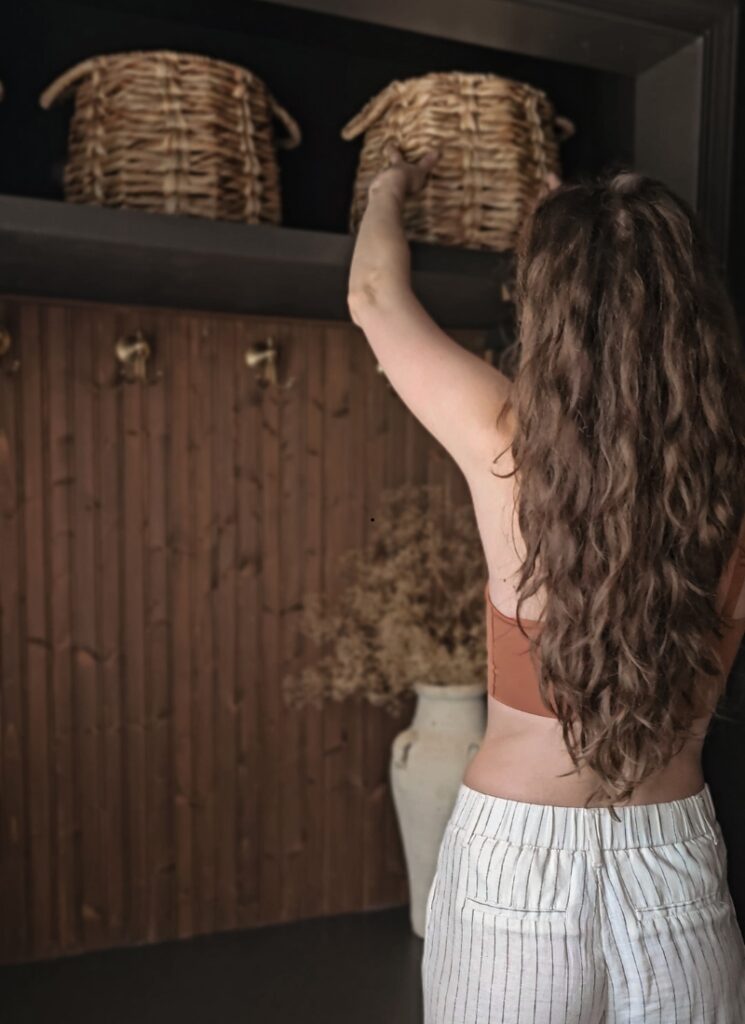
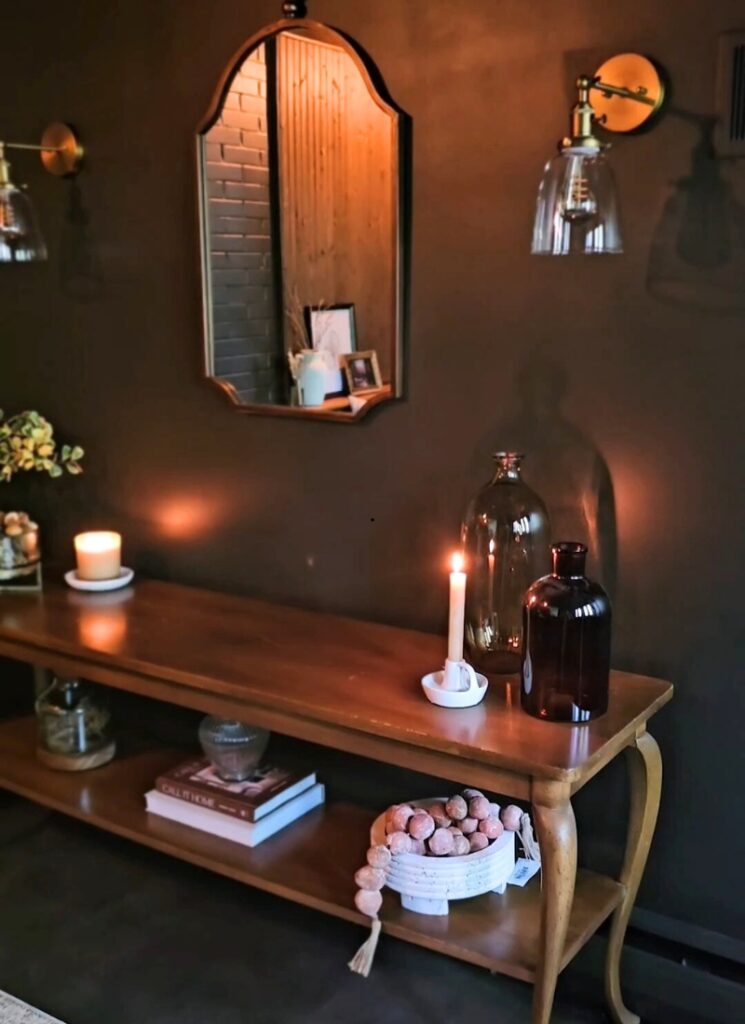
This is always the fun part! I added cushions, wicker baskets, a vintage table I found on Facebook Marketplace, curvy feminine mirrors, and some brass sconces.
Every little detail helped bring in the feeling I wanted: warm, welcoming, layered, and just a little bit luxe.
Why This Room Means So Much to Me
This was my first ever renovation, and it will always hold a special place in my heart. I had no clue what I was doing, but I just kept going. I took risks, trusted my gut, and pushed through every “I can’t do this” moment.
The ideas were mine. The work was mine. The mistakes were mine too but I learned so much along the way. So many firsts!
Even now, with all the other big creative projects I’ve taken on, this one still feels the most “me”. It’s where everything started. It’s where I first felt proud again.
I still have a lot of house left to renovate and I can’t wait to see what this journey teaches me next.