If you’re googling how to decorate a garden for a party, you probably want that easy, breezy, “wait, did she hire someone” vibe.
You want it to feel magical, but also like people can actually find the drinks, sit down, and not trip over a rogue hose.
You want the photos to look amazing, even if your patio furniture is a little sun-faded and one chair does that tiny wobble thing.
I’ve got you.
You’re going to build this party the same way you’d decorate a room: big decisions first, then layout, then layers, then the cute little finishing touches.
- You’ll learn how to pick a theme that works with what your garden is already doing
- You’ll set up seating that flows, not clumps
- You’ll style a table and lighting that instantly upgrades the whole yard
Quick-Start: If you only do 3 things, do this: lights + seating zones + a styled table.
Promise box: what you’re getting in this post
What readers get: theme → layout → table → lighting → accents → stations → comfort
Plus: a shopping list, a setup timeline, and budget tiers
Party types covered: casual backyard hang, birthday or celebration, tea party or elevated garden party
Affiliate note: This post may contain affiliate links, which means I may earn a small commission at no extra cost to you.
Step 1 – Pick a theme + color palette
You do not need a complicated theme to make this feel intentional. You just need one clear idea and a tiny bit of restraint, which is rude, because restraint is hard when you love cute stuff.
Choose 1 theme + 2–3 accent colors
Pick one theme and keep your colors on a short leash: one main color plus 2 or 3 accents. That’s what makes everything look “designed,” even if you’re using paper lanterns and grocery-store flowers. If you’re hosting a casual backyard hang, your theme can be as simple as “fresh and sunny,” with white, green, and one punchy color like lemon yellow. For a birthday, you can do the same, just turn up the celebration dial with one bolder accent. For a tea party or elevated garden party, go softer and calmer: creams, blush, sage, and a brass or vintage touch.
Here are spring and summer themes that work almost anywhere:
- English garden tea party: pastels, florals, vintage china vibes
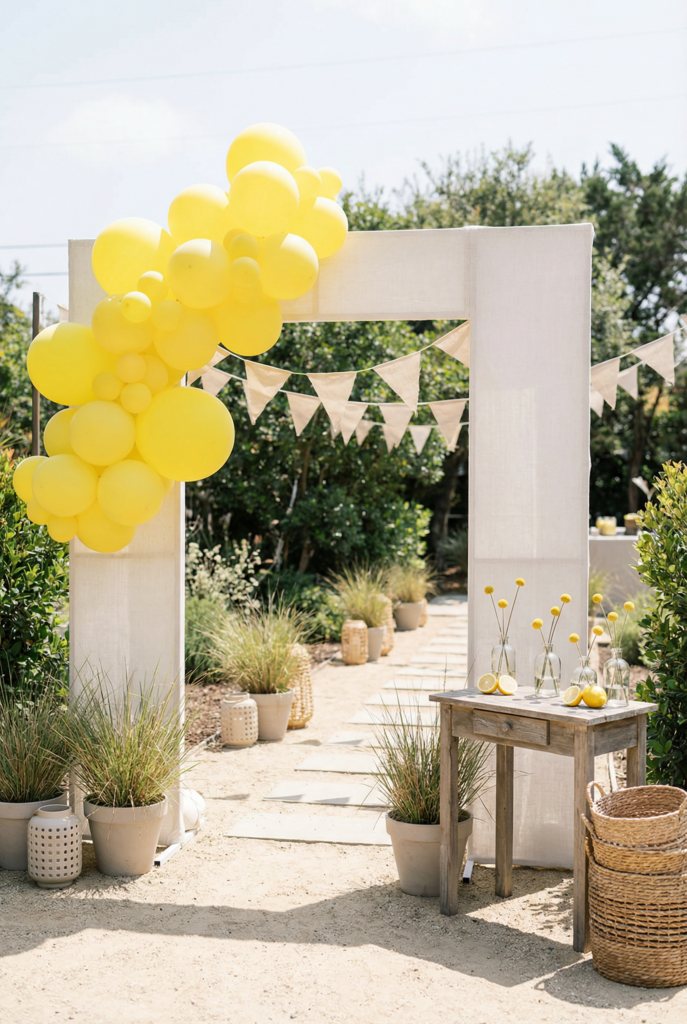
- Citrus brunch: yellow and white, lemons, gingham, crisp greenery
- Boho picnic: rugs, floor cushions, lanterns, warm neutrals
- Tropical night: palms, bright cocktails, playful prints, glow lighting
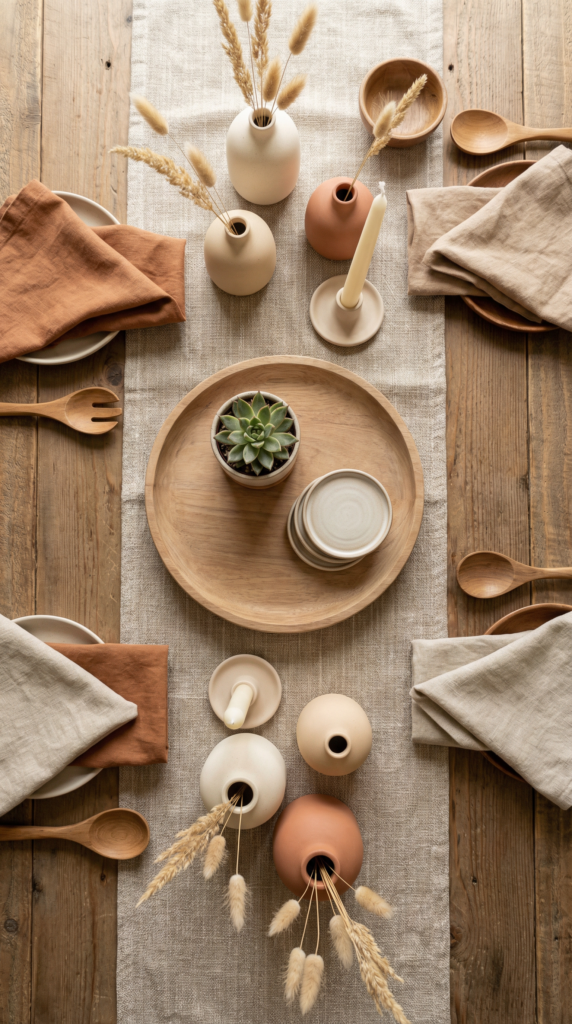
- Minimal modern: white linens, lots of green, warm lights
- Wildflower casual: mixed blooms, mismatched vases, relaxed color
- Sunset party: peach, terracotta, coral, and warm metals
Let your garden decide: match what’s blooming
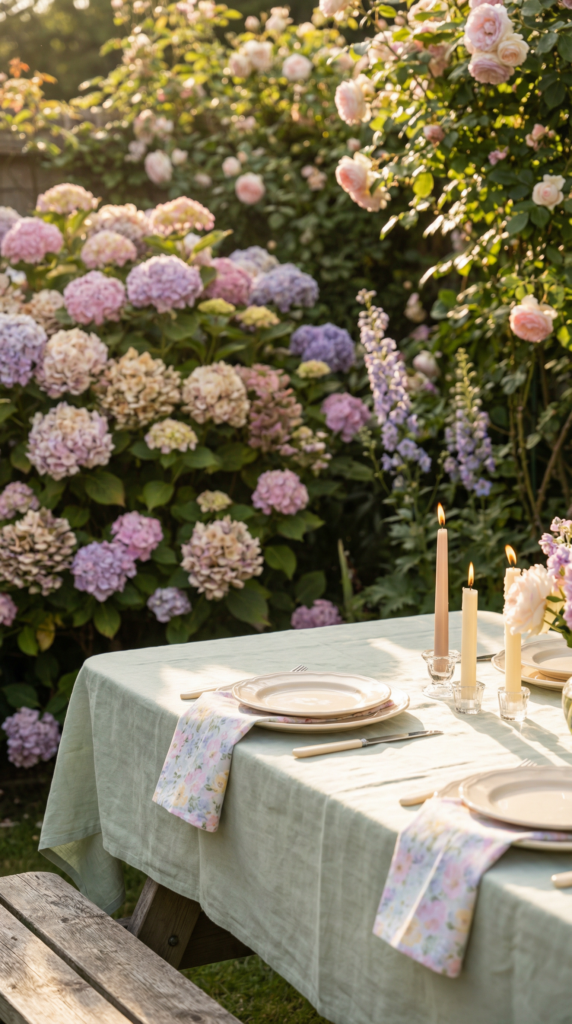
Your garden is literally handing you a free color palette, so let it. If your hydrangeas are going off right now, pull that color into napkins, candles, or little details. If everything is mostly green, lean into it and go modern, with white linens and warm lighting. When you match your decor to what’s already blooming, it looks expensive because it looks cohesive. Also, it saves you from the 9:12 pm panic purchase where you buy a random neon table runner and then regret it while brushing your teeth.
If your garden is between blooms, steal color from foliage: deep green, silvery sage, and warm wood tones are your best friends. Add one bright accent and call it a theme. Honestly, half of outdoor entertaining is just making peace with what nature is doing that week.
Pick 1 statement element: the hero

Choose one “hero” piece that announces the party. One. Not five. This can be a balloon garland, a floral arch moment, a big bunting banner, a dramatic table runner, or a canopy of lights over the dining area. The hero is what makes guests go, “Oh, cute,” when they walk in. Everything else is supporting cast.
For a casual hang, your hero can be lighting. For a birthday, it can be a bold backdrop or banner. For a tea party, it can be a gorgeous tablescape with vintage touches. This is also the moment where I always think I’ll DIY something elaborate, then I remember I have one hot glue gun and a very short attention span. Choose your hero based on your actual life, not your fantasy life.
DIY vs store-bought (Step 1)
DIY: thrifted vases, handmade bunting, ribbon-tied napkins, painted mason jars, garden clippings as decor
Store-bought: coordinated napkins and plates, a ready-made banner, pre-made garlands, matching candle holders
Shop the theme
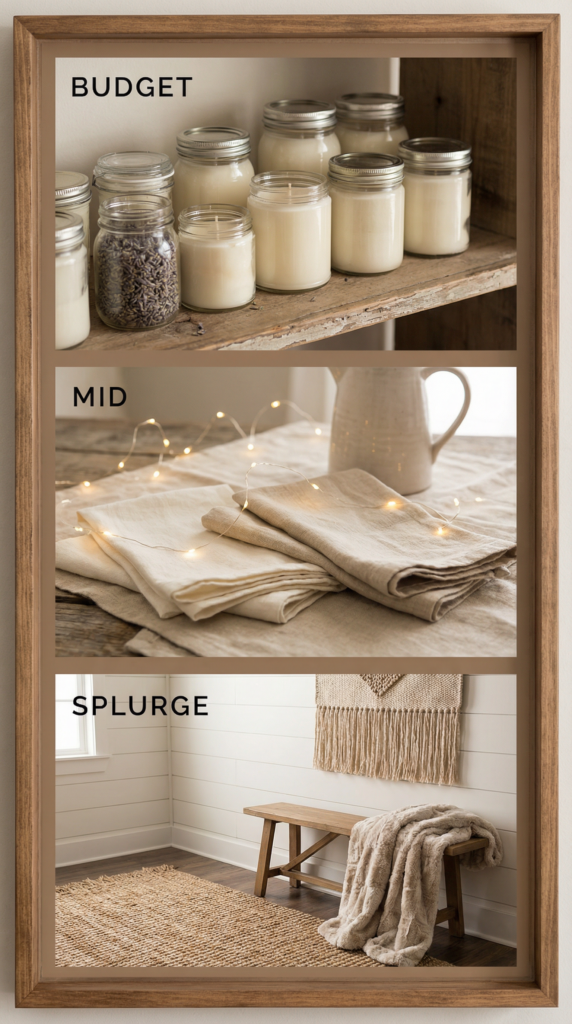
- Budget pick: paper lantern pack, simple bunting, bud vase set
- Mid-range: table runner, cloth napkins, a set of tapered candles and holders
- Splurge: a statement outdoor rug, a backdrop stand, upgraded serving pieces
Step 2 – Clear and prep the space
Prep is what makes decor look intentional instead of “we threw things out there.” You’re basically giving your decorations a clean canvas so they can do their job.
Start with a quick reset: mow or trim, pull obvious weeds, remove clutter, wipe furniture, and sweep the patio. I do this with a coffee in one hand, a trash bag in the other, and the very specific rage of someone who just found three abandoned kid shoes and a mystery plastic dinosaur in the flower bed. You don’t need perfection. You need “clean enough that the cute stuff reads as cute.”
Now identify your zones, like you’re setting up a tiny outdoor floor plan:
- Food zone
- Seating zone
- Games or photo zone
- A pathway lighting line so people can see where they’re going
If you only have one area, that’s fine. You’re still creating zones, they just overlap.
Empty space micro-guide: create a room outdoors
If your yard feels like a wide-open nothing, you can still create a “room.” Use a rug to anchor seating, string lights overhead to define the ceiling, and one focal backdrop to create a wall. That’s it. Suddenly the yard feels designed, not empty. I’ve done this in a rental yard with sad grass and it still worked, because your brain loves boundaries, even when they’re made of twinkle lights.
DIY vs store-bought (Step 2)
DIY: borrow a pressure washer, make simple zone signs, repurpose indoor rugs short-term, use planters to “wall off” space
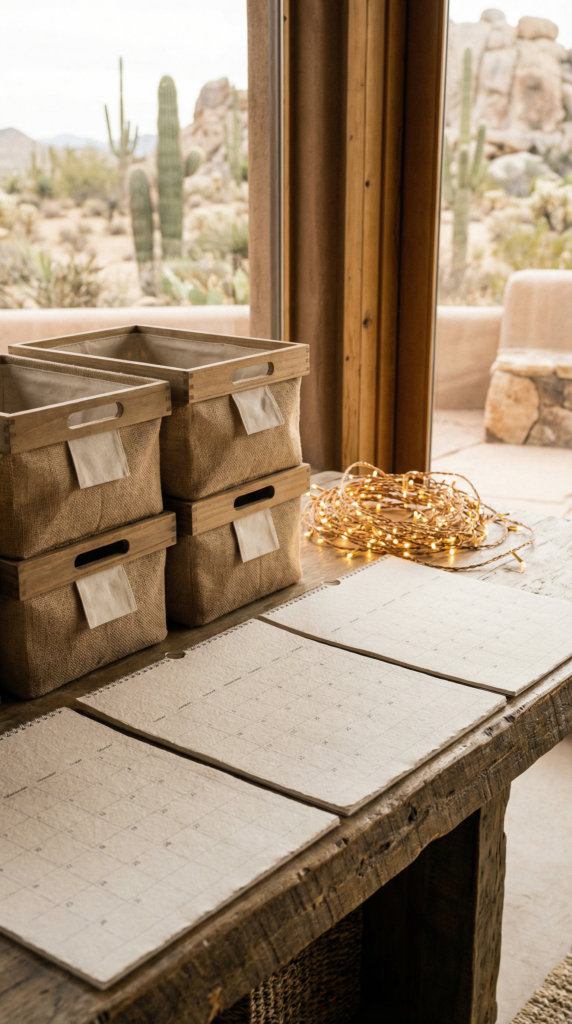
Store-bought: outdoor rug, patio storage boxes, lantern sets, clip-on hooks for lights
Shop this step
- Budget pick: outdoor broom, citronella candles, basic string light clips
- Mid-range: outdoor rug, storage bin for clutter catch-all
- Splurge: patio umbrella or shade sail for instant polish
Step 3 – Build seating flow
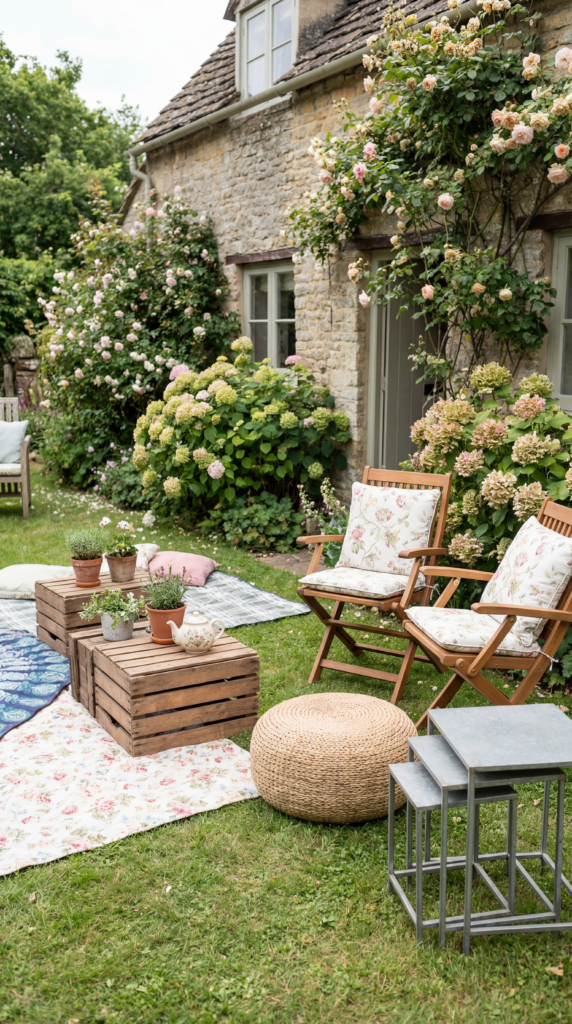
Seating flow is the difference between “everyone’s comfy” and “why are we all standing in a weird circle by the grill.” You’re creating little pockets so people can talk without shouting.
Here’s the layout recipe I actually use:
- Create 2–4 conversation pockets, even if they’re small
- Keep 3–4 feet of pathway space so people can pass through with a drink
- Put drinks within 6–10 steps of every seating area
- Mix seating types: a couple chairs, a bench, a blanket spot, something flexible
- Add surfaces. People need places to set cups, even if it’s a sturdy crate
And yes, I measure the pathways sometimes. Not with a tape measure like a normal person. I do the “walk it while carrying an imaginary platter” test, which is very scientific.
Seating setups that work
Intimate garden party (6–10 people): One main seating pocket plus a small overflow spot. Put the prettiest chairs closest to the table or hero area.
Medium party (12–20 people): Two main pockets plus a standing drink zone. Add at least two drink surfaces and one extra trash spot.
Small yard or limited space: One tight seating zone, one “lean” zone like a bar shelf or high-top surface, and keep the pathway open. In small spaces, clear walking lines matter more than extra decor.
For a casual hang, blankets and mixed chairs are perfect. For a birthday, add a “center of gravity” near the cake or photo moment. For a tea party, prioritize seated conversation and keep it calm and symmetrical.
DIY vs store-bought (Step 3)
DIY: picnic blankets, floor cushions, crates as side tables, borrowed folding chairs, upside-down planters as stools
Store-bought: folding chair set, outdoor poufs, a small patio loveseat, nesting side tables
Shop this step
- Budget pick: floor cushions, small folding side tables
- Mid-range: outdoor poufs, bench seating, washable throw blankets
- Splurge: a matching patio set or a couple statement lounge chairs
Step 4 – Style the table like a magazine
A styled table is the fastest way to make the whole party feel elevated. Even if you’re serving pizza, a good tablescape convinces people you planned this on purpose.
Use this tablescape formula every time:
- Base layer: tablecloth or runner
- Mid layer: placemats or chargers
- Center: greenery garland or 3–5 bud vases
- Height: 1–2 taller elements, but keep sightlines clear
- Finish: place cards and napkin styling
The magic here is repeating shapes and keeping the middle consistent. If you’re doing a casual backyard hang, you can do a simple runner, bud vases, and paper plates that match. For a birthday, add color and one “spark” element like metallic candles or a fun centerpiece. For a tea party, lean into layered texture: linens, delicate glassware, and a centerpiece that feels collected.
Wind-proof table styling
Wind is the villain of outdoor table decor. My unresolved annoyance is that the breeze always arrives the moment the napkins are folded perfectly. Make your setup heavier and more contained:
- Use tablecloth clips or a runner that’s weighted by decor
- Choose heavier vases and keep florals low and tight
- Put loose items in bowls or trays
- Skip feather-light decor and go for sturdy pieces
Centerpiece ideas that look good fast
- Mason jar bud vases: budget-friendly and charming
- Potted herbs: centerpiece plus favors, and they smell amazing
- Floating flowers and candles: instant evening wow
- Fruit and florals: summer citrus energy, especially for brunch
- Vintage teapot centerpiece: perfect for tea party vibes
Tiny styling rule that helps: the 3-5-7 idea. Group things in 3, 5, or 7 when you’re clustering vases or candles. It keeps it looking organic, not staged.
DIY vs store-bought (Step 4)
DIY: garden clippings, thrifted vases, handwritten place cards, ribbon-tied napkins
Store-bought: linen runner, charger set, coordinated candle holders, ready-made garlands
Shop this step
- Budget pick: bud vases, taper candles, place cards
- Mid-range: cloth napkins, a runner, a centerpiece tray
- Splurge: linen tablecloth, upgraded flatware, statement serving platters
Step 5 – Ambient lighting that makes it magical
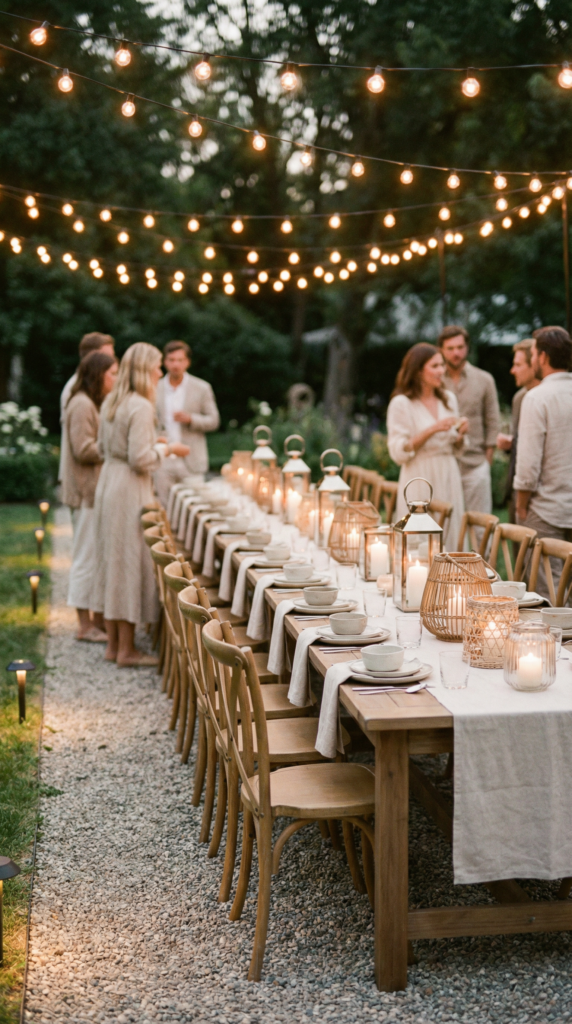
Lighting is what turns “nice backyard” into “wait, this is adorable.” You’re layering light the way you layer decor inside a room.
Think in lighting layers:
- Overhead: a string lights canopy
- Table-level: lanterns or candles
- Ground-level: path lights or stakes
- Accent: wrap a tree, highlight a backdrop, or add a little glow to the bar area
For daytime parties, lighting is still worth doing because it sets the mood for later and looks great in photos. For nighttime parties, lighting is the whole vibe. I call string lights my emotional support twinkle lights because they solve so many problems, including my tendency to overthink everything at 10:47 pm.
How many lights do you need
This is a simple estimator to avoid the “one sad strand” situation:
- Small patio: 48–96 feet total
- Medium yard dining zone: 96–200 feet total
- Big yard: 200+ feet total
Also: extension cords. Test them early. I have absolutely been on the lawn in the dark, five minutes before guests arrive, whisper-yelling at an outlet that suddenly stopped working.
Lighting for photos outdoors
If you want flattering photos, keep light sources above eye level when possible, and avoid putting a harsh spotlight straight at faces. Warm, layered light is forgiving. Candles and lanterns at table height make everything glow, and a softly lit backdrop gives you that “photo moment” without screaming “photo booth.”
DIY vs store-bought (Step 5)
DIY: mason jar lanterns, candle clusters, DIY light canopy with hooks and clips
Store-bought: commercial-grade string lights, solar path lights, battery lanterns, uplights
Shop this step
- Budget pick: fairy lights, battery votives, simple lanterns
- Mid-range: outdoor string lights, solar path lights, rechargeable lanterns
- Splurge: bistro light canopy setup, dimmable outdoor lights, a few statement lanterns
Step 6 – Add decor accents + a photo moment
Accents are where your theme becomes real. You’re choosing one or two focal moments, then sprinkling small touches so it feels cohesive, not cluttered.
Choose 1–2 focal decor moments:
- Balloon garland, or
- Floral arch, or
- Backdrop wall
Then add small touches that echo the theme: bunting, signage, place cards, a simple welcome moment. For a casual hang, a welcome sign and a styled drink station is plenty. For a birthday, the photo backdrop is the star. For an elevated tea party, the table is the main event, so keep the backdrop softer.
Garden party decor details that feel personal
This is the part that makes guests feel cared for, and it takes five minutes:
- Welcome sign
- Signature cocktail sign
- Place cards
- Party favor basket
I like favors that are also decor, like potted herbs or wrapped cookies. Also, if you’re worried about it feeling “boring,” personalization is the shortcut. People love a little sign that says “Lemonade, but make it fancy.”
DIY vs store-bought (Step 6)
DIY: painted signs, DIY balloon garland, homemade backdrop using fabric and clamps
Store-bought: backdrop stand, pre-made garlands, printed signage, ready-to-hang banners
Shop this step
- Budget pick: bunting, balloon kit, simple signage frames
- Mid-range: backdrop fabric, faux greenery garland, nicer place cards
- Splurge: arch stand, premium balloon garland, custom sign
Step 7 – Style food & drink stations
This is not a food article, but stations are a huge part of the decor. They’re functional decor, which is my favorite kind because it earns its keep.
Outdoor entertaining: make stations look intentional
Pick one surface per station and style it like a mini vignette:
- One tray to corral the chaos
- One tall element for height, like a lantern or a vase
- One label or sign so guests don’t ask you 47 times where the cups are
- One “repeat” of your theme color, like napkins or a small floral
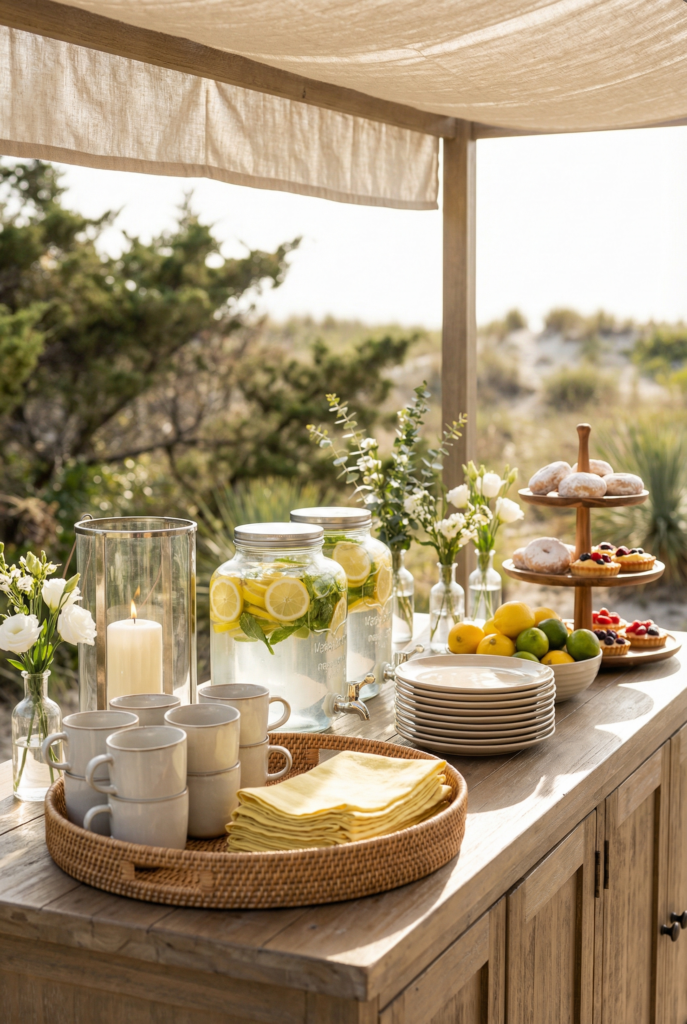
For drinks, I love dispensers with citrus and herbs because they look fancy and take almost zero effort. Add a bowl of lemons, a little stack of cups, and suddenly your yard feels like an event.
Dessert table ideas without going overboard
A dessert table looks best with height variation. Use stands, crates, or upside-down bowls under a cloth to create levels. Keep it simple: one hero dessert, one supporting dessert, and some pretty garnish. For a birthday, the cake is the hero. For a tea party, do small pastries on tiered stands. For a casual hang, cookies on a pretty platter is still a win.
DIY vs store-bought (Step 7)
DIY: crate risers, thrifted trays, printed labels, a repurposed bar cart moment
Store-bought: drink dispenser, tiered stand, matching serving trays, a real bar cart
Shop this step
- Budget pick: trays, drink dispenser, label cards
- Mid-range: tiered dessert stand, nicer serving utensils, a big tray for cups
- Splurge: bar cart, matching serving set, statement beverage tub
Step 8 – Comfort & hostess wins

Comfort is the difference between “cute party” and “I never want to leave.” Also, comfort solves 90 percent of outdoor chaos before it starts.
Add practical touches that also look pretty:
- Bug spray and sunscreen basket with a simple label
- Blanket basket for nighttime
- Fans for heat
- Trash and recycle bins disguised in baskets
My one imperfect solution that I keep trying to improve: bugs. They are relentless. Citronella helps, fans help, keeping food covered helps, but sometimes the mosquitoes still show up like they paid rent. If bugs are intense where you live, don’t be shy about adding a couple extra layers like discreet repellents and moving the seating away from dense plants at dusk.
Also, check the ground. Uneven grass makes chairs wobbly, and that’s not the charming kind of rustic. If you have a lumpy spot, place blankets there instead of chairs. This is a very “work with your yard” moment.
DIY vs store-bought (Step 8)
DIY: labeled baskets, borrowed fans, thrifted blanket bins, simple covered trash setup
Store-bought: outdoor fan, mosquito repellent lanterns, lidded containers, nicer storage baskets
Shop this step
- Budget pick: basket for bug spray, citronella candles, cheap throw blankets
- Mid-range: outdoor fan, lidded drink tub, covered trash can
- Splurge: outdoor heater, upgraded umbrellas, comfy outdoor throws
Budget tiers + where to buy
You can make this feel special at any budget. The trick is spending on the pieces that change the whole mood, like lighting and a strong table moment.
Prices vary by brand and season, but here are realistic ranges:
- Outdoor string lights: $15–$60
- Solar or path lights: $10–$40
- Paper lantern packs: $10–$25
- Tablecloth or runner: $10–$35
- Outdoor pillows: $12–$35 each
- Citronella candles: $10–$25
- Bud vases set: $15–$40
$50 budget: small upgrades, big impact
Focus on lighting and one styled surface.
Do: a lantern or candle cluster, a simple banner, DIY jar bud vases, and a small balloon or bunting moment. Use what you already own for plates and linens, and add one pop color with napkins.
$150 budget: the “this looks planned” tier
Add: string lights, better table linens, a more cohesive centerpiece setup, and a drink station tray. This is where the party starts looking like a magazine without you losing your mind.
$300+ budget: the full moment
Add: a backdrop or arch, upgraded seating pieces, premium lighting, and maybe an outdoor rug. This is the tier where you can create multiple zones that feel like outdoor rooms.
Where to buy in the USA
- Amazon: lights, lanterns, place cards
- Target and Walmart: tableware, candles, outdoor pillows
- Home Depot and Lowe’s: string lights, extension cords, stakes
- Dollar Tree: vases, candles, basic decor
- Michaels and Joann: garlands, DIY supplies
- Etsy: personalized signs, place cards, themed printables
Master shopping list, organized by steps
Theme: banner or bunting, napkins, vases, statement decor
Layout and seating: extra chairs, cushions, side tables, outdoor rug
Table: runner, placemats, bud vases, candles, place cards
Lighting: string lights, path lights, lanterns, extension cords
Accents: backdrop piece, signage, favor basket
Stations: trays, drink dispenser, tiered stand
Comfort: bug spray basket, blankets, fans, covered trash setup
Plan & setup timeline
If you want this to feel effortless while you think how to decorate a garden for a party, you do not do everything on party day. Party day is for styling, not for discovering your string lights are missing half the hooks.
7 days before
Pick your theme and colors. Order supplies. Decide zones and seating plan. Confirm whether it’s a casual hang, birthday vibe, or elevated tea party energy.
2–3 days before
Prep the garden: mow, trim, declutter. Test lighting and extension cords. Wash linens. Do a quick check for seating and surfaces, and borrow what you need.
Day before
Make centerpieces. Set zones. Stage tables and stations. Put everything in bins by category so you’re not hunting for candles while holding a roll of tape in your mouth.
Party day, 2–3 hours before
Final styling: table layers, candles, place cards, then lighting last. Set up stations. Do the quick walkthrough from the gate to the seating to the drinks, like you’re a guest. Then change your shirt if you’re sweaty, because you will be.
FAQs
What are some fun ideas for a garden party?
Fun comes from one clear theme, a couple interactive moments, and a space that feels easy to move through. Add a signature drink sign, a small photo corner, and one simple activity like lawn games, a DIY flower bar, or a “decorate your cupcake” station. For a casual hang, keep it relaxed with mixed seating and string lights. For a birthday, lean into a backdrop and a bold color accent. For a tea party, make the table the star with layered linens, bud vases, and pretty place cards.
What are some budget friendly garden party ideas?
Spend on lighting and use DIY for everything else. A single strand canopy plus candles makes the whole yard glow, even if your decor is simple. Use garden clippings in thrifted jars, fold napkins with ribbon, and style a drink station with a tray and a bowl of lemons. Focus on one hero moment, not fifty little things. Budget parties look expensive when they’re cohesive, not when they’re crowded.
How to host the perfect garden party?
Perfect is a trap. Aim for comfortable, clear, and pretty. Clear pathways, defined seating pockets, drinks within easy reach, and lighting that makes people want to linger. Prep the yard, test your lights, and set up zones so guests don’t ask you where to go. Add a few thoughtful comforts like blankets, bug spray, and a covered trash spot, and you’ll feel like you’re hosting instead of sprinting.
How to decorate an empty space for a party?
Create a room outdoors. Anchor with an outdoor rug, define the “ceiling” with string lights, and add one focal backdrop. Then place seating in a pocket, add a side table, and style one station like a drink cart. Empty space feels awkward when it has no boundaries. Once you give it edges, it starts feeling intentional fast.
How to throw a party with limited space?
Go vertical and keep pathways open. Use wall or fence decor, hang lights overhead, and choose one tight seating zone plus one lean zone for drinks. Avoid too many decor clusters on the ground. In small spaces, one styled table plus good lighting does more than a bunch of scattered accents. Also, fewer chairs that are comfortable beats more chairs that block walking.
How to not throw a boring party?
Give people something to do and somewhere to land. The best parties have seating pockets for conversation and one little point of interest, like a photo moment or a signature drink station. Keep the music on, keep the lighting warm, and add small personal touches like place cards or a welcome sign. Boring happens when there’s no flow, no mood, and no moment. You can fix all three with layout and lighting.
How do I decorate a garden party for daytime vs nighttime?
Daytime is about color, texture, and shade. Use linens, bright accents, and a clean tablescape, and add umbrellas or a shaded seating pocket. Nighttime is about lighting layers. Add overhead lights, table-level lanterns, and path lights so guests can move around comfortably. If your party starts in daylight and ends at night, set up lighting early so it’s ready when the sun drops.
What’s the easiest garden party decor that looks expensive?
A canopy of string lights, a styled table runner with bud vases, and a cohesive color palette. That combination makes everything look intentional, even if the food is casual. Add one hero element like a simple backdrop or a dramatic centerpiece, and stop there. The “expensive” look usually comes from restraint and repetition.
How do I keep decorations from blowing away?
Use weight and containment. Clip tablecloths, choose heavier vases, and put loose items in trays or bowls. Skip feather-light decor in windy conditions. For balloon moments, anchor them properly and consider placing them closer to a fence or wall. Also, test your yard’s wind patterns. Some corners are always breezier, and they will absolutely target your napkins.
How do I keep bugs away at an outdoor party?
Layer your strategy. Use citronella or repellent lanterns, add a fan near seating, cover food, and avoid placing seating right next to dense plants at dusk. Offer bug spray in a labeled basket so guests can help themselves. If bugs are intense in your area, plan the party timing earlier in the day, or keep the brightest lighting away from the main seating to reduce the bug magnet effect.
Closing thoughts
That’s the real answer to how to decorate a garden for a party: decide the vibe, map the zones, layer the table, then let lighting do the heavy lifting. Everything else is just a supporting detail.
If I were doing this tonight, I’d start with my emotional support twinkle lights, build two cozy seating pockets, and style the table with bud vases and candles. I’d still probably forget one extension cord and have to do a frantic drawer search at 6:03 pm, but that’s part of the charm, right.
And if your setup isn’t perfect, it’s fine. The best garden parties feel lived-in. A little messy, a little glowy, a little “stay for one more drink.” That’s the goal.