If you’ve been staring at your balcony like, “You could be so cute,” I’m with you. A balcony mini garden is basically the fastest way to make a home feel softer, calmer, and a little more alive.
I’m talking coffee in one hand, leaves brushing your arm, a tiny bit of privacy, and some color that makes you want to open the door more often. It’s the outdoor version of fluffing pillows, except the pillows are basil and petunias.
And yes, you can do this in one afternoon. Then you keep it going with a 5-minute weekly reset.
Quick safety note before we get carried away: check building rules, and make sure anything on the rail is properly secured and not overloaded. If you’re unsure, keep heavier pots on the floor near the wall, not out on the edge.
My go-to framework is simple: 4 Zones + 3 Layers + Thriller/Filler/Spiller. Also, if you came here searching for how to decorate a balcony with plants, this is the exact system I use, so it looks styled, not like a plant yard sale.
Supplies quick checklist
- Potting mix (container-specific, not garden soil)
- A few containers in 2–3 sizes (lightweight is your friend)
- Saucers or drip trays for every pot
- One “anchor” pot (bigger than you think you need)
- Rail or wall planters, if your building allows them
- Plant ties or soft garden twine
- Small hand trowel
- Pruning snips or scissors
- Slow-release fertilizer or a simple liquid feed
- A watering can you like using
- A little broom or handheld brush (soil happens)
- Optional: hooks, clamps, or a freestanding plant stand
Start Here: The 60-Second Balcony “Microclimate Map.”
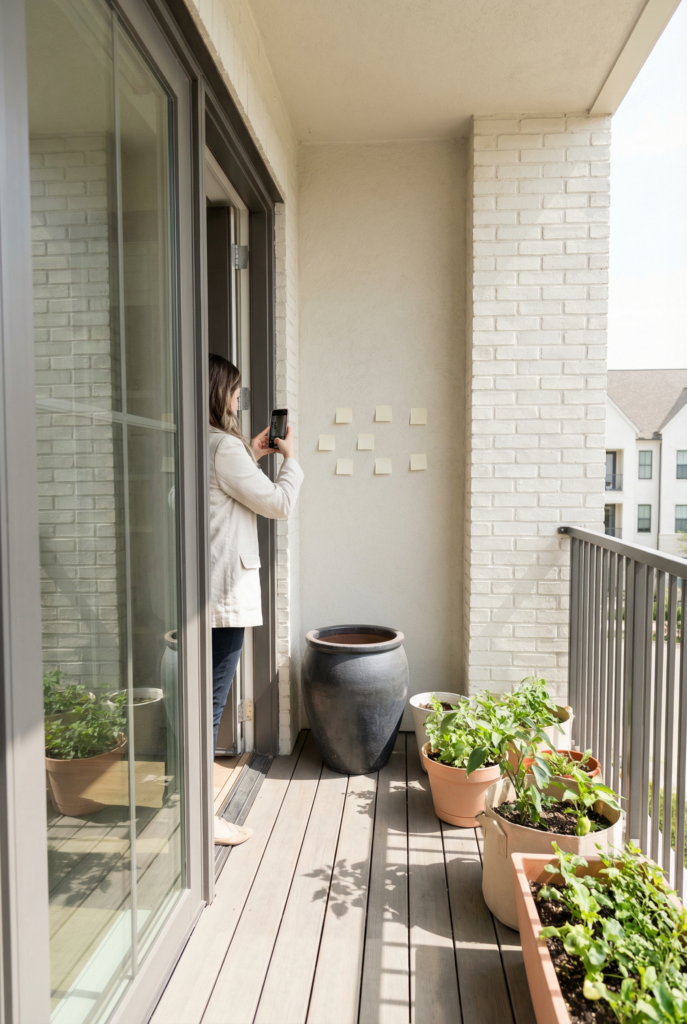
Your balcony microclimate is basically its personality—once you know it, plant choices stop being guesswork (and you stop replacing crispy “casualties”).
Take one minute to notice light, wind, and your goal (privacy, herbs, color, low-maintenance). Check nearby surfaces too—glass and concrete can reflect heat and make the space hotter than you think. Then do a quick safety check: follow your building rules, spread weight out, keep heavy pots near the wall, and use a lighter potting mix.
Quick win: snap a photo in the morning, midday, and late afternoon to map your light fast.
Find your light (the easy way)
Your light level decides everything. Figure that out first, and the rest gets fun.
If you get strong sun for 6+ hours, you’re in full sun territory. If you get 3–6 hours or filtered light, you’re more in part shade. If the balcony is bright but never really sunny, or blocked by buildings, you’re in shade.
Two sneaky things: morning sun is gentler than afternoon sun, and the seasons shift your sun angles. That “perfect” spot in June might be gloomier in October.
Quick win: Put a sticky note on the door with “SUN AM / SUN PM / SHADE” so you stop forgetting what you just observed.
Note wind + heat reflection.
Wind is the silent plant bully. It snaps stems, knocks over lightweight pots, and dries containers way faster than you’d think.
If you notice consistent wind, plan for sturdier plants, fewer tall flimsy stems, and heavier pots down low. Heat reflection matters too. Concrete, brick, and glass can intensify heat and cook roots, especially in smaller plastic pots.
This is also where you decide if you need shade cloth, a small screen, or just smarter placement. Sometimes the “problem” is simply one pot that needs to move 18 inches.
Quick win: If wind hits hard, start with one heavy floor pot as your stabilizing anchor.
Choose your main goal (pick 1)
Pick your main goal so the garden feels intentional, not random. You can have multiple goals later, but start with one.
- Privacy: taller plants, climbers, and layered height
- Edibles: a little herb bar and one or two bigger veggie containers
- Flowers: color, pollinators, constant blooms
- Low-fuss green: low-maintenance plants that still look lush
Mini box: If you only do one thing, match plants to light.
Quick win: Choose one goal and write it down. It keeps you from buying seven plants that do not get along.
How to Decorate a Balcony with Plants Blueprint (Your Layout That Always Works)
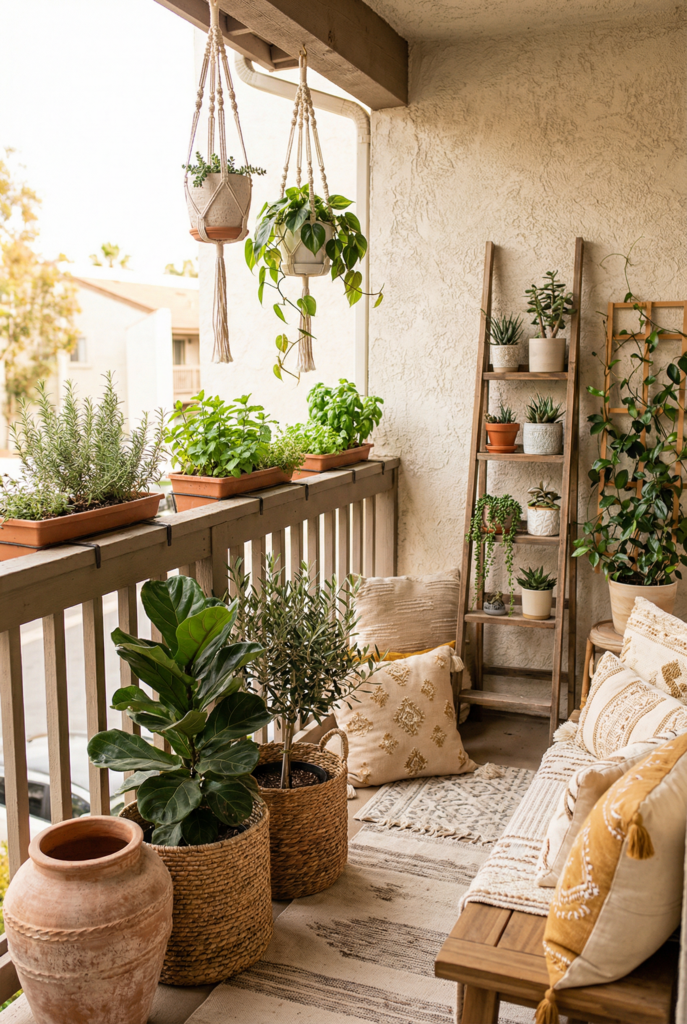
This is the layout that keeps your balcony from feeling cluttered. It’s the same way I decorate a shelf: give it zones, give it height, and leave breathing room.
I like to think of the balcony in four zones, then I style it in three layers, so it reads like a tiny room. Start vertically, because walls and rails are free real estate. Then create one strong “anchor” moment on the floor so the space feels grounded. After that, you sprinkle in the middle layer and add something that trails to soften edges. The final piece is leaving a walkway strip so you can actually use your balcony without doing the sideways crab walk. This is how you maximize space without crowding: you’re designing for movement, not just for the plant photo.
Quick win: Mark a clear walkway with painter’s tape, even temporarily, so you don’t accidentally block your own balcony.
The 4 Zones (use vertical space first)
The zones are your cheat code. When you use all four, the balcony looks fuller without needing a million pots.
- Railing zone: herbs, small bloomers, anything you want within arm’s reach
- Wall zone: trellis, ladder shelf, or a grid for climbing plants
- Floor zone: bigger anchor pots, corner planters, heavier items
- Overhead zone: lightweight planters only, and only if drips are controlled
If you’re a renter, you can still do this with freestanding stands and clamp-on hardware.
Quick win: Choose just two zones today if you’re overwhelmed. Railing plus floor is a great start.
The 3 Layers (how to make it look styled, not cluttered)
Layers are what make it feel designed. Without layers, everything sits at the same height and reads messy.
Think: back layer (tall), mid layer (medium and full), and a trailing edge (soft spills). The tall layer also creates privacy and “room feeling.” The mid-layer is your main visual body. The trailing edge is what makes it look expensive.
I like to repeat one texture twice, and one color twice, and then stop. That’s usually enough.
Quick win: Add one trailing plant to soften a hard balcony corner instantly.
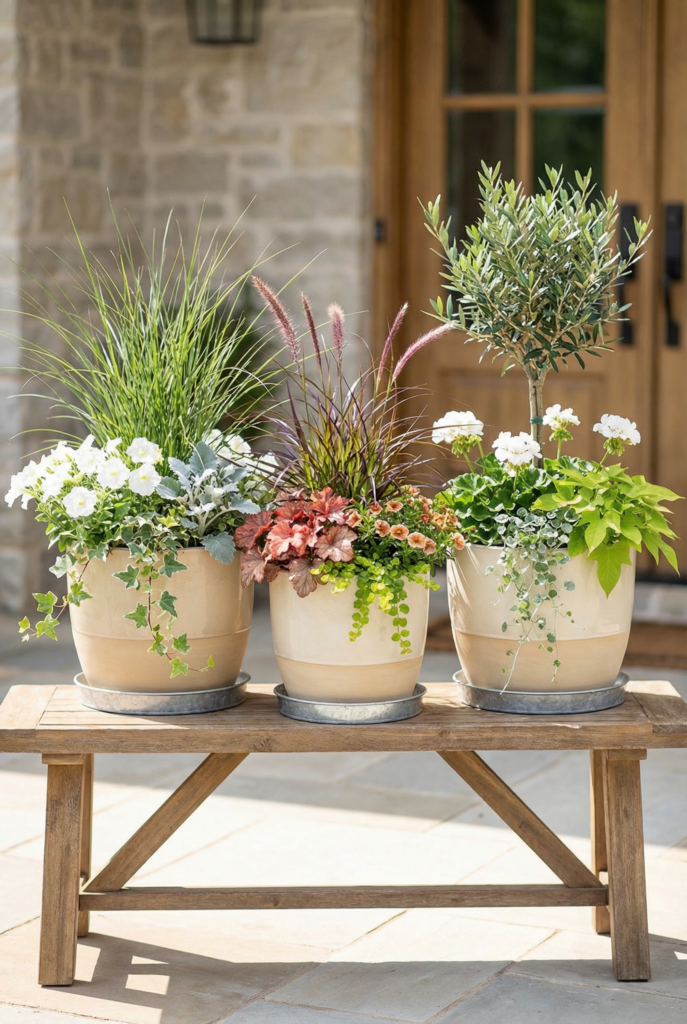
“Thriller / Filler / Spiller” styling rule
This rule is my plant styling training wheels, and I still use it.
Thriller is your star, tall or bold. Filler makes it look full. Spiller trails over the edge.
Photo-style example: one upright rosemary as the thriller, a mound of white alyssum as the filler, and a trailing nasturtium as the spiller in a medium pot. That combo also quietly helps with pests and pollinators, which is a nice little bonus.
Quick win: Build one container using this rule and let it be your “proof of concept” pot.
Choose Balcony-Friendly Containers (So Plants Thrive + No Mess)
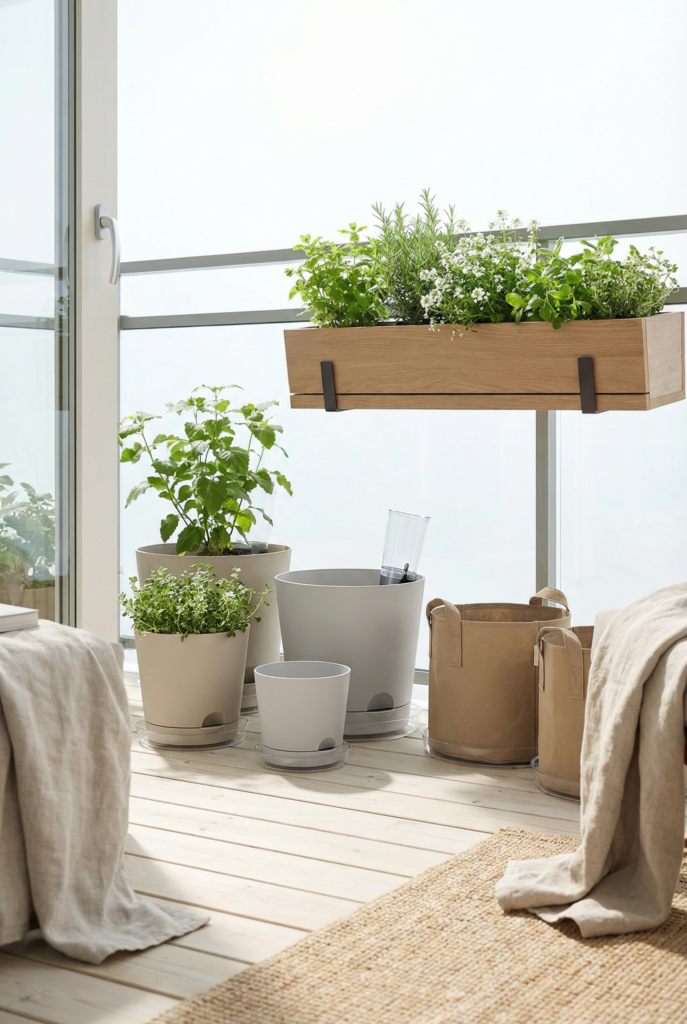
Containers are not just “a pot.” They’re your drainage system, your mess-control plan, and honestly, your sanity.
Balconies need containers that won’t crack, won’t leak on neighbors, and won’t become a soggy swamp. I also want you to think about weight. Wet soil is heavy, and tiny balconies add up fast. Lightweight pots, fabric grow bags, and airy potting mixes can make a real difference. If you want to be a little more eco-friendly about it, go for peat-free mixes and reuse containers you already own, as long as you can add drainage. This is where container gardening tips actually matter, because the plant can be perfect and still struggle if the pot situation is wrong.
Quick win: Commit to drip trays for every single pot, even the “temporary” ones.
Best container types for balconies
The best containers are the ones you can lift and manage.
Lightweight resin or fiberglass pots are great. Fabric grow bags are fantastic for edibles because they breathe and drain well. Window boxes are cute, but only if they’re properly supported. Self-watering inserts are amazing if you travel or forget.
And yes, you can upcycle. Old metal tubs, storage bins, and even a cute vintage bowl can work if you drill drainage holes and add a tray underneath.
Quick win: If you’re reusing a container, test it in the shower first to see how it drains.
Drainage + drip-proof setup (non-negotiable)
Drainage is not optional. It’s the difference between thriving roots and root rot.
You need drain holes, and you need something to catch water. Use saucers, trays, or long planter trays for rail boxes. Water slowly until you see drainage, then stop. If you dump water fast, it runs straight through and doesn’t actually soak the root ball.
If you’re worried about neighbors, line trays with a thin layer of gravel or a capillary mat so the pot isn’t sitting directly in water.
Quick win: Water in two passes. Half now, wait a minute, then finish. It soaks in better.
Pot size cheat sheet (simple)
Pot size is a big deal, and I say this as someone who loves cute little pots and has learned the hard way.
- Herbs: small to medium containers work, bigger is easier to keep moist.
- Leafy greens: medium is better, so they don’t dry out daily
- Fruiting plants: go larger; they need stable moisture
- Small trees: large containers only, with serious drainage
When in doubt, size up. Bigger pots buffer heat, wind, and missed waterings.
Quick win: Consolidate two tiny pots into one medium pot and watch how much easier it gets.
Soil + feeding basics for containers
Use potting mix, not garden soil. Garden soil compacts and suffocates roots in containers.
I like a quality potting mix plus a slow-release fertilizer at planting. Then, a liquid feed every couple of weeks in peak season if things look hungry. If weight is a concern, look for mixes that include perlite or coco coir, which keeps things lighter and airier.
Mini box: My drip-proof watering routine
- Check moisture with a finger down to your first knuckle.
- Water slowly until it drains
- Empty trays after 20–30 minutes if they’re holding water
- Sweep spilled soil before it stains
Quick win: Label the bag of potting mix with the date you opened it. You’ll forget by next week.
Pick Plants by Light (Fast ‘Menu’ for Beginners)
Plant shopping is way more fun when you’re not guessing. Pick your light menu, then choose a mix of structure, color, and one “surprise” plant that makes you smile.
I like to start with what will live, then choose what will look good. Light is the big filter, but wind and heat matter too. If you want a balcony that feels alive, add at least one nectar-rich bloomer or flowering herb so you get little visitors. Even a small balcony can support bees and butterflies, and it makes the whole space feel less like decor and more like a tiny ecosystem. Also, if you’re growing edibles, tuck in aromatic herbs for the balcony alongside them. Basil, rosemary, and mint can confuse pests, and flowers like marigolds and nasturtiums pull their weight by attracting beneficial insects.
Quick win: Buy one plant that’s purely for joy. That’s allowed.
Full sun balconies (hot + bright)
Full sun balconies are bright, intense, and sometimes brutal. Choose plants that like heat and don’t wilt the second you miss a watering.
Mediterranean herbs love this. So do sun-loving flowers and drought-tolerant foliage. If your balcony bakes, prioritize thicker leaves and tougher stems.
You can absolutely grow tomatoes or peppers in pots here, but commit to bigger containers and consistent watering. If you’re not ready for that level of responsibility, start with herbs and a cheerful bloomer.
Quick win: Group full-sun pots close together so they shade each other’s soil a bit.
Part shade / bright shade
Part shade is the sweet spot. You can do a balanced mix of foliage, flowers, and some edibles without fighting the weather every day.
Think leafy greens, many herbs, and flowering plants that don’t need all-day sun. You can also play with texture here, because you’re not constantly battling scorch.
This is also a great place to add early spring bulbs in containers if you want that first pop of life after winter.
Quick win: Add one plant with a big leaf and one with tiny leaves. That contrast reads instantly styled.
Shade balconies (north-facing / blocked light)
Shade balconies can still be lush. The trick is choosing plants that actually tolerate low sun, not just “doesn’t mind it for a week.”
Go for shade-friendly foliage and blooms, and accept that growth will be slower. You can make a shade balcony feel expensive by leaning into greens, textures, and fewer, larger containers instead of lots of small ones.
Quick win: In shade, fewer pots look better. Go bigger, not more.
Windy balconies (plants that won’t look wrecked)
Wind needs compact plants, sturdy stems, and heavier bases. Think plants that won’t snap the second the forecast gets dramatic.
Use heavier containers on the floor, and keep tall plants closer to the wall for shelter. Skip delicate, floppy stems unless you’re okay with them looking like they had a rough night out.
Quick win: Tie one tall plant to a simple stake now, before wind forces the issue.
Want a “statement plant”?
A statement plant is the easiest way to make a balcony feel designed. One small tree or shrub can become the whole vibe.
Dwarf citrus can work if you have strong sun and you can bring it in or protect it in cold weather. You’ll need a big container, good drainage, and regular feeding. If that feels like a lot, a compact evergreen shrub or a small ornamental tree can give the same “anchor” effect with less drama.
Quick win: Choose one statement plant and build your layers around it, not the other way around.
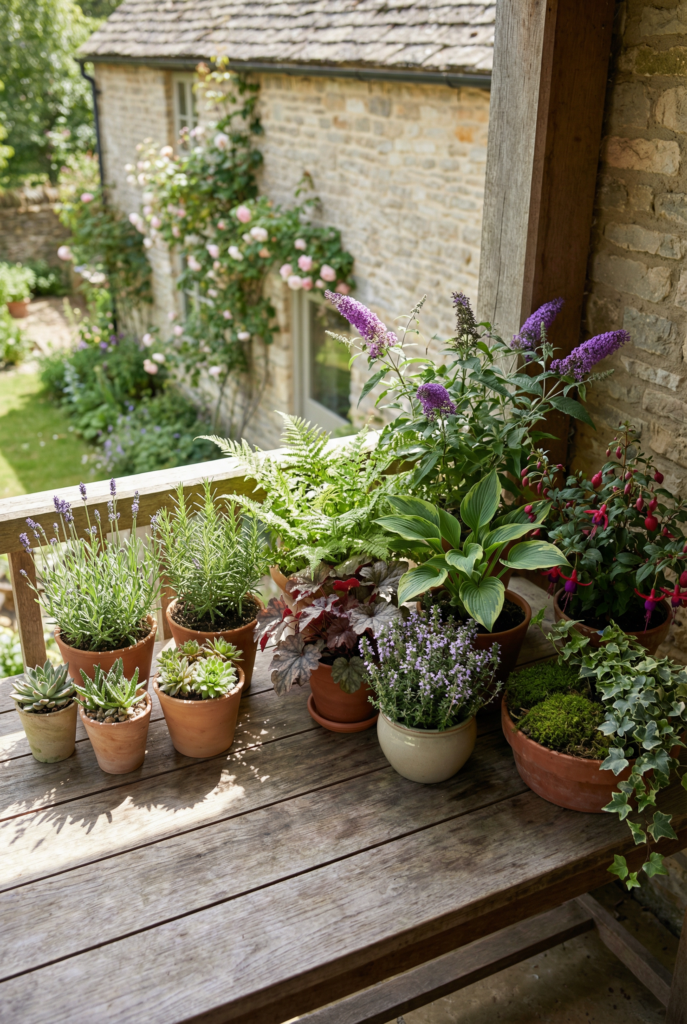
Copy-These Planting Recipes (Container Combos That Look Designer)
These combos are my “I want it to look done” shortcut. Use them as written, then tweak colors later once you see what your balcony light does.
I’m going to be specific here because vague plant advice is how we all end up with three sad pots and a receipt we don’t want to talk about. Each recipe uses the thriller/filler/spiller rule, includes a container size, and has a reason it works. I’m also sneaking in some natural pest control and companion planting logic where it makes sense, because it’s honestly satisfying when your balcony looks cute and helps itself. If you want more pollinators, choose at least one bloom that stays flowering for a while, plus one flowering herb. That’s usually enough to get little visitors without turning your balcony into a meadow.
Quick win: Pick one recipe and buy only what it requires. No bonus plants today.
Recipe 1 — Full Sun Color Pop (bright + cheerful)
This one is happy and tough.
- Container: 12–16-inch pot with drainage
- Thriller: upright rosemary or a compact ornamental grass
- Filler: bright geraniums or lantana
- Spiller: trailing nasturtium
Why it works: Rosemary handles heat, the filler blooms hard, and nasturtium drapes and also distracts aphids from your edibles if it’s nearby.
Quick win: Put this pot where you see it from inside. It’ll lure you outside.
Recipe 2 — Shady + Lush (the “expensive-looking” green balcony)
This is the “I have my life together” combo, even if you don’t.
- Container: 14–18 inch pot, slightly wider than tall
- Thriller: a taller fern or upright foliage plant
- Filler: heuchera or compact hosta in a container
- Spiller: trailing ivy or a soft draping plant that tolerates shade
Texture is the point. Keep the palette mostly green and let leaf shape do the work.
Quick win: Wipe the leaves once. It instantly looks more polished.
Recipe 3 — Wind-Resistant + Low Water (set-it-and-forget-it vibe)
If your balcony is windy and you forget to water, start here.
- Container: heavier pot, 12–16 inches, on the floor
- Thriller: compact juniper or a sturdy upright succulent
- Filler: hardy sedum
- Spiller: trailing stonecrop
Why it works: Thicker leaves lose less moisture, and sturdier forms don’t shred in the wind.
Quick win: Add a thin top layer of gravel to reduce soil splash and evaporation.
Recipe 4 — Privacy Screen Planter (living wall feel)
This one creates height fast.
- Container: long trough planter, 24–36 inches, with trays
- Back row thriller: tall grasses or upright bamboo-style lookalikes suited to containers
- Mid filler: flowering herbs or compact shrubs
- Front spiller: trailing sweet potato vine or a draping flower
Place it along the railing or the side where you want coverage, but keep it stable and supported.
Quick win: Angle this planter slightly toward the view you want to block.
Recipe 5 — Succulent Bowl (low maintenance, modern)
This is the “I want it to look cool, and I want to do nothing” bowl.
- Container: wide, shallow bowl with drainage
- Mix: 5–7 succulents with different shapes, plus a trailing one at the edge
- Soil: gritty mix, not regular potting mix
Go for contrast: spiky, rosette, round, and one draper. Keep it in bright light.
Quick win: Rotate the bowl weekly so it grows evenly.
Recipe 6 — “Cut-and-Come-Again” Edible Pot (herbs + greens)
This is the pot you actually use. It makes cooking feel fancy for no reason, which I love.
- Container: 14–18 inch pot or fabric grow bag
- Thriller: upright chives or green onion clumps
- Filler: leafy greens you can harvest often
- Spiller: trailing oregano or a soft, draping green
Harvest a little weekly, and it keeps producing. Keep it near the door so you remember.
Quick win: Snip something today, even if it’s just for a sandwich.
Mini box: What plants should NOT be planted together?
- Don’t put mint in a mixed pot. It will take over. Give it its own container.
- Don’t crowd heavy feeders together in a small pot. They’ll fight for nutrients.
- Keep drought lovers separate from thirsty plants. The same pot needs the same watering style.
- Pair edibles with aromatic herbs or flowers like marigolds and alyssum for gentler pest control.
Rail Planters + Herb Bar Setups (2 Plug-and-Play Templates)
If you want results fast, the rail zone is where you start. It’s close to your kitchen, it’s easy to water, and it instantly makes the balcony feel greener.
I like rail setups because they give you that “garden edge” look without taking floor space. The main thing is stability and drip control. Secure everything, keep weights balanced, and use trays so you’re not accidentally watering your downstairs neighbor’s chair cushions. If you’re worried about load, stick with smaller boxes, lighter soil mixes, and fewer containers on the rail. You can still get a full look by repeating the same planter style along the edge.
Quick win: Install one rail box first and live with it for a week before adding more.
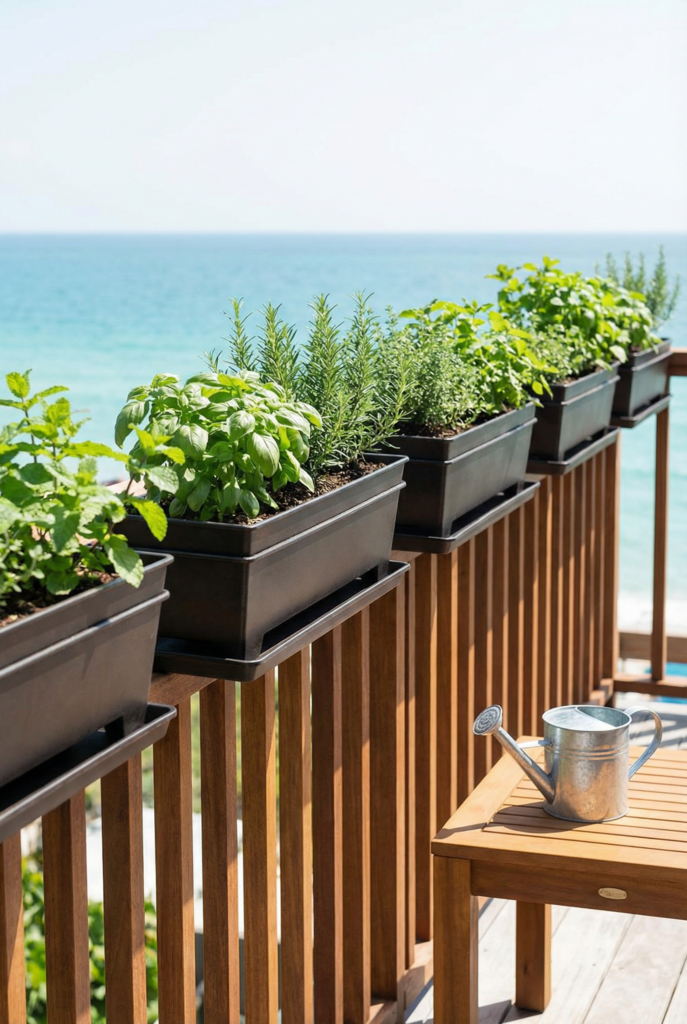
Template A — “Mediterranean Rail” (sunny balconies)
This setup smells amazing when you brush past it.
Plant together in one long box: rosemary, thyme, oregano. Add one trailing edible flower at the edge if you want extra charm.
Keep rosemary toward the back or center so it’s your little upright star.
Quick win: Put this near where you sit so you can pinch herbs without standing up.
Template B — “Salad Rail” (part shade-friendly)
This one is a constant snack, which feels very luxurious for a balcony.
Plant together in one box: parsley, chives, leafy greens. Add a strawberry or trailing green if you have room.
Leafy greens like consistent moisture, so don’t let this box dry out completely.
Quick win: Harvest a small handful weekly so it stays productive.
Safety + stability tips
Use proper brackets, clamps, or over-rail supports rated for outdoor use. Don’t improvise with something sketchy.
Balance weight evenly. Add drip trays. Water slowly. If your rail is narrow or flimsy, skip the rail and do a floor planter along the edge instead.
Quick win: Give each box a gentle shake test. If it wiggles, fix it before you fill it with wet soil.
Vertical Garden Ideas That Don’t Feel Cluttered
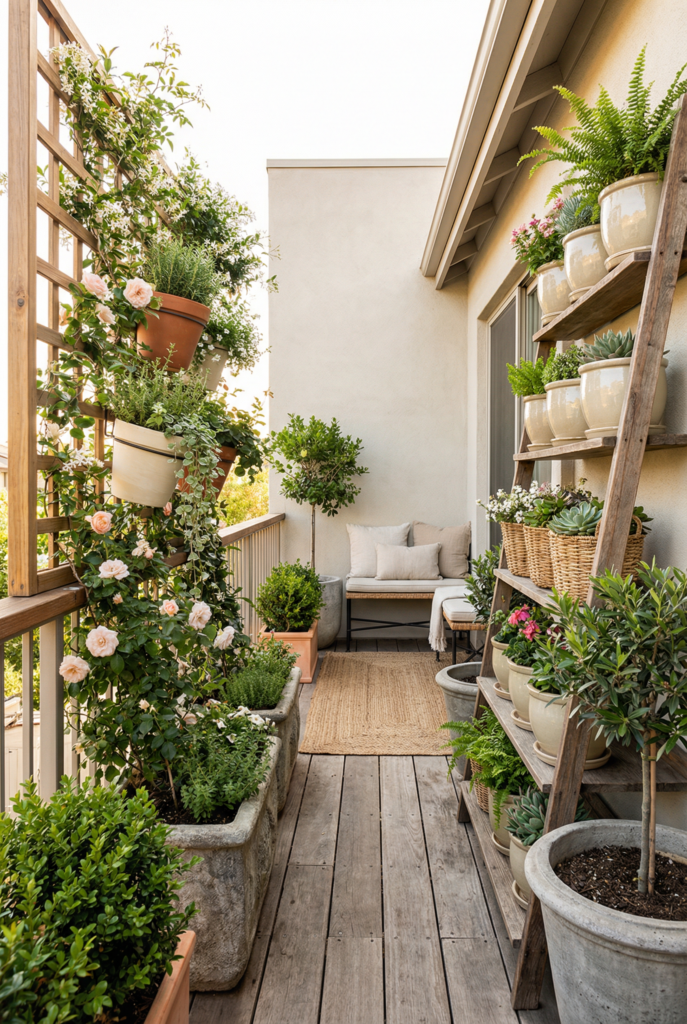
Going up is how small balconies look full without becoming unusable. The trick is to keep the vertical elements simple and repeating, not chaotic.
I like one main vertical structure, not five different ones fighting each other. A trellis on one side, a ladder shelf on the other, and you’re basically done. Group plants by how often they need water so you’re not juggling constant micro-needs. Also, place heavier items lower for safety and for visual calm. If everything is hung high and light, it can feel jittery, like the balcony is floating away. Keep a grounded base, then add height.
Quick win: Choose one vertical system today, not all of them.
Trellis + climbing plants (privacy + height)
A trellis gives you height fast, and climbing plants make it feel alive instead of like a fence.
Pick climbers that do well in containers, and train them early. Gentle ties and a little guidance go a long way. If you want privacy, place the trellis where you want the screen, and let the plant fill in over time.
Quick win: Tie the first few stems now. Waiting makes it harder.
Tiered planters & ladder shelves (tiny balcony MVP)
Tiered planters and ladder shelves are perfect when your floor space is basically one chair and a dream.
Keep the heaviest pots on the bottom. Put sun lovers on the top tier if that’s where the light hits. Repeat pot styles so it looks intentional, not like a random thrift store lineup.
Quick win: Limit yourself to two pot colors on the shelf. It reads calmer instantly.
Hanging planters (when they’re worth it)
Hanging planters are cute, but only if you can control drips and weight.
Go lightweight. Use liners. Water carefully. And don’t hang them where you’re going to bonk your head, because that is a personal beef of mine.
Quick win: Hang one, live with it for a few days, then decide if you want more.
No-drill renter-friendly options
You can still do this without drilling.
Clamp hooks, over-rail hangers, freestanding stands, and tension systems can all work. The goal is stable, removable, and not a damaging situation.
Quick win: Choose hardware first, then buy the planter that fits it, not the other way around.
Balcony Privacy With Plants (Without Building a Wall)
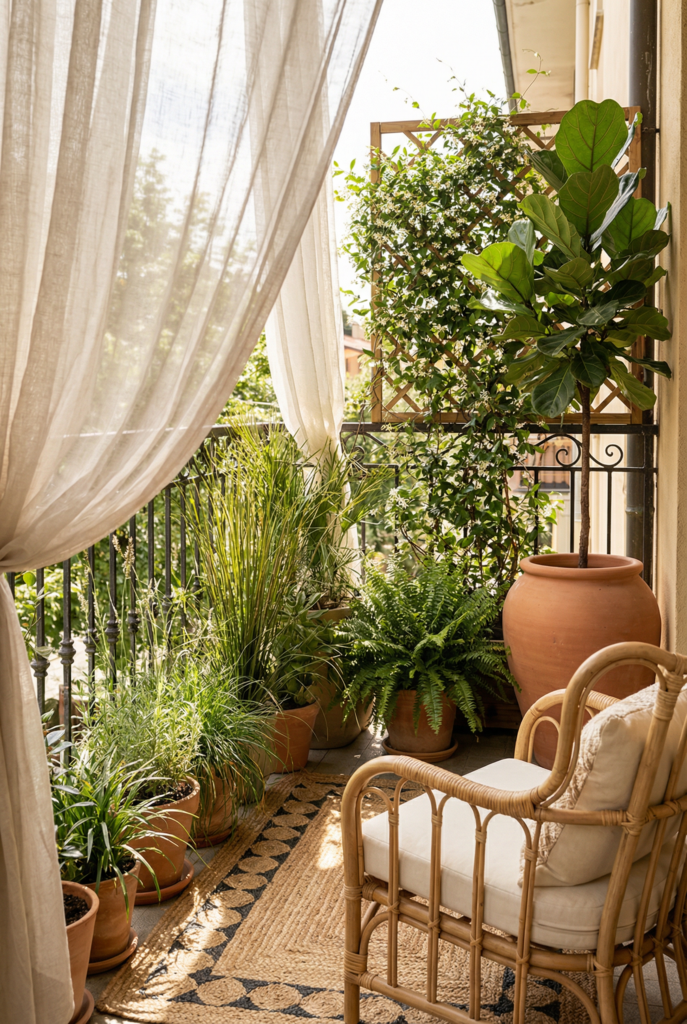
Plant privacy is my favorite kind of privacy because it’s soft. It filters views instead of blocking them, and it makes the balcony feel like a little room.
Start by deciding where you want the screen. One side, the rail, or the whole edge. Then build height using tall containers, climbers, or layered planting along the railing. I also want you to keep it breathable. If you pack a dense wall of plants with zero airflow, you can get mildew and stressed leaves, especially in humid summers. The sweet spot is layered coverage, not a solid hedge. And once you add one cozy seating moment, the whole space starts to feel like indoor-outdoor living, but in the tiny apartment version, which is honestly my favorite version.
Quick win: Create privacy in one direction first, the one that bothers you most.
3 ways to create privacy fast
You have three main options, and you can mix them.
- Tall planters with upright plants on the floor near the rail
- A trellis with climbers for height and softness
- Layered railing planters plus one taller anchor pot
Even one tall planter in a corner can make the space feel less exposed.
Quick win: Place one tall element at the “open” corner. It changes the whole feel.
Privacy plant picks by sun/shade
Match to your light. That’s the whole secret.
Sunny balconies can handle tougher upright plants and sun lovers. Shadier balconies do better with lush foliage and shade-tolerant upright forms. Windy balconies need compact, sturdy shapes.
Quick win: If a plant is flopping from the wind, it’s not you. Swap it for something sturdier.
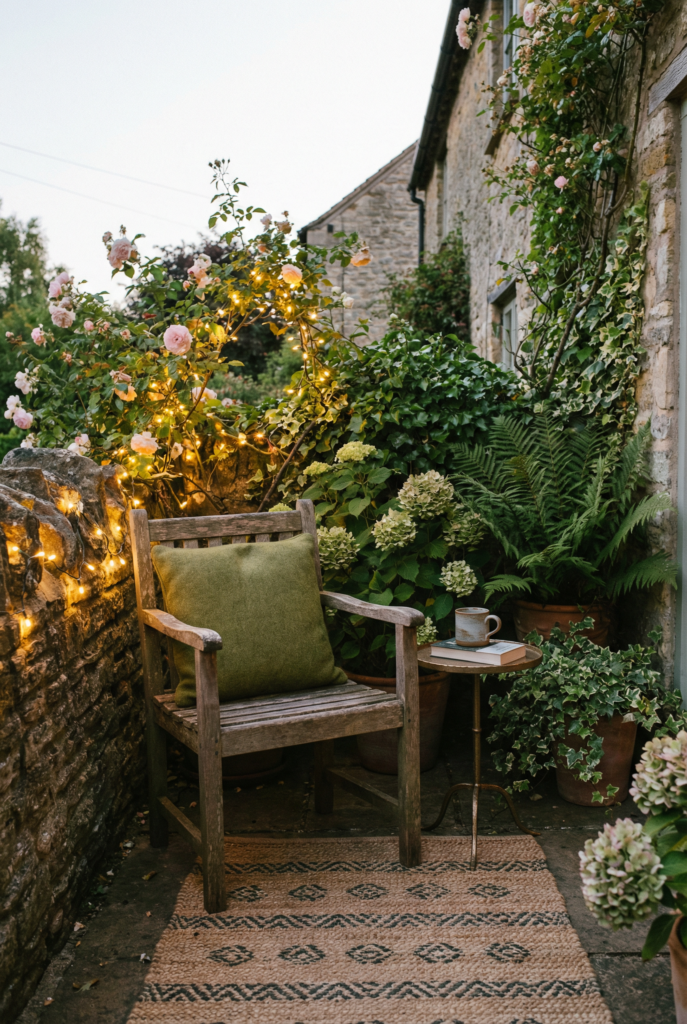
Make it cozy: the “indoor–outdoor living” styling touches
Keep it minimal, so plants stay the star.
A compact chair, a small side table, and one outdoor rug can do a lot. Add warm string lights if your building allows it. Then stop. I always want to add more, and then I remember I still need somewhere to put my feet.
Quick win: Add one soft element, like a rug or cushion, and call it done.
Watering a Balcony Garden (The Drip-Proof, Low-Stress System)
Watering is the make-or-break habit, but it doesn’t have to be a whole production. The goal is consistency without chaos.
Containers dry out faster than garden beds, especially with wind and reflected heat. Bigger pots hold moisture longer, smaller pots dry fast, and hanging planters dry the fastest of all. I like to water in the morning when possible, because it’s calmer and plants can use that moisture all day. If you’re dealing with neighbors below, slow watering and trays are everything. This is also where tools help. A collapsible watering can is genuinely great for small storage, and a sink-adapter hose can make you way more likely to water regularly. If you want a simple mantra, it’s this: water balcony garden slowly, thoroughly, and with drip control.
Quick win: Pick one watering time you can actually stick to, even if it’s not “ideal.”
How often to water containers (real talk)
There’s no perfect schedule. The weather changes it.
Hot and windy weather occurs more often. Bigger pots mean less frequent. If you’re unsure, check the soil with your finger. Dry on top does not always mean dry down below.
Quick win: Check moisture before you water. It prevents both underwatering and swamp pots.
The best way to water (so roots grow deep)
Water thoroughly until it drains, then stop. That encourages deeper roots.
A quick splash on top trains the roots to stay shallow, which makes plants more fragile. Aim for slow soaking. Morning is ideal. Evening is fine if that’s realistic for you, just avoid leaving leaves wet overnight if you can.
Quick win: Water in two stages for better soak-in.
Easy upgrades for busy weeks
If you travel or forget, set yourself up to succeed.
Self-watering planters help. Watering spikes can get you through a heat wave. A small drip kit can work if you have a water source and want to get fancy, but it’s optional.
Quick win: Add one self-watering insert to your thirstiest pot first.
Weather backup plan
Bad weather happens. Don’t let it derail you.
If a storm is coming, move lighter pots closer to the wall or inside temporarily. For heat waves, cluster pots, add a bit of shade, and water earlier. For cold snaps, bring in tender plants if you can, and avoid watering late in the day so roots aren’t sitting cold and wet.
Quick win: Decide which three pots you would move first in a weather emergency. That’s your priority list.
The 5-Minute Weekly “Balcony Reset” (So It Stays Cute)
This is the part that keeps your balcony garden from becoming that sad corner you avoid. Five minutes is the sweet spot because it’s so short you’ll actually do it.
I like a weekly reset because it’s mostly tiny maintenance: check moisture, remove dead leaves, rotate a pot, sweep spilled soil. The biggest visual upgrade is usually just deadheading spent blooms and tidying the surface. I also do a quick “does this still belong here” glance. Sometimes a pot looks great in one spot for a month, and then the plant grows, and suddenly the whole area feels crowded. I used to pretend that meant I needed more pots. Actually, I changed my mind halfway through one season and just moved two planters to the floor, and it fixed everything. Plants are forgiving if you keep showing up.
Quick win: Set a timer for 5 minutes. Stop when it rings, even if you’re tempted to spiral.
Weekly checklist
Do this once a week, and your balcony stays photo-ready.
- Check soil moisture
- Deadhead blooms
- Snip herbs and leafy greens
- Rotate pots for even growth
- Wipe dusty leaves
- Sweep the floor
- Quickly look for pests under leaves
Quick win: Pick one task you always skip and do just that one today.
Monthly mini refresh
Once a month, do a slightly deeper tidy.
Top up the soil if it’s settled. Add a little compost. Trim leggy growth. Replace one tired plant if something looks sad. One swap can make the whole balcony feel fresh again.
Quick win: Replace one underperformer instead of trying to “save” it for months.
Seasonal swaps (simple)
Seasonal swaps do not need to be complicated.
In spring, add bulbs in pots for early color. In summer, lean into heat lovers and consistent watering. In fall, swap in cooler-weather greens and a few sturdy blooms. In winter, protect roots from frost by raising pots on bricks, wrapping containers, and top-dressing with compost or bark. If you can, use peat-free compost options and keep tender plants sheltered.
Quick win: In winter, protect the pot, not just the plant. Roots are the fragile part.
Budget-Friendly Shopping List (With Price Ranges + Where to Buy)
You can do this on a budget, and you can also absolutely spend a little extra where it actually matters. I like to spend on the things that make the process easier, not just prettier.
Start with a basic set that covers drainage, soil, and a few containers. Then upgrade slowly. Matching containers can make even small plants look intentional, but you don’t need a full matching set on day one. If you want one “looks expensive” move, it’s buying fewer, larger pots instead of lots of tiny ones. Also, don’t waste money on super cheap potting mix that turns to sludge. It’s not worth the headache.
Quick win: Buy fewer containers than you think, and leave room to add later.
Starter balcony setup (budget)
These are typical starter ranges.
- Basic pots: $8–$25 each, or £6–£20
- Potting mix: $10–$25 per bag, or £8–£20
- Saucers/trays: $3–$12 each, or £2–£10
- Simple hand trowel: $5–$15, or £4–£12
- One larger anchor pot: $25–$60, or £20–£50
Quick win: Spend the extra few dollars on trays. It solves so many problems.
“Looks expensive” upgrades (still small-space)
These upgrades make the balcony feel like a room.
A trellis, a matching pot set, a warm string light strand, and one plant stand go a long way. Choose one upgrade at a time so it doesn’t turn into an everything cart.
Quick win: One plant stand can replace three random floor pots and look cleaner.
Common Balcony Garden Mistakes (And Quick Fixes)
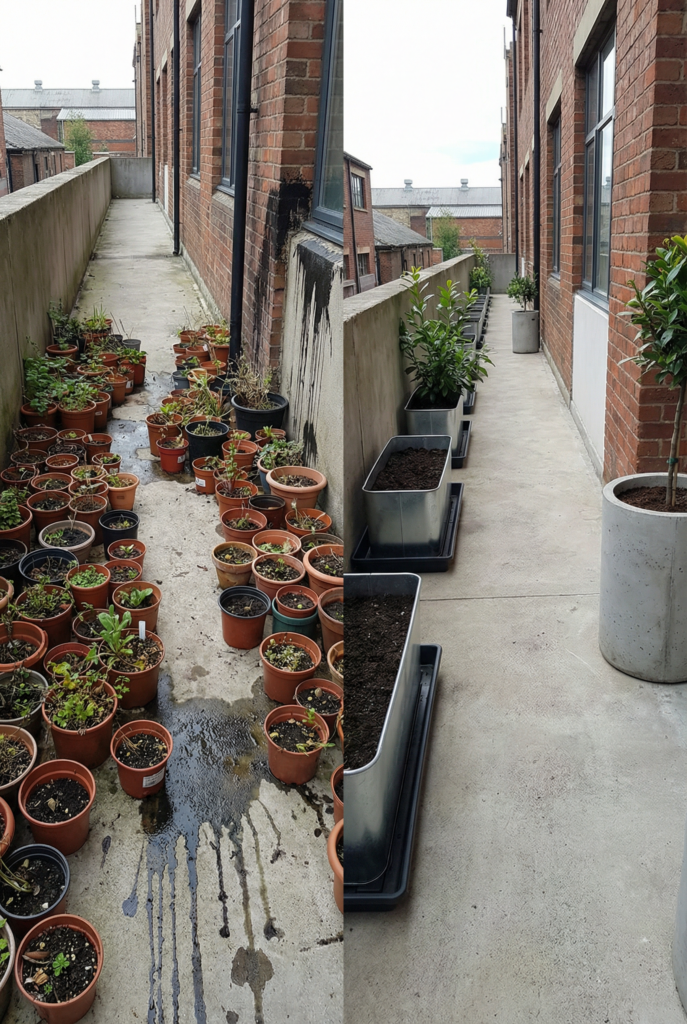
If your balcony garden has ever looked sad, it’s usually one of these issues. And the good news is the fixes are not complicated.
The most common mistake is having too many tiny pots. Tiny pots dry out fast and look visually busy. Consolidating into fewer, bigger containers makes everything easier and instantly more stylish. The next big one is forcing the wrong plant for your light. Swap it. Don’t struggle. Third is skipping drainage and drip control, which creates a mess, stress, and unhappy roots. Overcrowding is another one. Plants need airflow and space to grow, and your walkway matters. Finally, ignoring wind can undo everything, so stabilize with heavier bases and sturdier plants. If you have kids or pets, keep anything toxic or spiky out of reach, and avoid hanging pots over seating.
Quick win: Consolidate two small pots into one bigger pot this week. It’s the easiest reset.
FAQs
How to style plants on a balcony?
I use zones and layers. One anchor pot, a mid-layer, and one trailing plant make it look intentional fast.
How to arrange flower pots in a balcony?
Put taller pots near the wall or corners, medium pots in front, and trailing plants on edges. Leave a clear walkway strip so it feels like a space, not storage.
How to hang plants in a balcony without drilling?
Use clamp hooks, over-rail hangers, tension systems, or freestanding stands. Always check weight limits and drip control.
What to plant on a balcony?
Start with what matches your light, then add one edible and one bloomer. A mix of foliage and flowers keeps it looking full.
Which plant is best for a balcony?
The best plant is the one that matches your sun and wind. If you want a safe bet, start with hardy herbs and one sturdy flowering plant suited to your light.
What is the most low-maintenance outdoor plant?
Succulents and many hardy foliage plants are low-maintenance in the right light. Bigger pots also make almost any plant lower maintenance.
What is the rule of 3 in landscaping?
Groups of three often look balanced and natural. On a balcony, there can be three similar pots, or three plants with a repeating color.
How many plants should be grouped together?
I like groups of 3–5 in one visual cluster, then a little breathing room. Too many single pots read cluttered
What color plants go together?
Pick one main color, one supporting color, and let green be your neutral. Repeating a color twice is usually enough to feel cohesive.
What plants should not be planted together?
Avoid mixing plants with totally different water needs in the same pot. Also, give aggressive growers like mint their own container.
How do I stop water dripping onto neighbors below?
Use trays under everything, water slowly, and don’t overfill saucers. If needed, add a thin gravel layer in trays and empty standing water after watering.
Conclusion
When you wonder how to decorate a balcony with plants, start simple. Pick your light. Choose one recipe. Build the 4 zones as you go.
That’s it. That’s the whole magic. You don’t need a perfect balcony, you just need one solid little plant moment that makes you want to step outside.
If you save or pin this for later, I get it. I do that too. And if you want to make this personal, tell me your balcony light direction and what you want most: privacy, herbs, or flowers.