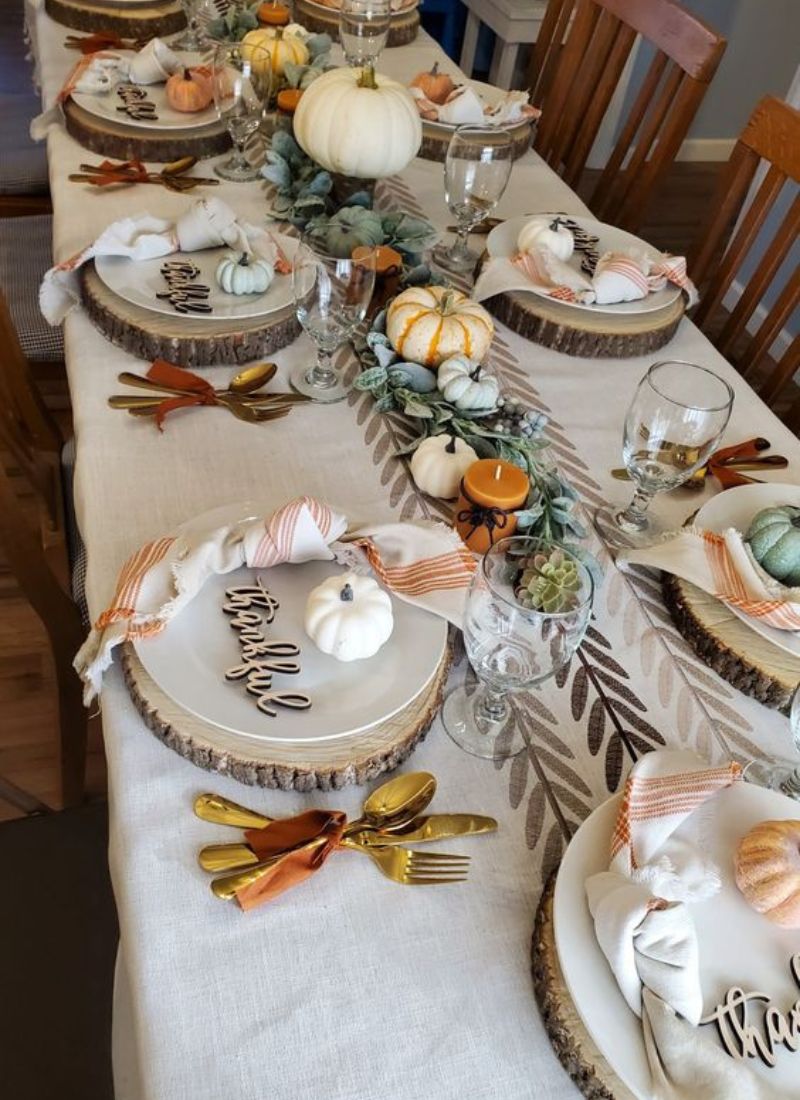
I blinked and suddenly my house needed a little spring energy (and apparently I was the one in charge). I pulled together a bunch of easy DIY Easter touches that look cute on a mantel or table, even if you’re crafting at 4:38 pm with a glue stick shortage.
I had fully planned to skip seasonal decorating this spring. Like, “I’m a mature adult who doesn’t need tiny ceramic animals judging me from every surface” energy.
And then… it was a gray Tuesday, it was 4:38 pm, and I was doing that end-of-day “why is everything slightly sticky?” lap around the living room. I opened the hall closet for one innocent reason (a candle? a scarf? emotional support?) and found a bag of plastic eggs that I swear multiplies like rabbits when I’m not looking. I made the mistake of saying, “We could do something small.” (Dear reader, it was not small.)
So here we are: my cozy, very real-life guide to do it yourself Easter decorations that feel festive and pretty without tipping into craft-store explosion.
I’m going to be super specific about what to use, what to skip, and what to do when your hot glue strings end up on your sweater. Again.
Also yes: there will be at least one unresolved annoyance. There always is. That’s kind of my brand.
Start Here (if you want the shortest path to cute)
3 easiest ideas: the five-minute entryway bowl, jar “meadow lights,” paper table runner
Best with kids: dyed eggs + clue signs + egg carton flowers (aka controlled chaos)
Best looks-expensive: painted taper candles + bunny napkin ears + a loose grapevine wreath
Best for small spaces: one-shelf refresh + a brunch tray corner + a single bowl of eggs by the door
If you’re just scrolling for easter decoration ideas, I honestly think this box is your friend.
Pastel Crafts and Spring Colors
Two pastels. One neutral. One “adult” anchor. That’s the whole plan (and it keeps my brain from buying ten colors and regretting eight).
I usually do dusty pink + butter yellow, then warm white, then a little black or brass.
Natural texture makes pastel easter decorations feel calm, not sugary. If it starts looking like a cupcake, add wood, linen, or deep green and suddenly it’s… chic.
Also: I do not trust shiny ribbon. It lies.
The supplies I actually use (and what I always forget until I’m mid-glue)
I’m listing this like a friend texting you from the craft aisle. This is basically the backbone of most diy Easter decorations, so if you gather it once, you’ll feel smug all week.
Basics you’ll use for almost everything
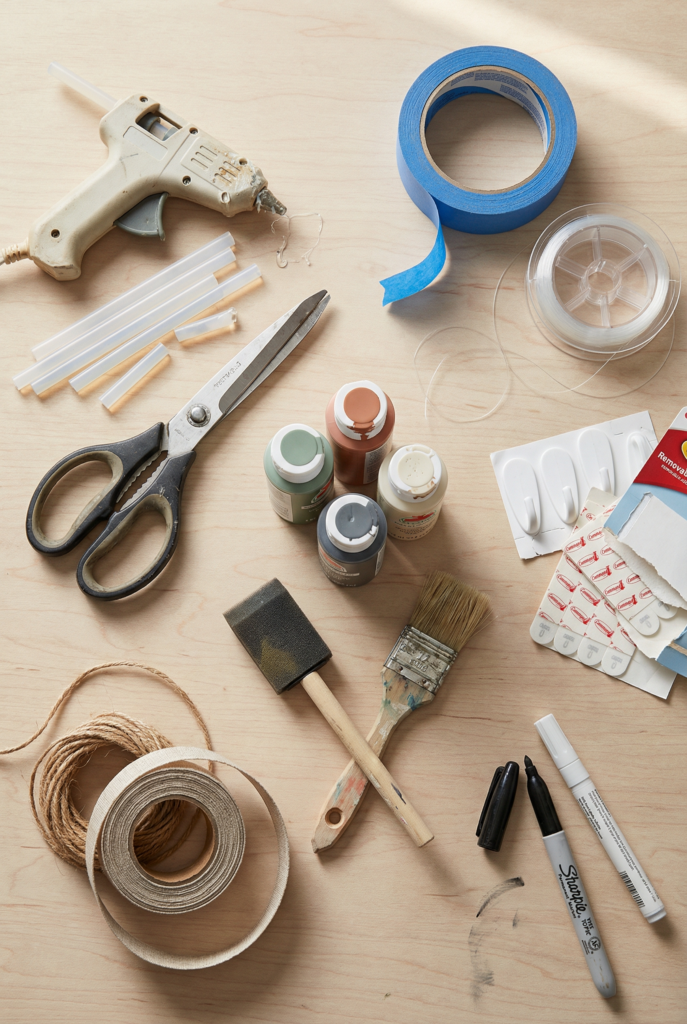
- Hot glue gun + glue sticks (mini is fine, but keep extra sticks nearby)
- Scissors (the good ones, not the “paper only” ones your kids ruined)
- Painter’s tape
- Clear fishing line (for hanging things invisibly)
- Command hooks or removable strips (because I’m still in my “fear of drilling tile” era… even when tile is not involved)
- Acrylic craft paint (2–4 colors is enough)
- Foam brush + one decent paintbrush
- Twine or ribbon (⅜” to 1″ wide depending on the project)
- A Sharpie + a white paint pen (for quick faces/dots/stripes)
The “Spring Texture” pile (cheap but high impact)
- Moss (bagged craft moss or preserved moss)
- A few faux stems (tulips, ranunculus, or eucalyptus)
- One bundle of real flowers (grocery store is perfect)
- A couple of empty jars (pasta sauce jars, jam jars, anything)
- Neutral napkins (linen-look ones instantly calm everything down)
My personal oops-kit
- Band-aids (hot glue is rude)
- A damp rag (paint hands)
- Trash bag (because the scraps multiply)
- A candle (not for vibes, for when you need to hide the smell of “wet acrylic paint panic”)
Idea 1: Painted taper candles (yes, really)
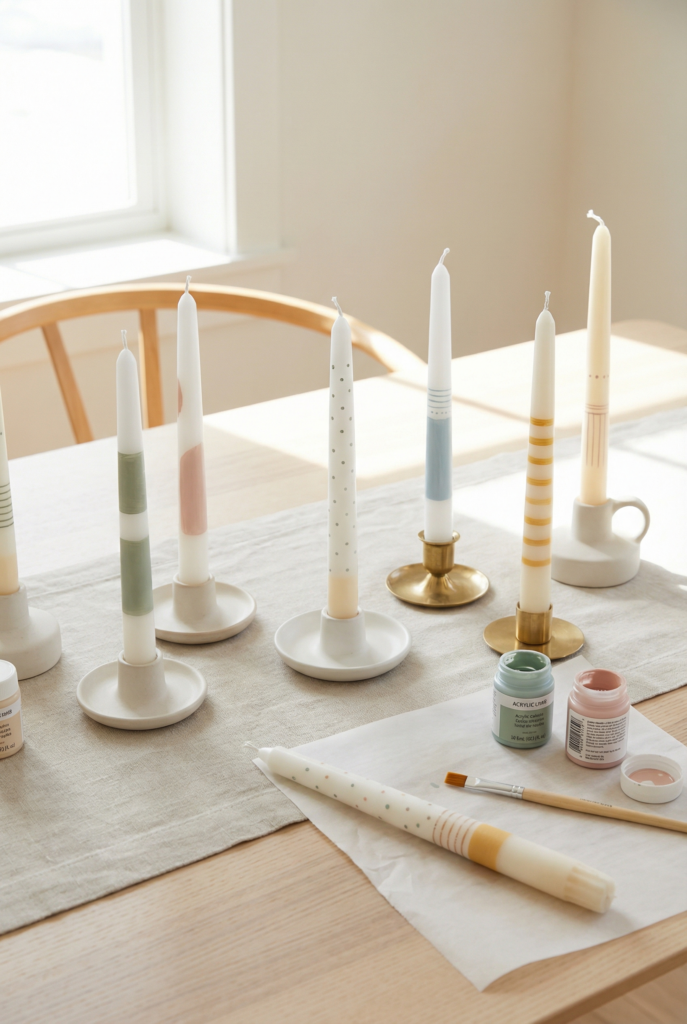
Time: 10 min + dry • Cost: $3–$10 • Mess: low • Kid-friendly: no (unless you love risk)
This looks like a boutique candle for the price of… the paint you already own. It’s one of my favorite “best looks-expensive” tricks, and it quietly upgrades your whole Easter table decor situation without buying more stuff you’ll store until next year.
You need:
- Plain taper candles (white or cream)
- Acrylic paint + small brush
- Optional: painter’s tape for clean stripes
How to do it:
- Paint simple stripes or tiny dots. Keep it minimal.
- Let dry completely before putting in holders.
- Don’t paint the very bottom half inch (it hides in the holder anyway).
Tiny real-life note: if you paint and then immediately touch it (because you forgot you’re human), you will leave one fingerprint forever. Ask me how I know.
Idea 2: The paper-egg garland that looks like a boutique window display
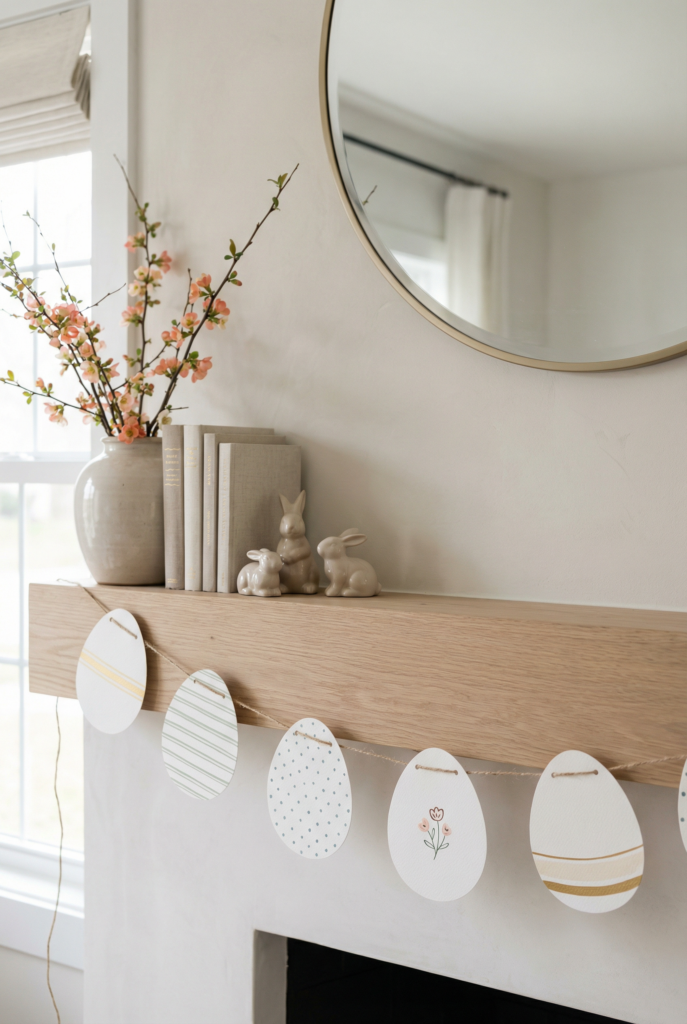
Time: 20–35 min • Cost: $0–$8 • Mess: low • Kid-friendly: yes (with scissors supervision)
This is my favorite “wow” for very little money, and it’s what I mean when I say Eeaster garland without it looking like a kid’s birthday party. This also plays so nicely with Easter mantel decor because it fills space without adding clutter.
You need:
- Cardstock or watercolor paper
- Pencil + scissors
- Hole punch
- Twine or ribbon
- Optional: gold paint pen or white pen
How to do it:
- Cut egg shapes: about 4″ tall is a sweet spot. Make one template from cardboard so your eggs don’t look like potatoes.
- Decorate simply: stripes, tiny dots, one little floral doodle. Keep it calm. (This is where “easy easter crafts” can still look… not cheap.)
- Punch holes at the top and string them with about 2–3″ spacing between each egg.
- Hang with removable hooks or tape behind a mantel, mirror, or bookshelf.
Unresolved annoyance: mine always sags in the middle after two days. I keep pretending it’s “casual drape” but it’s really gravity winning.
Idea 3: The simplest “bunny” decor that doesn’t scream bunny
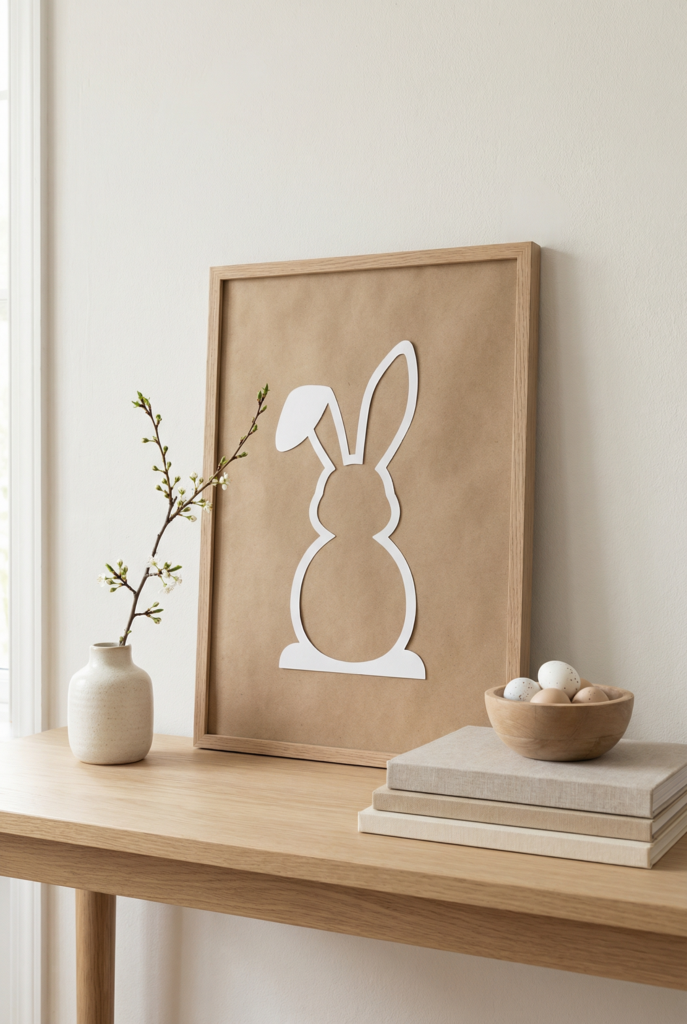
Time: 10–15 min • Cost: $0–$5 • Mess: low • Kid-friendly: yes
If you like the idea of Easter bunny decorations but don’t want literal rabbits staring at you, do this instead. It reads more like calm spring art than plastic parade.
You need:
- White cardstock
- Pencil
- Scissors
- Optional: neutral frame
How to do it:
- Draw a simple bunny silhouette (no face, just shape).
- Cut it out and tape it onto a piece of tan paper for contrast.
- Pop it in a frame or lean it on a shelf.
This is also secretly great Easter home decor for small spaces, because it’s vertical and doesn’t eat your surfaces.
Kid-Friendly Crafts + Activities
Idea 4: Dyed eggs, but make them “soft and fancy” (without buying a kit)
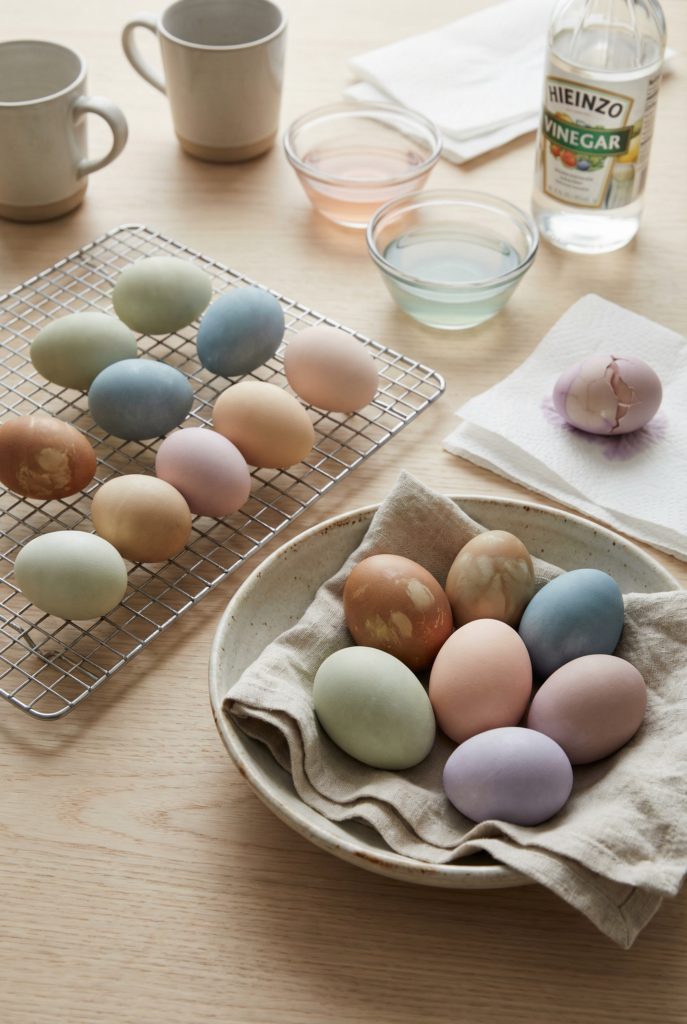
Time: 30–60 min • Cost: $2–$6 • Mess: medium • Kid-friendly: yes (with rules and aprons)
Yes, dyed easter eggs can look chic. The trick is muted color… and not letting anyone “just add a little more dye” twelve times until you get colorful easter eggs that glow in the dark.
You need:
- Hard-boiled eggs (white eggs dye best, brown eggs go moody and earthy)
- White vinegar
- Food coloring OR gel coloring
- Mugs or small bowls
- Paper towels + a drying rack (or a muffin tin)
The specific mix that works:
- 1 cup hot water
- 1 tablespoon white vinegar
- 6–10 drops food coloring (start with 6, go up slowly)
How to do it (aka the part of easter egg decorating that actually matters):
- Dip eggs for 30–90 seconds for pale color. Longer = brighter.
- Let them dry on a rack. Don’t wipe them. Wiping makes streaks.
- For that dreamy, chalky look: once dry, rub a tiny bit of mineral oil on a paper towel and buff lightly. It deepens the tone but still looks natural.
My chaotic moment: one egg cracked, leaked dye, and I now have a faint lavender fingerprint on the fridge handle. It’s… staying for now. Also yes, this counts as Easter egg decorating even if it feels like a science experiment.
A quick chaotic intermission: why is pastel pink either perfect or… Pepto
I need to say this out loud: pastel pink is the most emotionally risky color. One shade looks like French macarons and the next shade looks like cough syrup. There is no middle ground.
My fix:
- Pair pink with warm white + natural wood so it feels intentional.
- Avoid shiny pink ribbon. It’s too “gift bag.”
- If it’s reading too sweet, add one dark anchor (black candlestick, dark green stems).
Okay. I’m calmer now.
Floral-inspired Handmade Accents
Idea 5: Glass jar “meadow lights” for the mantel or porch
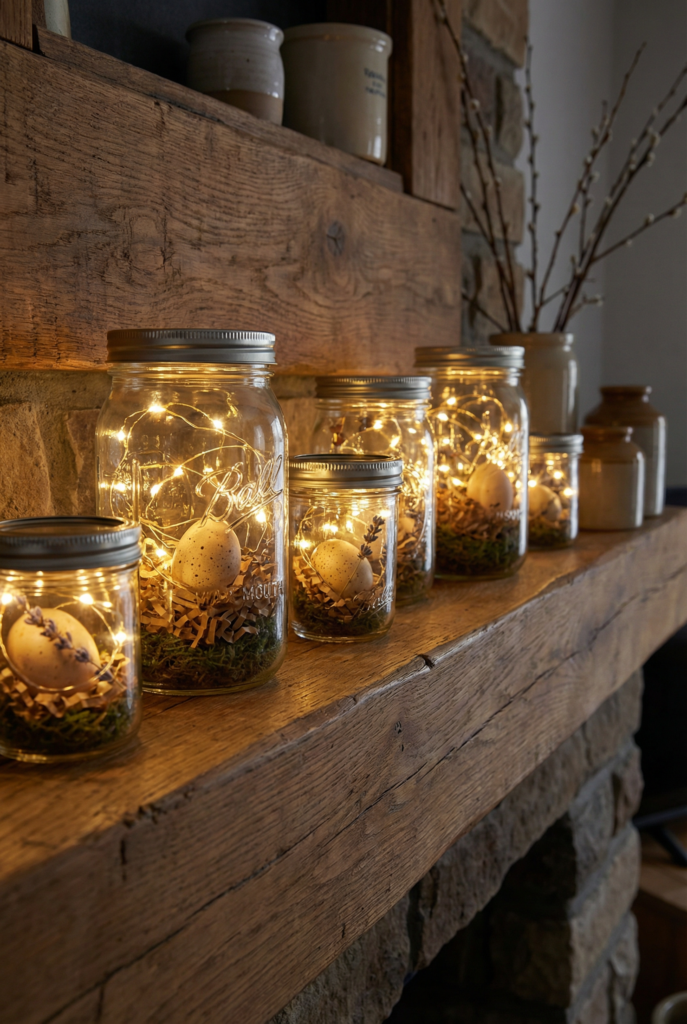
Time: 5–10 min • Cost: $0–$12 • Mess: low • Kid-friendly: yes
Cute indoors, cute outdoors, and honestly one of my favorite simple Easter decorations because it looks like effort without being effort.
You need:
- Clean jars (mason jars, jam jars)
- Battery fairy lights
- Moss or shredded paper
- A few eggs or small faux blooms
How to do it:
- Put a little moss at the bottom.
- Coil fairy lights inside.
- Add one egg and one tiny flower like it “happened naturally.”
These are also very forgiving if your house is currently doing… whatever it’s doing.
Idea 6: The “spring centerpiece” that’s basically a grocery run in disguise
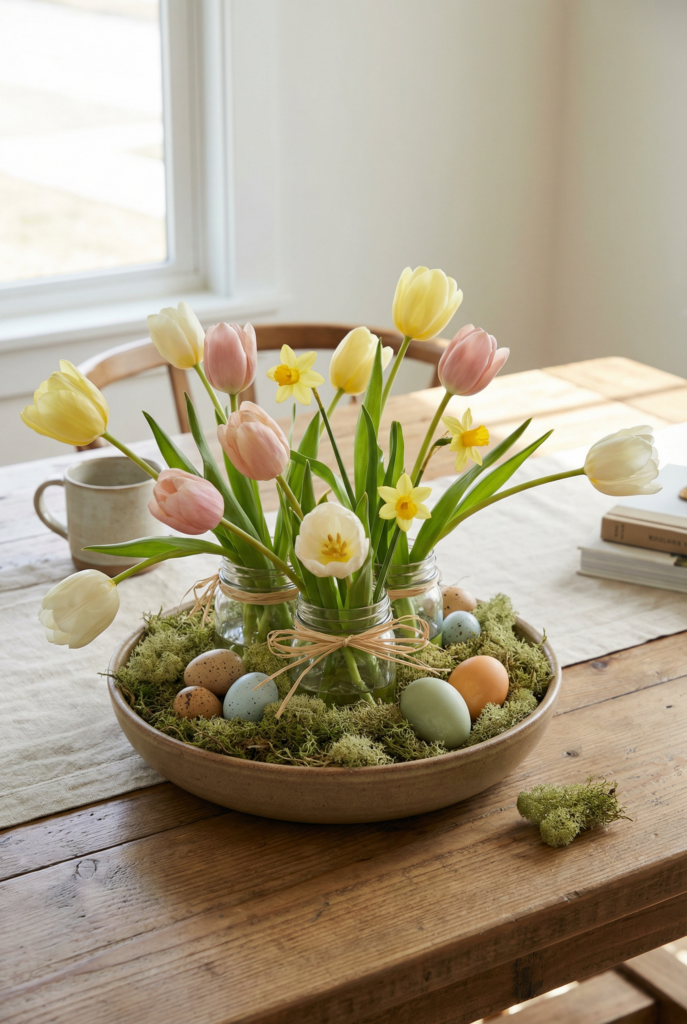
Time: 15–25 min • Cost: $8–$25 • Mess: low • Kid-friendly: yes (they can place eggs, not trim stems)
This one is all about looking like you planned ahead when you absolutely did not. If you’ve ever googled Easter centerpiece ideas, this is the version that doesn’t require a florist degree.
You need:
- One low bowl or shallow pot (8–12″)
- 2–3 small jars or bud vases (or cut-down plastic cups hidden inside)
- A grocery-store bundle of tulips or mini daffs (hello, vibrant spring flowers)
- A few eggs (real or faux)
- A little moss or raffia
How to do it:
- Place the jars inside the bowl first. That’s your structure.
- Add moss around them to hide the jars.
- Arrange flowers loosely. Leave space. Not every inch needs “stuff.”
- Nestle a few eggs near the base like little accidental treasures.
I made this at 2:05 pm and then realized the dog had stolen a piece of moss and carried it into the hallway like a prize.
I found it later under a sneaker. Classic.
Also yes, this counts as an extremely casual version of Easter flower arrangements.
Idea 7: The mantel “layering” method that fixes everything
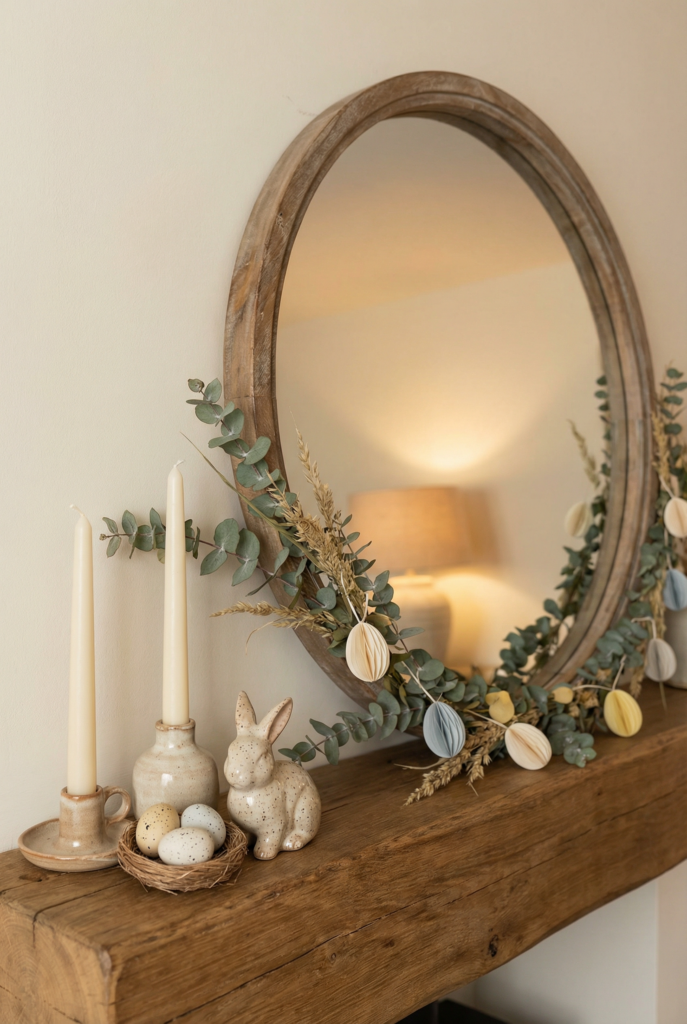
Time: 10–20 min • Cost: $0–$15 • Mess: low • Kid-friendly: not really (small hands will relocate everything)
I have lingering boob light trauma (I mentioned that before) from an old rental and I think that’s why I over-style mantels now.
Like, if I can’t erase the past, I can distract it with decor. This is basically my whole approach to Easter home decor: distract, soften, repeat.
Here’s the layering formula that works every time:
- Back layer: something tall (a mirror, framed art, or a big woven tray)
- Middle: a garland or greenery
- Front: 3–5 small items (candles, eggs, a bunny, a small vase)
Specific tip: keep the smallest items in one tight “cluster” instead of evenly spacing them. Clusters look intentional.
Even spacing looks like you’re setting up a science fair display. (Also: this is where “handmade Easter decor” actually shines, because the little imperfect things look sweet in a cluster.)
Idea 8: Carrot bunches that look cute, not cartoonish
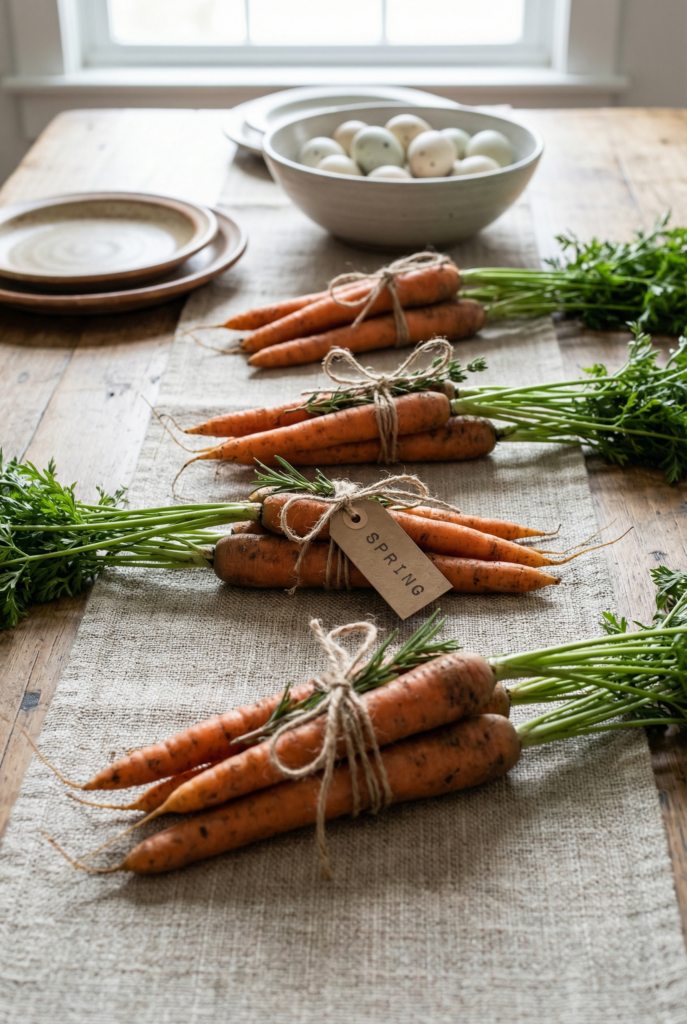
Time: 5–10 min • Cost: $2–$6 • Mess: low • Kid-friendly: yes
You need:
- Real carrots with the greens attached (or faux if you must)
- Twine or ribbon
- Optional: a small tag
How to do it:
- Wash and dry carrots (dry matters so they don’t slime your table runner… learned that the gross way).
- Tie into bundles of 3 or 5.
- Place bundles down the center of the table, alternating direction so the greens feel lush.
This is one of those “why does this look so good?” things. It’s just vegetables, but suddenly it’s festive spring decor.
Idea 9: A wreath, but not the “stiff craft store” kind
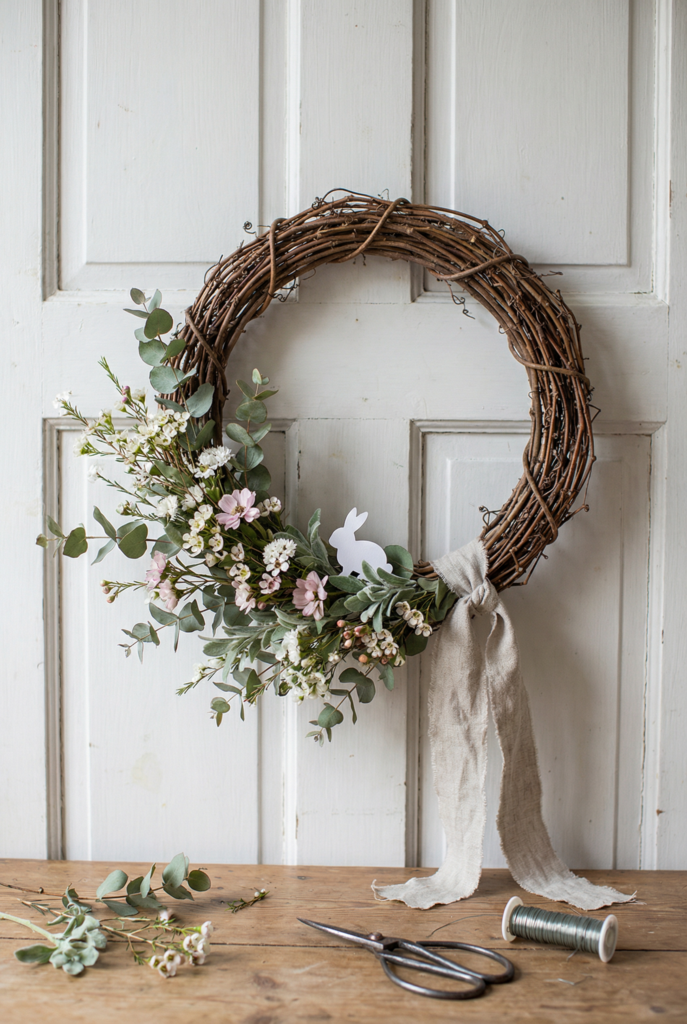
Time: 25–45 min • Cost: $10–$35 • Mess: medium • Kid-friendly: yes (they can help choose stems, not wire them)
I’ll say it once: Easter wreath ideas are way better when they’re loose and imperfect. If you want the extra springy version, you can absolutely aim for a spring floral wreath vibe without covering every inch.
You need:
- A grapevine wreath form (12–18″)
- Faux florals OR a few real stems + floral wire
- Ribbon
- Optional: a tiny bunny silhouette cut from cardstock or wood
How to do it:
- Don’t cover the whole wreath. Leave grapevine showing.
- Attach one “floral moment” on one side (about a third of the wreath).
- Add a ribbon that’s soft and not too shiny. Linen ribbon is my weakness.
Budget note: I’ve done this with a $6 grapevine wreath and two faux stems and it looked better than some $60 pre-made ones. (I said what I said.)
Idea 10: A “brunch corner” that’s basically snacks plus a pretty tray
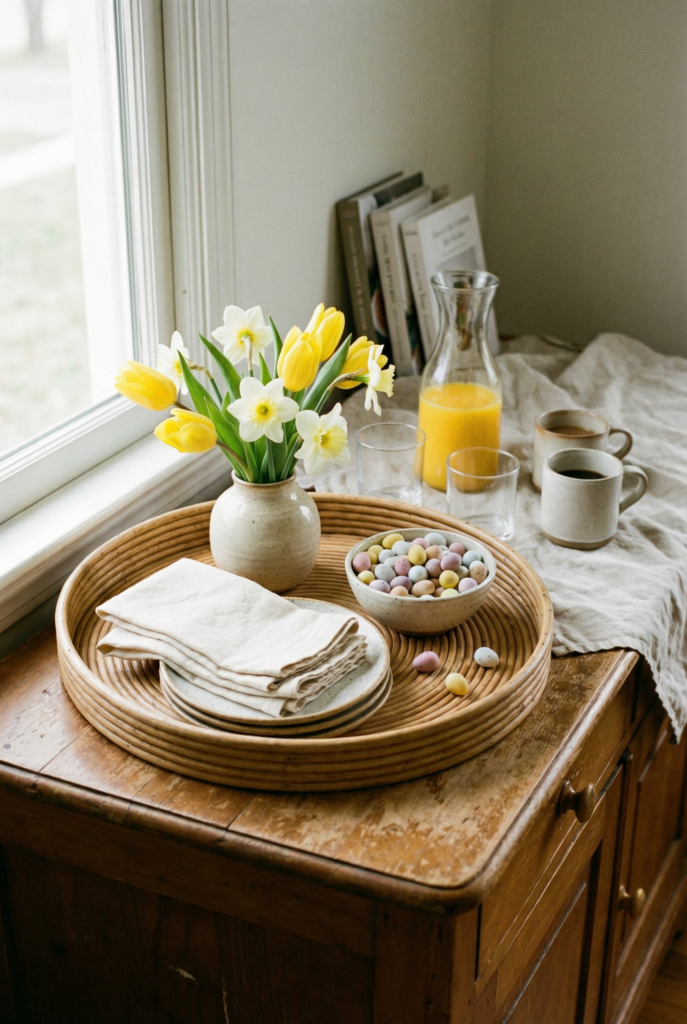
Time: 5–10 min • Cost: $0–$20 • Mess: low • Kid-friendly: yes (they will still sneak candy)
This is my favorite hosting hack because it’s decor and functional, and it’s the easiest way to make Easter brunch ideas feel “real” without you making seventeen dishes.
You need:
- A tray
- Small plates/napkins
- One small vase of flowers
- One bowl for candy eggs or chocolate
- A little place for coffee or juice cups
How to do it:
- Put the vase at the back of the tray.
- Add napkins/plates stacked (stacking looks neat even if the rest of the house is chaos).
- Add candy bowl at the front.
You can call it Easter party ideas if you want, but really it’s just: put snacks somewhere pretty so you don’t keep walking back to the kitchen.
Quick DIY Projects for Families
Idea 11: The “five-minute entryway bowl” that makes the whole house feel festive

Time: 5 min • Cost: $0–$12 • Mess: low • Kid-friendly: yes
This is the quickest mood-shift I know. It’s basically the gateway drug to easter decoration ideas (and I mean that affectionately).
You need:
- A bowl, tray, or shallow basket (12–16″ wide looks generous)
- A handful of plastic eggs or wooden eggs
- A little moss (or shredded paper filler)
- One small bunny or bird figurine (optional, but emotionally effective)
How to do it:
- Put a thin layer of moss in the bowl. Not a mound. A thin, believable meadow.
- Add eggs in two colors max. If you only have neon eggs, mix them with neutral filler so they behave.
- Tuck in one tiny figurine off-center (off-center always looks “styled” even when you’re winging it).
Mundane detail: I did this at 7:12 am while my coffee was still too hot to drink, and it genuinely made me feel like I had my life together for exactly eight minutes.
Idea 12: The “one-shelf spring refresh” for small spaces
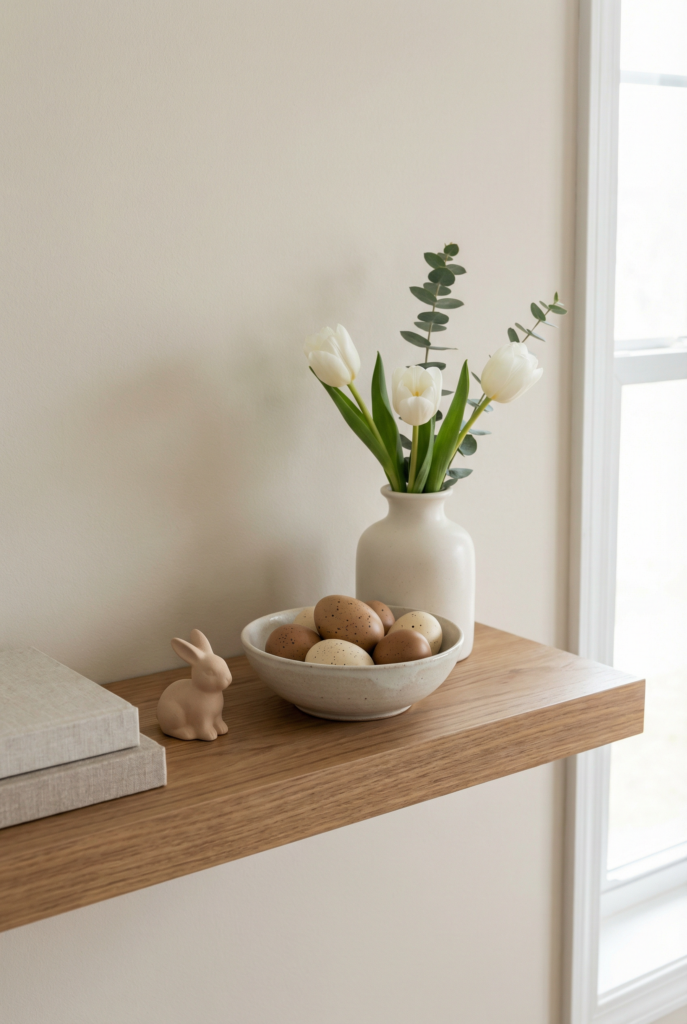
Time: 10 min • Cost: $0–$15 • Mess: low • Kid-friendly: yes
If you live in an apartment or just don’t want Easter everywhere, do one shelf. That’s it. This is peak “I like spring, but I also like surfaces I can wipe.”
You need:
- One shelf surface
- A small vase
- A bowl of eggs
- One little spring thing (bunny, bird, or floral)
- A neutral book stack (optional)
How to do it:
- Put the tallest thing in the back (vase with flowers).
- Put the bowl of eggs in front.
- Add one small “character” item off to the side.
This is also how I keep myself from spiraling into “I should decorate the bathroom too” territory. (Nobody needs a bunny in the bathroom. Unless you do. No judgment.)
Idea 13: The “one minute” egg place cards (that people will think took longer)
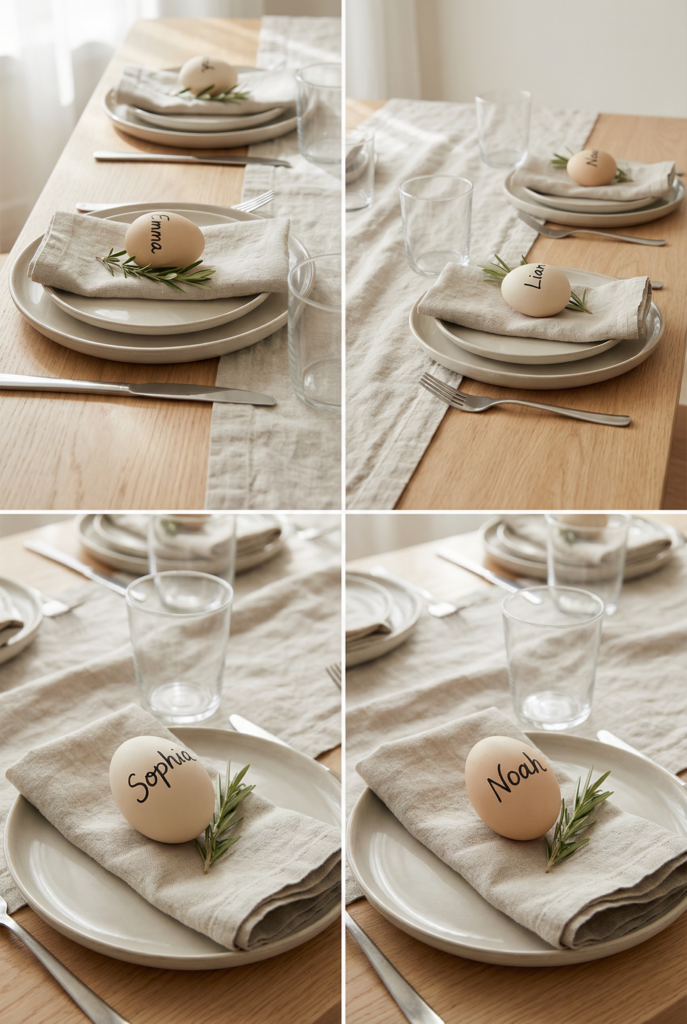
Time: 5–8 min • Cost: $0–$5 • Mess: low • Kid-friendly: yes
You need:
- Eggs (real or faux)
- Sharpie or paint pen
- Optional: a tiny sprig of greenery
How to do it:
- Write names directly on the egg.
- Place on each plate.
- If you want it extra cute: tuck a tiny sprig under the egg like a little nest.
This is the kind of detail that makes the whole Easter table settings situation feel thoughtful without you doing anything dramatic.
Mundane detail: last year I spelled my own name wrong on a place card because I was talking while writing. I’m still thinking about it.
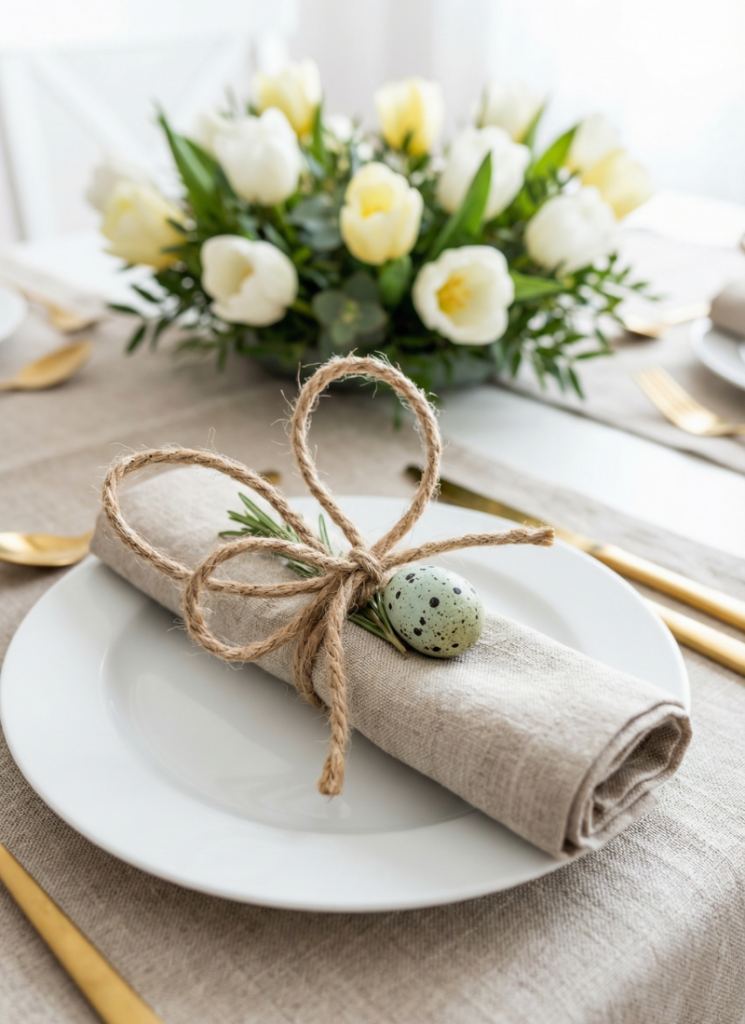
Idea 14: Bunny napkin “ears” that look weirdly expensive
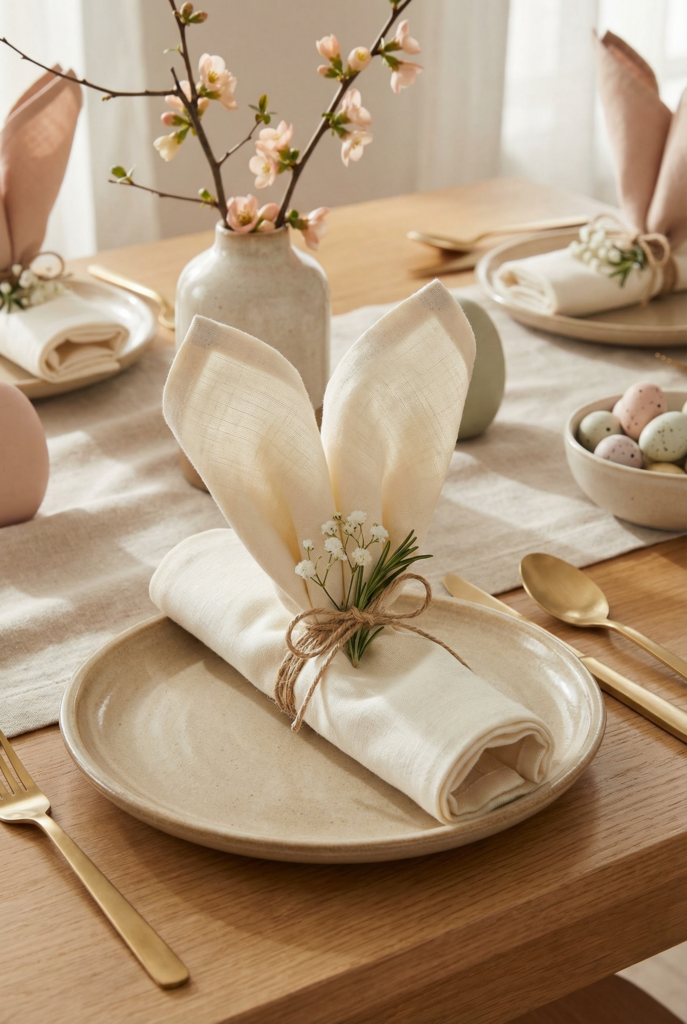
Time: 5–10 min • Cost: $0–$10 • Mess: low • Kid-friendly: yes
Perfect for a brunch table, and kids love it because it looks like a costume for your napkins. Also: it’s one of my sneaky “looks expensive” moves for easter table decor.
You need:
- Linen or linen-look napkins (18″ or 20″ square)
- Twine, thin ribbon, or pipe cleaners
- Optional: a tiny faux flower stem to tuck in
How to do it:
- Fold napkin into a rectangle.
- Roll from one end into a loose tube.
- Bend in half so the loop becomes “ears.”
- Tie at the base of the ears with twine.
If you want it extra: tuck a single tiny flower or sprig of greenery in the knot. It’s one of those details that makes people go, “Ohhh.” Even if you did it in 40 seconds.
Idea 15: Table runner trick: paper + ribbon = instant charm
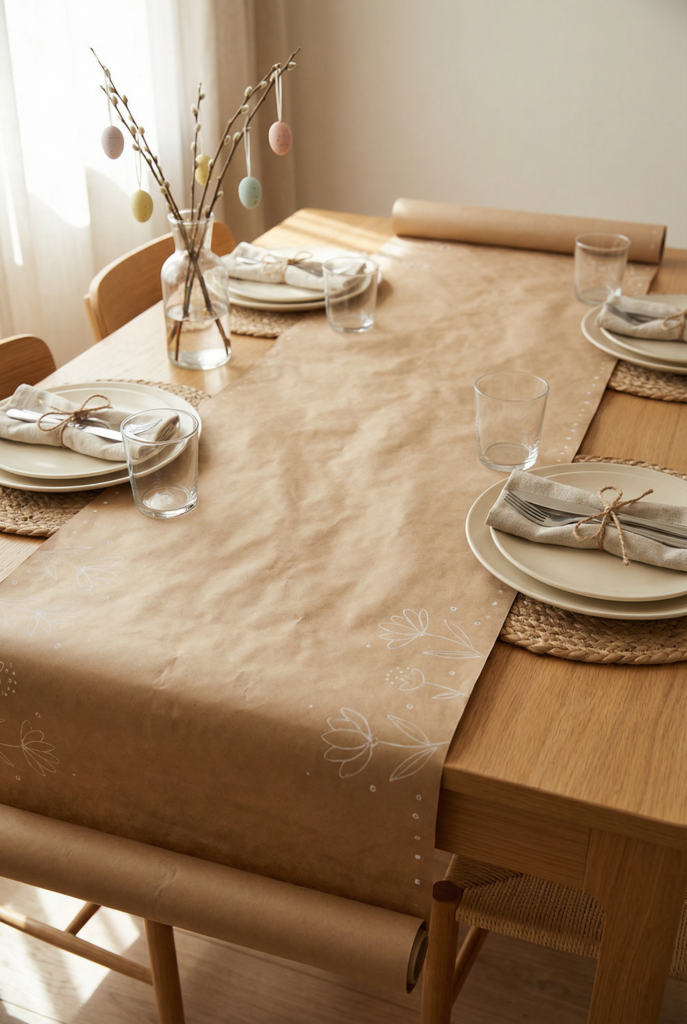
Time: 5–12 min • Cost: $0–$8 • Mess: low • Kid-friendly: yes
If you don’t own seasonal linens (hi, me), this is a lifesaver… and it’s honestly one of my favorite simple Easter decorations because it covers a chaotic table like a magic cape.
You need:
- Kraft paper or white butcher paper
- Ribbon or twine
- Marker for doodles (optional)
How to do it:
- Roll paper down the center of the table like a runner.
- Tie little ribbon bows around napkins, utensils, or even around the base of glasses.
- If you’re feeling extra: doodle tiny flowers along the edge.
I once did this with a $3 roll of paper and it looked so intentional people thought I bought a special runner. I did not. I just didn’t want to do laundry.
(If you’re into it, you can also hang a few paper eggs from a branch in a vase for low-commitment Easter tree decorations. I’m not saying I do this every year, but I’m also not saying I don’t.)
Idea 16: The egg carton flower trick (it’s charming, I swear)
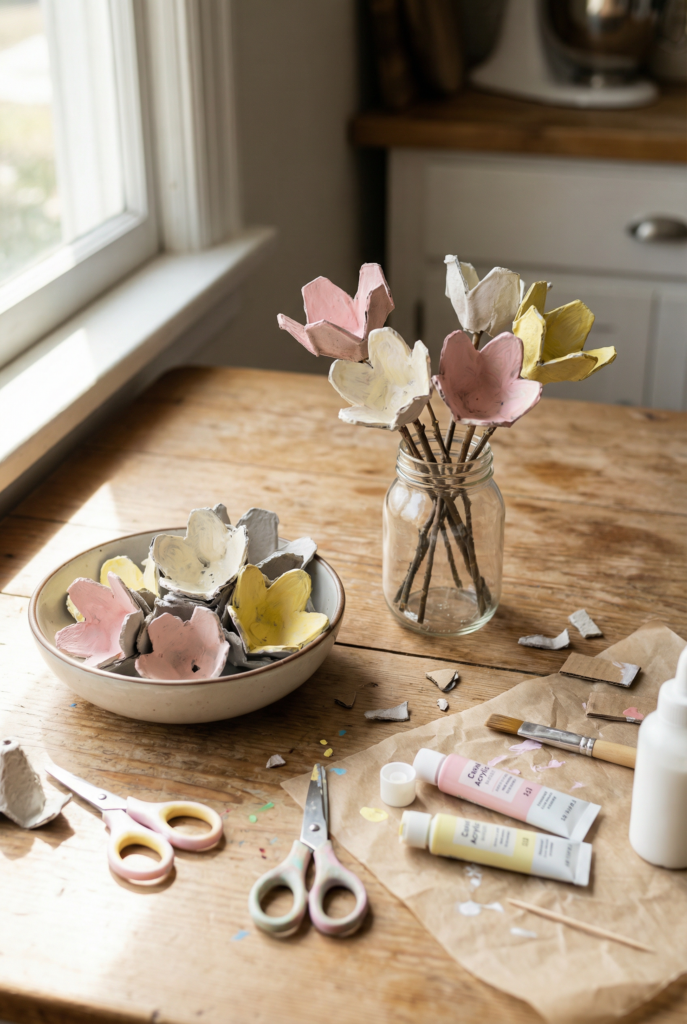
Time: 25–40 min • Cost: $0–$6 • Mess: medium • Kid-friendly: YES
This is peak “I am repurposing household items and feeling smug about it.” It’s also classic Easter crafts for kids because it looks adorable even when the petals are… interpretive.
You need:
- A cardboard egg carton
- Scissors
- Acrylic paint
- A toothpick or skewer
- Glue
How to do it:
- Cut the individual cups out of the carton.
- Trim each cup into petal shapes (don’t overthink perfection).
- Paint them pale pink, white, or butter yellow.
- Poke a small hole in the center and glue onto a twig or skewer for a stem (or just scatter them in a bowl as “blooms”).
This one is fun with kids… but you will find tiny cardboard petals in your laundry later. Ask me how I know. (Also: yes, this qualifies as creative Easter crafts even if it feels like crafting under duress.)
Idea 17: Mini “egg hunt” clue signs for the backyard or hallway
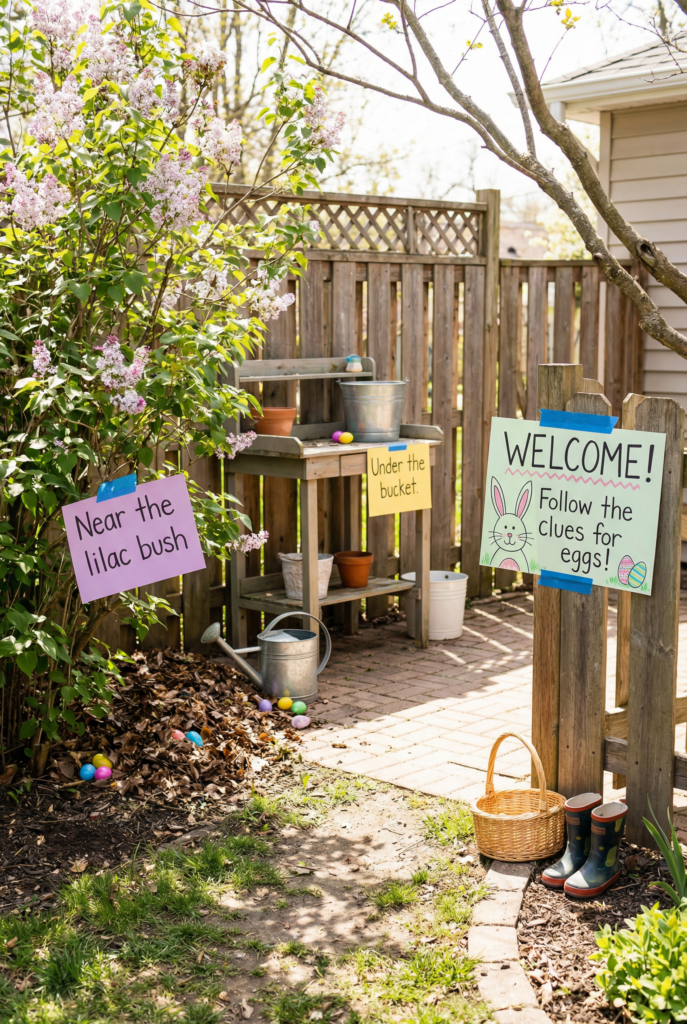
Time: 10–15 min • Cost: $0–$4 • Mess: low • Kid-friendly: yes
If you’re doing a hunt, little signs make it feel like an event. These are basically Easter egg hunt decorations that cost nothing and make kids lose their minds in the best way.
You need:
- Cardstock or scrap paper
- Marker
- Painter’s tape
- Optional: string lights for evening hunts
How to do it:
- Write simple clues: “Under the couch,” “By the boots,” “Near the lilac bush.”
- Tape them at kid height.
- Add one “fancy” clue sign at the start with a little doodle of a bunny or egg.
A few small-budget moves that punch way above their weight
I’m not trying to be dramatic, but this is where handmade Easter decor beats store-bought sometimes. A few tiny things repeated around the house reads “styled,” not “spent money.”
If you’re trying to keep it affordable, here’s what I’d do first:
- One flower bundle + split it into 2–3 tiny vases (instant spring, minimal commitment)
- Paper garland (seriously, paper is undefeated)
- A bowl of eggs (even plain eggs look pretty in a wood bowl)
- One ribbon moment (on a wreath, on napkins, around a vase)
Also: if you’re buying anything new, buy it in a color you’ll reuse. Neutral baskets and glass jars don’t care what holiday it is.
That’s the whole cheat code of springtime holiday crafts… reuse the grown-up basics, swap the cute details.
Mini FAQs (because I know what you’re going to ask)
What DIY Easter decorations are easiest for beginners?
Start with the entryway bowl, the paper egg garland, or the jar “meadow lights.” They’re forgiving, they look cute even if slightly messy, and you don’t need special tools.
How can I decorate for Easter on a small budget?
Pick one “hero” spot (mantel, table, or entryway) and focus there. Use grocery store flowers, repurpose jars, and make paper decor. You can get a whole-house vibe with like… $15–$25 if you’re strategic.
Are DIY Easter crafts suitable for kids to help with?
Yes, but choose the right ones: egg carton flowers, egg decorating, clue signs, and place cards are great. Anything with hot glue should be “kids assist, adult glues” unless you enjoy living dangerously.
What handmade Easter decorations last from year to year?
Paper garlands (stored flat), grapevine wreath bases, painted wooden eggs, and neutral trays/bowls you can restyle each season. Basically: sturdy base pieces + change the small details.