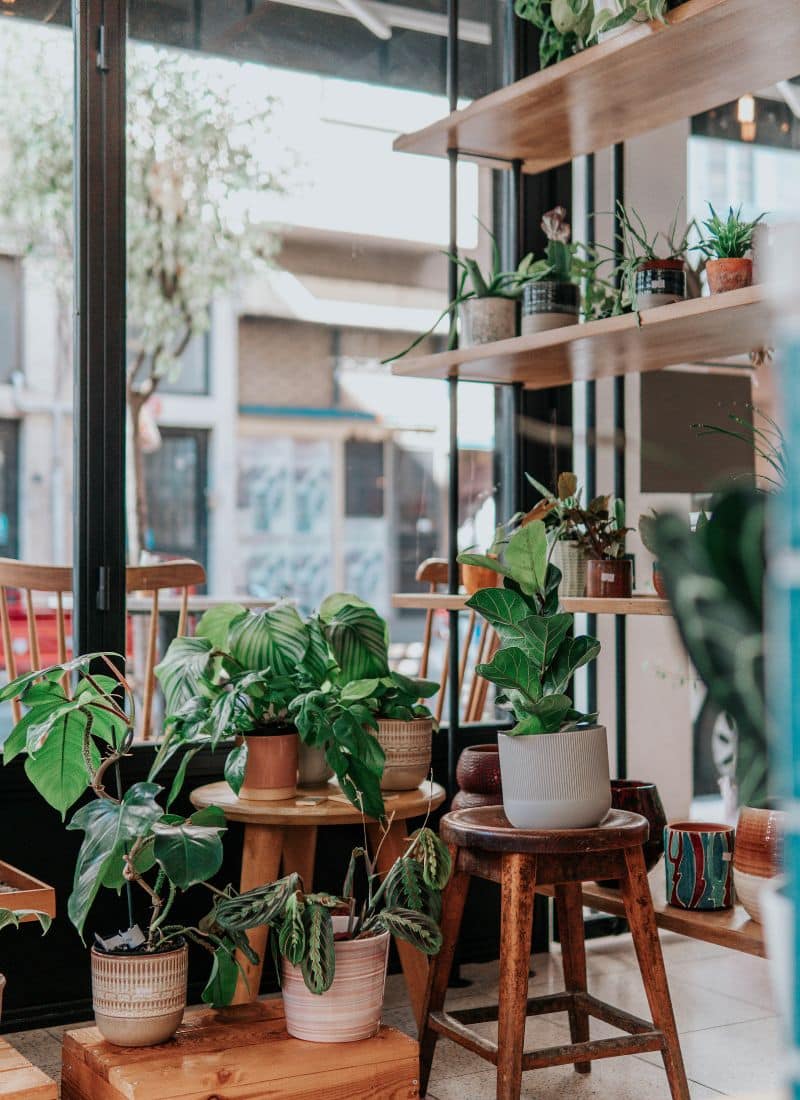
DIY boho decor doesn’t have to mean pricey “artisan” finds or a cluttered shelf situation. I’m walking you through cozy, beginner-friendly projects with rope, wood, clay, and thrifted textiles that make your home feel calmer and more lived-in.
I got so close to buying a set of “artisan” shelves the other night. You know the ones. Two pieces of wood, some rope, a dreamy lifestyle photo, and a price tag that makes you whisper, “Is this… for the whole shelf?
Or just the vibe?” It was almost midnight, my cart was full, and my brain was doing that unhinged decorating math where $400 feels fine because it is “an investment.” (I hate myself a little when I do this.)
So instead, I made tea, dug through my craft drawer, and started messing around with twine and scraps like a raccoon with a vision. That is how I fell back into diy boho decor… again.
If you want a space that feels relaxed, earthy, and lived-in without turning your home into a beige dust museum, I’ve got you. I’m going to walk you through beginner-friendly projects using macrame, driftwood, jute, clay, and thrifted textiles.
We’re talking soft layers, raw edges, calming tones, and the kind of handmade charm that looks better the more you live with it. Also yes, you will find twine in your sofa later. Consider it part of the experience.
Supplies Quick Checklist
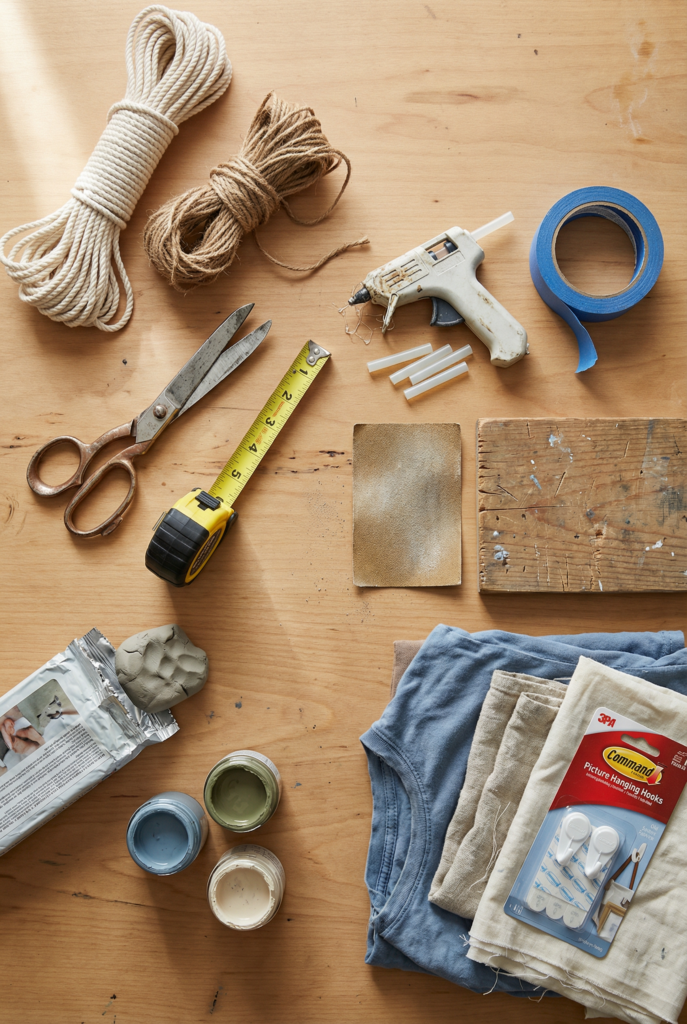
You don’t need a craft studio. You need a few basics and a willingness to embrace “close enough.”
- Cotton rope or clothesline (3 mm to 6 mm is easiest)
- Jute twine (scratchy is fine)
- Scissors you don’t love (twine ruins blades, sorry)
- Hot glue gun and glue sticks
- Sandpaper (medium grit)
- Scrap wood, an old cutting board, or a thrifted wood tray
- Air-dry clay
- Acrylic craft paint in muted tones
- Old T-shirts, sheets, linen scraps, or napkins
- Painter’s tape (optional, but calming)
- Command hooks or picture hooks (renters, I see you)
If you’re missing something, start anyway. Half of this style is “use what you have and make it feel intentional.”
The Cheat Sheet For Choosing Your First Project
If you’re staring at this like, “Okay but where do I begin,” here’s how I choose without spiraling. Pick one quick win and one slower project.
The quick win gives you instant dopamine and the slower one gives you that deep cozy payoff. You’ll also avoid the classic mistake of starting three things at once and finishing none, which is how twine ends up in your couch forever.
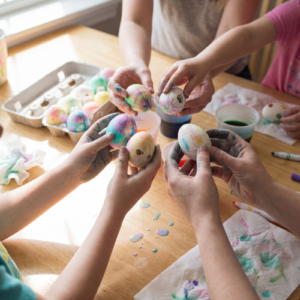
For kids, choose projects without heat or sharp tools. Tassels, fabric painting, simple clay dishes, and twine wrapping are great.
For renters, focus on hanging, leaning, and removable hooks. For small spaces, go vertical and keep your palette tight. Texture can be abundant, but color should be calm so it doesn’t feel like a thrift store shelf is yelling at you.
Fast projects are anything you can finish in one sitting. Twine-wrapped bottles, tassel garlands, mini wall hangings, and small clay pieces.
More involved projects are shelves, larger macrame pieces, and anything that requires drying time.
Also, anything that requires you to find the “perfect” branch outdoors can turn into a full afternoon quest. Fun, but still… a quest.
If you only do one thing today, do a tiny project for a tiny spot. One finished corner changes your whole mood.
Macrame And Woven Elements
Macrame and woven pieces are the fastest way I know to make a room feel softer without adding clutter.
They absorb light, warm up hard surfaces, and give you that layered, lived-in look even if your furniture is basic and your walls are still rental white.
Fiber is forgiving too. Uneven knots look handmade. Fraying ends look charming. Slightly crooked hangs look like you didn’t spend forty minutes “leveling” something with your eyes. (Even if you did.)
The trick is scale and placement. A huge wall hanging can be gorgeous, but smaller pieces are easier to live with and easier to finish.
I love putting mini pieces near mirrors, above hooks, beside a window, or over a nightstand. They create a soft moment without swallowing the room.
In smaller spaces, vertical texture is your best friend because it adds depth without taking up surface area.
For the 2026 vibe, keep your colors muted. Think sage, warm clay, ochre, dusty rose.
Let texture be the statement.
And if a piece looks a little “crafty” on your table, don’t panic. Once it’s up on the wall with real life around it, it usually settles into the room like it belongs.
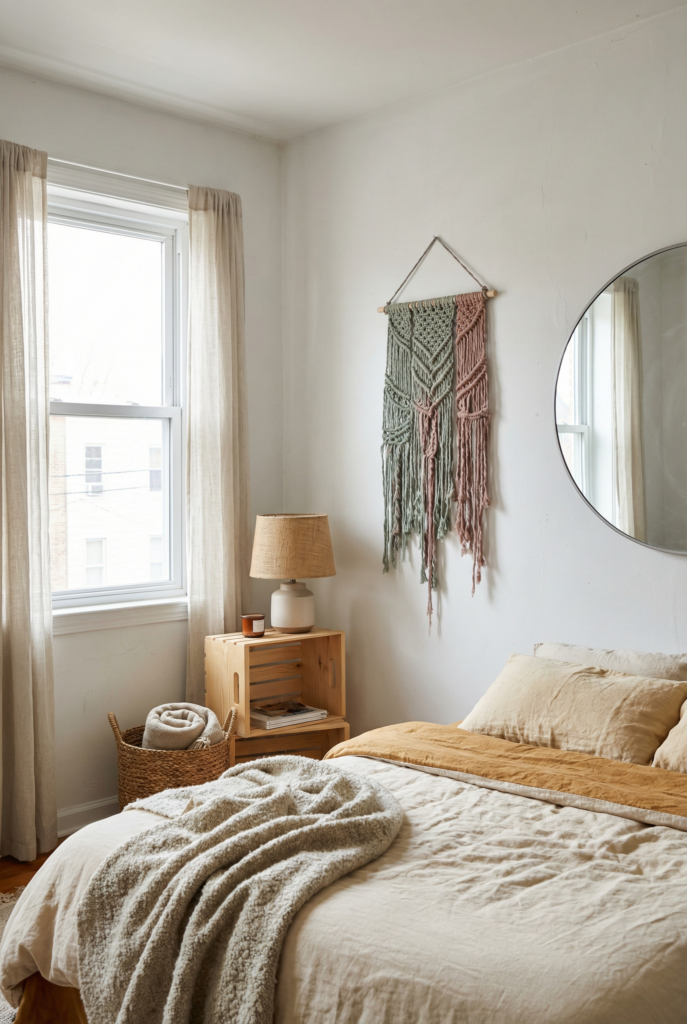
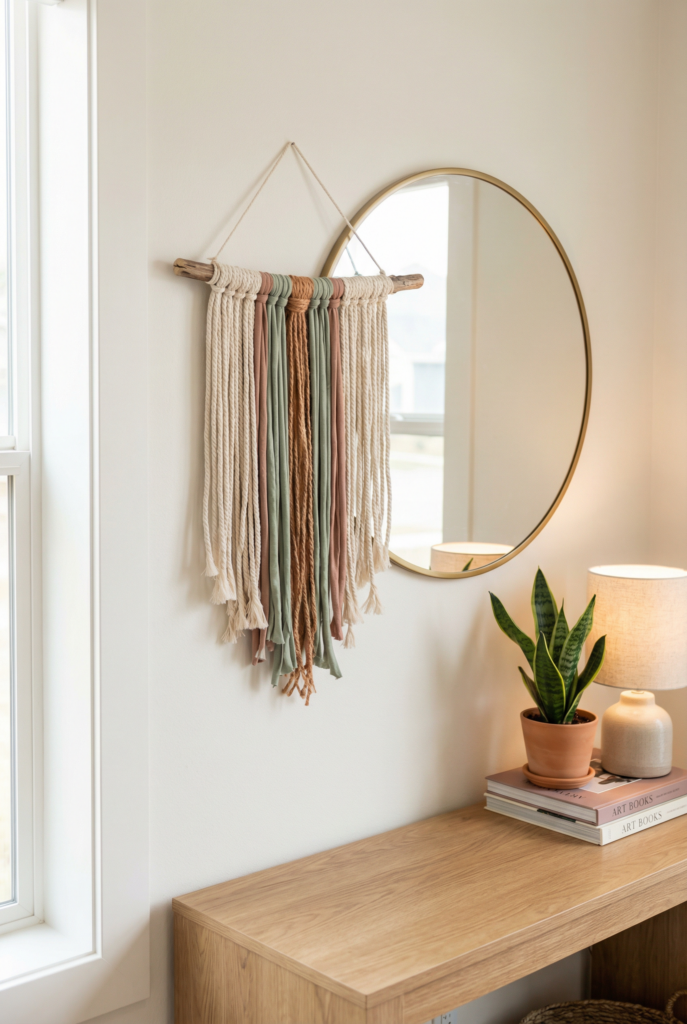
Mini Wall Hanging For A Mirror Corner
A mini wall hanging is my favorite “start here” project because the stakes are low and the payoff is high.
It adds softness fast, it doesn’t require a ton of materials, and it looks good in places where hard surfaces feel a little cold.
I love it near mirrors because mirrors can read sharp and shiny. Fiber makes that whole zone feel warmer, like you’re intentionally layering textures instead of just trying to fill a blank wall.
Make it about the size of a paperback book or a small throw pillow. Bigger is not better when you’re learning.
Cotton rope gives you that soft drape. Jute gives you a more earthy, rustic look, but it can go messy quickly, so I use it like an accent rather than the whole piece.
And yes, you can absolutely do this with T-shirt strips if you’re in a “use what I have” mood.
Also, if you make something and it starts looking like my tiny mop situation, don’t toss it. Shorten the fringe, add a tighter band of knots, or reframe it as a plant hanger. Fiber projects are very forgiving that way.
- Time: 30 to 60 minutes
- Cost: $0 to $12
- Best For: renters, small spaces, beginners
- Sustainability Note: this is great for using leftovers
What You Do
- Cut 10 to 16 strands, about 24 to 30 inches long.
- Fold each strand in half and lark’s head knot it onto a dowel or stick.
- Add a few simple knots in loose rows.
- Trim the ends unevenly and let them fray naturally.
Quick win: If your knots look “off,” add one extra strand and call it texture.
No Sew Tassel Garland From Old T Shirts
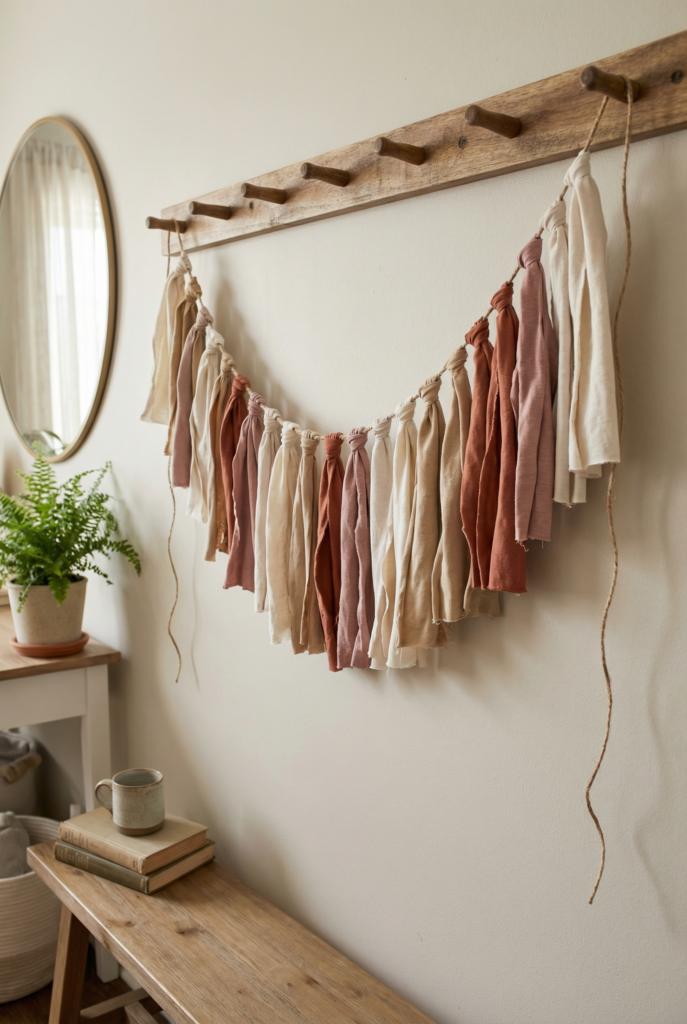
This is the project I make when I need instant cozy and I don’t want to think too hard. It’s also secretly a solution to the pile of old T-shirts you can’t donate because they’re stretched, stained, or weirdly sentimental.
Tassels work because they add movement and softness. They take a rigid shelf, mirror, or peg rail and make it feel casual, like a home that’s lived in, not staged.
The thing that makes this look good is the palette. Pick two to four tones and stick to them. If you go full rainbow, it leans playful. If you keep it muted, it leans calm.
Either is fine, but mixing ten random colors is how it starts looking like a classroom craft day.
I like warm neutrals with one accent color, like clay plus dusty rose, or cream plus sage. It’s enough contrast to feel intentional.
This is also a good project to do while half-watching a show. I did one at 9:18 pm last week and found fabric strips in my hoodie pocket the next morning. Like a surprise snack, but worse.
- Time: 20 to 45 minutes
- Cost: $0 to $8
- Best For: kids helping, fast decorating, low-pressure zones
- Sustainability Note: peak reuse project
What You Do
- Cut fabric strips about 1 inch wide and 10 to 14 inches long.
- Stack 6 to 10 strips, fold in half, and wrap a small strip around the “neck.”
- Tie the wrap or glue it.
- Tie tassels onto twine, spacing them 2 to 4 inches apart.
Related: 27 Boho Bedroom Ideas: Dreamy Decor to Snooze in Style
Driftwood And Natural Fiber Projects
Wood and fiber are the grounding elements of a boho space. They bring warmth and texture without feeling busy, and they naturally look “collected over time.” That’s the whole secret sauce.
If your room feels flat, you usually don’t need more stuff. You need better contrast in materials. A weathered wood piece next to soft textiles and matte ceramics creates depth instantly.
This category is also where you can get the most expensive-looking results for the least money.
A simple rope shelf can read like a boutique find if the wood has character and your styling isn’t cluttered.
Let the wood be imperfect. Saw marks, knots, uneven edges, a little wear. Sand splinters, yes. But don’t sand away the story.
If you’re renting, you can still do this. You don’t have to mount a shelf like you’re building a bridge.
Use strong hooks, respect weight limits, and style lightly.
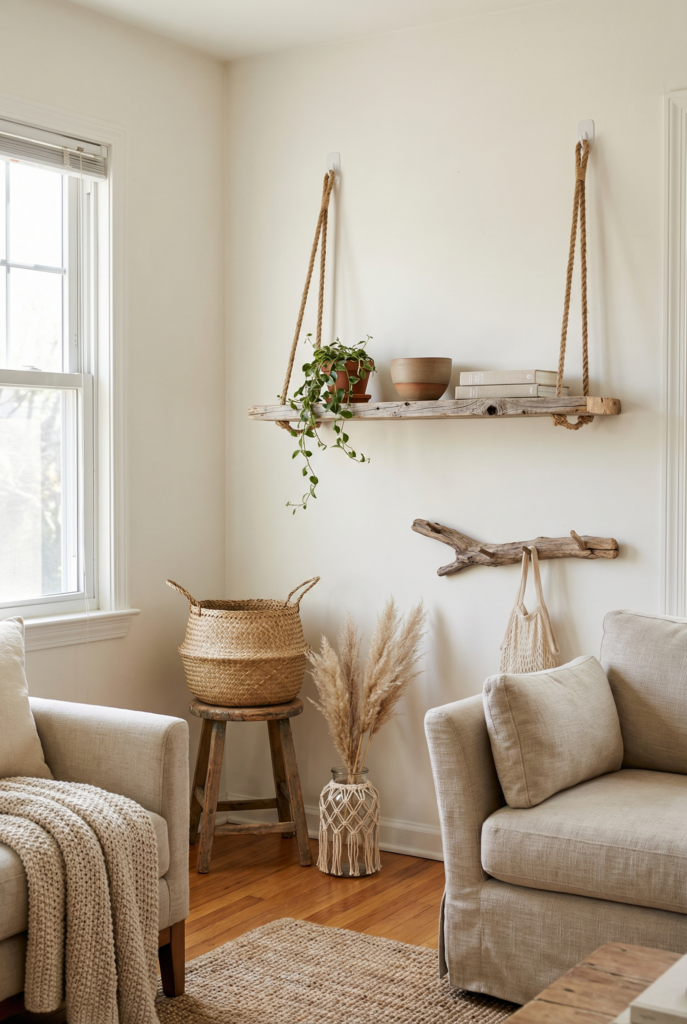
The Low Stress Rope Shelf For A Cozy Nook
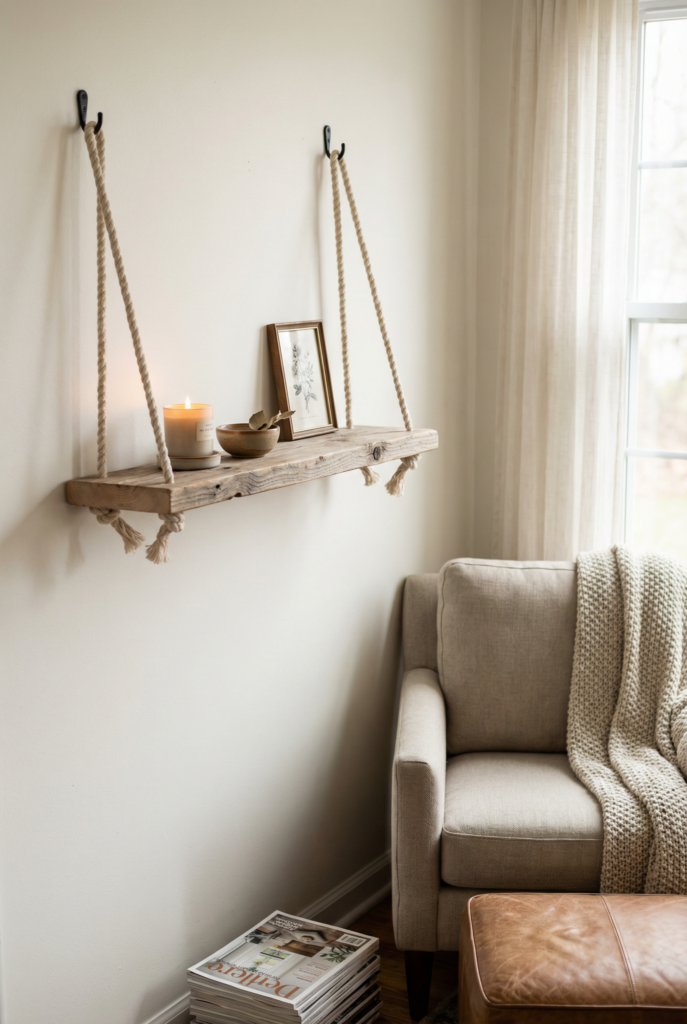
This is the kind of shelf that made me feel weirdly capable. It looks like “a real project,” but it’s basically a board and rope.
The trick is keeping it lightweight and styling it with restraint. This is not the shelf for stacks of heavy books and a giant vase.
This is the shelf for a candle, a small bowl, and maybe a little framed photo. The goal is a cozy nook moment, not a loaded cargo situation.
I love this above a reading chair, a bench, or a little entry perch. It adds vertical interest, which is especially helpful in small spaces.
And it gives you a designated styling spot so you’re not sprinkling objects across every surface like decorative confetti.
Choose wood with texture. A thrifted cutting board, a worn tray, a scrap piece with character. Sand it just enough so it’s touchable. Then rope it up.
I like cotton rope for a cleaner look and jute for a more rustic look. If you’re nervous, start with a shorter shelf. A smaller piece swings less and feels easier to “get right.”
- Time: 60 to 120 minutes
- Cost: $8 to $35
- Best For: small spaces, cozy corners, beginners who want a bigger payoff
- Sourcing Tip: thrift stores for cutting boards and wood trays
- Safety Note: respect hook weight ratings
What You Do
- Choose a board 18 to 28 inches wide.
- Drill two holes near the corners or use eye hooks.
- Thread rope through and knot underneath.
- Hang with two hooks so it doesn’t swing.
Quick win: If it looks plain, wrap a little rope around the ends as a “detail.”
Twine Wrapped Bottles For A Shelf Vignette
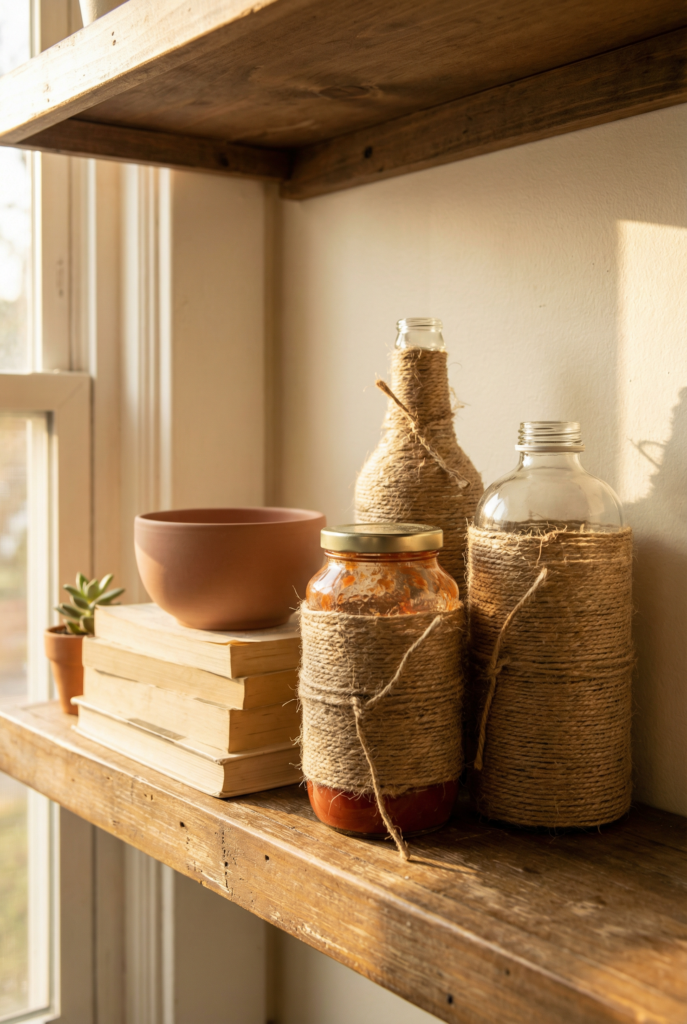
Twine-wrapped bottles are my go-to when a shelf looks unfinished but I don’t want to buy anything.
They add texture, they fill space, and they look good in groups. Also, they’re basically free if you’re using jars you already have. Pasta sauce jars, kombucha bottles, that vase you hate. Wrap it and it becomes charming.
The reason this works in a boho space is simple. It adds tactile texture without introducing more colors or patterns. That’s how you avoid the clutter trap.
If your room already has a lot going on, keep these neutral and let them support the other elements. If your room feels too beige, you can sneak in subtle color by painting the inside of the bottle with a muted tone like dusty rose or warm clay, then wrapping the outside. It’s a tiny little glow, not a loud statement.
I did three of these around 3:42 pm one Saturday when the light goes golden and everything looks nicer than it deserves.
- Time: 15 to 40 minutes
- Cost: $0 to $10
- Best For: fast styling, shelf moments, budget upgrades
- Sustainability Note: reusing glass is always a win
What You Do
- Clean and fully dry the bottle.
- Glue in small sections and wrap twine tightly as you go.
- Let it dry overnight so it doesn’t slide.
Quick win: If it looks too rustic, add one thin band of cotton rope near the top.
Handmade Pottery And Textile Pieces
Clay and textiles are what make a space feel personal instead of purchased. They add warmth, softness, and that “someone made this with their hands” energy that makes boho style feel soulful.
This is also the category where imperfections look the most beautiful.
Fingerprints in clay, uneven paint strokes, slightly wonky lines in a fabric pattern. All of it reads intentional when your materials are natural and your palette is grounded.
Air-dry clay is my favorite because it’s approachable. You don’t need special equipment. You can make tiny bowls, trays, and candle holders on your kitchen table, then let them dry while you live your life.
Textiles are equally powerful because they add pattern and softness without eating up space.
A pillow cover, a framed fabric square, a draped throw with raw edges. You can change the whole mood of a room without buying furniture.
One note for 2026 boho: contrast matters. Too much beige can make the room feel flat. Warm clay, sage, and dusty rose are perfect for subtle contrast that still feels calm.
Related: 26 Dreamy Boho Living Room Ideas for a Magical Home in 2026
Air Dry Clay Trinket Dish You Will Actually Use
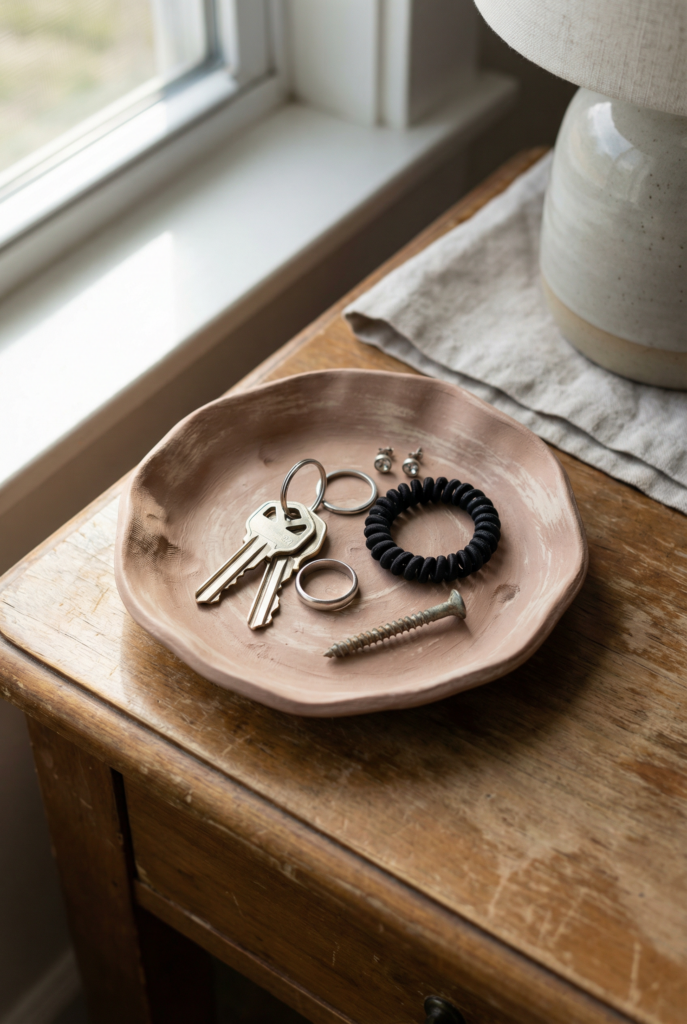
A clay trinket dish is small but mighty. It makes your space feel styled in a functional way, which is my favorite kind of decorating.
Keys, rings, hair ties, earrings, that one random screw you swear you’ll use later. It’s also a gentle way to introduce earthy color without painting walls or buying new decor.
The best-looking clay pieces are rarely perfect. I like uneven edges, soft curves, and a little texture.
Press a piece of linen into the surface for a subtle pattern. Drag a fork lightly across for fine lines. Add a thumb dent in the rim.
These tiny touches catch the light and make it feel handmade. Then paint it with a dry brush so it’s streaky, not solid. Matte, imperfect finishes look more organic and more “collected.”
Let it dry fully. Like fully. I once got impatient and painted too soon, then the paint cracked in a way that felt dramatic. I pretended it was intentional. Well.. it was not.
- Time: 20 minutes active, 24 to 48 hours drying
- Cost: $6 to $18
- Best For: beginners, small-space styling, gifts
- Sustainability Note: small projects help you avoid waste
What You Do
- Roll clay to about 1/4 inch thick.
- Cut a circle or freehand a shape.
- Lift edges slightly to form a dish.
- Let dry fully, then paint lightly.
Quick win: If you hate the paint, sand it and repaint. Clay is forgiving.
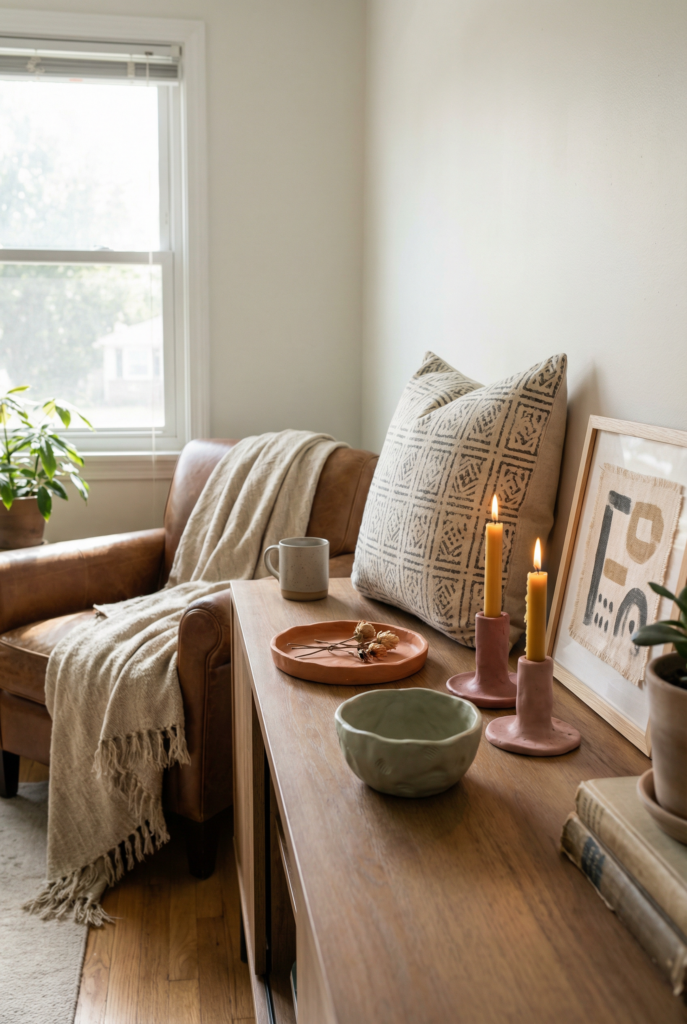
Mudcloth Style Fabric Accent Without Perfection Pressure
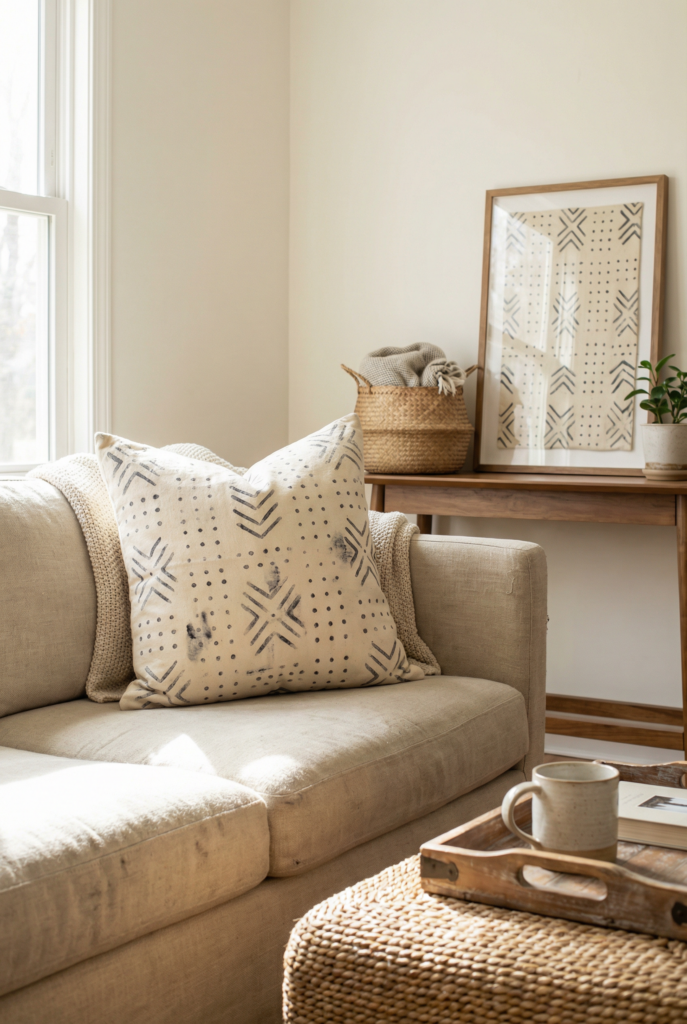
This is how I add pattern without making the room feel loud. A mudcloth-style textile moment can be a pillow cover, a framed fabric square, or even a simple tea towel draped over a basket.
The goal is soft pattern, grounded color, and that slightly imperfect handmade feel. Perfect lines look printed. Slightly wonky lines look like you made it. Which is the point.
Pick one simple motif. Dots, lines, arches, little blocks. Keep it calm and repeat it loosely. Use a sponge brush or paint pen and stick to one color, maybe two if you’re feeling brave.
I like warm black, deep brown, or faded charcoal for a graphic look that still feels cozy.
If you’re doing a pillow cover, you can paint directly onto thrifted fabric. If you’re sewing-averse, frame the fabric instead. It reads like art and takes zero stitching skills.
- Time: 45 to 90 minutes
- Cost: $0 to $22
- Best For: adding pattern without clutter, thrift lovers
- Sustainability Note: reused fabric means less waste
Quick win: If the pattern feels too bold, wash once to soften it visually.
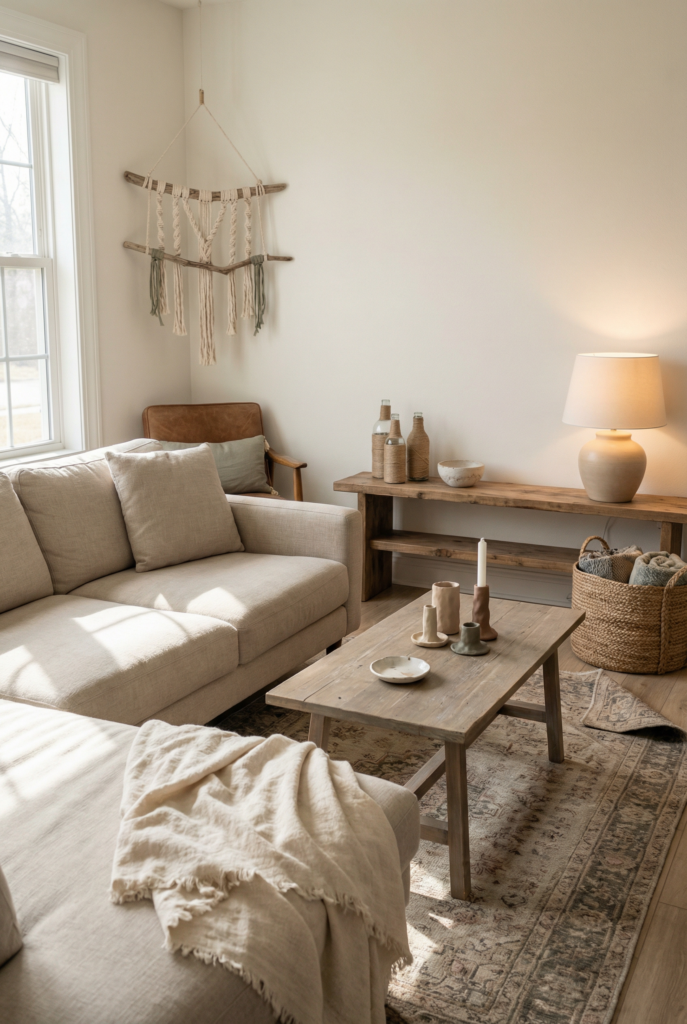
Styling It So It Feels Lived In Not Cluttered
Boho styling is not “add everything at once.” It’s layering with intention so your room feels cozy, not chaotic. The quickest way to ruin the vibe is to treat every surface like a display shelf.
Suddenly you have a thousand tiny objects and none of them feel special. Editing is what makes handmade pieces look good. Space is what makes texture feel calming instead of busy.
Here’s what works for me. Group objects by tone instead of by texture. Wood, clay, fiber, and linen can mix beautifully when they share the same warm mood.
Then use height variation so your eye moves naturally. A vertical hanging, a medium piece, a low tray. That’s depth without clutter. Finally, lean into asymmetry. Perfect symmetry looks staged. Slight imbalance feels human.
If you’re decorating a small space, choose one zone to “layer” and keep the rest calmer. One shelf vignette plus one wall moment plus one textile hit is plenty. Your room needs breathing room to feel restful.
Also, if you have a rug that flips up at the corners like it’s trying to trip you, welcome. Mine does it too. I keep saying I’ll tape it down. I keep not doing it. Imperfect homes still count.
Cost And Sourcing Notes That Will Save You From A Craft Store Spiral
Let’s talk money in a way that actually helps. These projects can be very low-cost, but only if you don’t accidentally turn them into a shopping hobby.
I like to use three tiers. Free-ish, low-cost, and “okay fine but it better be worth it.” Free-ish is using what you already own, foraging, and thrifting.
Low-cost is rope, clay, paint, and hooks. Worth it is when you buy one good supply that makes everything easier, like quality cotton rope that doesn’t unravel into chaos.
My favorite sourcing spots are not glamorous. Thrift stores for cutting boards, frames, and linens. Hardware stores for rope and sandpaper.
Craft stores for air-dry clay and muted acrylic paint. Your own closet for fabrics that are too worn to wear but still soft. Also, keep your scraps. Those tiny leftovers become future tassels, wraps, and accents.
If you’re aiming for a more sustainable approach, start by reusing. Natural materials already have visual interest. You don’t need a pile of new decor to get the look. And fewer, better pieces always read calmer than a lot of small stuff.
Quick win: Make one project using only what you already have before you buy anything new.
How I Pull It Together Over A Weekend Without Melting Down
If you want a simple plan that doesn’t turn into a chaos pile, here’s what actually works for me. Choose one corner or one wall zone. Not the whole room.
Then do one fiber piece, one grounding wood or twine piece, and one clay or textile piece. That’s enough to shift the mood without making your space feel overwhelmed.
Saturday morning is perfect for clay and fabric, because those need drying time. Saturday afternoon is great for twine wraps or tassels, because those are fast and satisfying.
Saturday evening is when I hang the wall piece and style the shelf, because the lighting is cozy and my brain is more romantic about everything.
Sunday is for tweaking. Moving things. Editing. Swapping one item out. This is where the “boho magic” actually happens, because it’s not about perfection. It’s about living with it for a minute and seeing what feels right.
Styling ideas that almost always work:
- A mini wall hanging near a mirror to soften that zone.
- A rope shelf above a cozy nook for function and warmth.
- A framed fabric square for pattern without clutter.
Quick win: Finish one corner fully before you start another. One finished spot changes everything.
FAQ
Boho questions can get weird fast, so I’m sticking to the ones that actually help you decorate.
Is Boho Out Of Style In 2026?
No. It’s evolving. The newer boho decor trends lean calmer and more grounded, with natural materials and fewer loud, cluttery layers. It’s less “look at my stuff” and more “this feels like a soft place to land.”
What Are Boho Colors For 2026?
Sage, warm clay, ochre, dusty rose, and muted neutrals. The easiest way to use them is in small doses: one pillow, one painted dish, one throw, one little accent. Let texture do the heavy lifting.
What Are Common Mistakes In Boho Decor?
The big one is too much beige with no contrast. The second is clutter disguised as “layering.” If you have twenty tiny objects, it won’t look collected, it’ll look chaotic. Edit. Give things space. Let one or two pieces be the stars.
How Do I Create Bohemian Style Decor On A Budget?
Reuse and thrift first. Make a few intentional pieces instead of buying a pile of cheap decor. Focus on texture and warmth. A small macrame wall hanging, one thrifted textile, and a simple clay dish can shift a whole room without draining your bank account.